I’ll be honest, when I first started woodworking, routers seemed intimidating. But here’s what changed everything: I realized routers are just precision tools that shape wood in ways hand tools can’t match.
They hollow grooves, round edges, and cut perfect joints faster than you’d think possible. The question isn’t whether you need one, it’s which type fits your projects best, and that’s which type we’re covering next.
What Routers Actually Do (And Why You Need One)

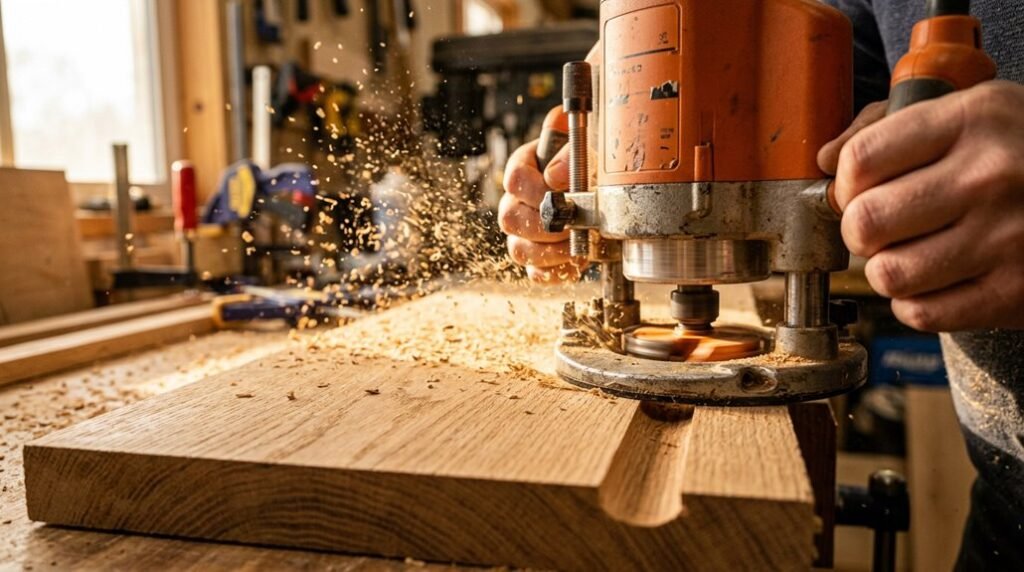
Have you ever wondered how woodworkers create those perfectly rounded edges on furniture or carve intricate designs into wood? That’s where routers come in. I use my router to hollow out spaces, bevel edges, and shape complex forms that’d be nearly impossible by hand.
Routers hollow out spaces, bevel edges, and shape complex forms that’d be nearly impossible to achieve by hand.
Here’s what routers do best:
- Edge profiling: Round over sharp corners or create decorative edge details
- Joinery: Cut dadoes and grooves for strong, clean joints
- Decorative work: Carve signs and intricate patterns into wood surfaces
You’ll want a router because it takes basic lumber and turns it into polished pieces. Whether you’re trimming laminates or flattening tabletops, a router opens up possibilities you can’t achieve with other tools. It’s a valuable addition for anyone serious about woodworking.
Fixed, Plunge, and Trim Routers: Which Type for Your Shop

Now that you know what routers do, I’ll help you figure out which type fits your woodworking goals. Each router style—fixed-base, plunge, and trim—excels at different tasks. Understanding their strengths helps you choose the right tool for your projects.
Let me break down what makes each one special and when you’d actually want to use it.
Fixed Base Router Capabilities
Choosing the right router for your workshop depends on understanding what each type does best. A fixed-base router locks your cutting depth before you start, giving you precision for edge work and surface cuts. You’ll control it with both hands for stability, like steering a boat rather than flying a plane.
| Feature | Benefit | Best For |
|---|---|---|
| Preset depth adjustment | Consistent cuts | Repetitive edging |
| Two-handed control | Enhanced stability | Detailed work |
| Dust collection options | Cleaner workspace | Health and visibility |
| Fixed positioning | Reliable results | Edge routing |
You’ll appreciate how a fixed-base router handles decorative edges and trim work reliably. It’s your go-to when you need steady, predictable results without surprises mid-cut.
Plunge Router Advantages
While a fixed-base router excels at edge work, a plunge router opens up a whole different world of possibilities. I find that plunge routers let me control exactly when the bit enters the material, which is crucial for interior cuts like mortises and decorative patterns.
Here’s what makes them invaluable:
- Controlled Entry: Lower the spinning bit gradually into your workpiece without sudden contact
- Interior Cuts: Create recesses, inlays, and detailed carvings anywhere on your board
- Template Work: Follow precise patterns for consistent, professional results
- Depth Control: Adjust your cutting depth mid-project without stopping
You’ll appreciate how a plunge router prevents tear-out and mistakes. Whether you’re tackling dovetails or carving designs, this capability greatly expands what you can accomplish in your shop.
Trim Router Best Uses
The trim router is your go-to tool when you’re working on smaller, more delicate projects that don’t require the power of a full-size router. I find it perfect for decorative edges, detailed work, and finishing touches where precision matters most.
| Task | Best For | Bit Type |
|---|---|---|
| Edge rounding | Thin stock | Roundover |
| Chamfering | Veneer work | Chamfer |
| Fine profiling | Detail work | Edge bits |
| Decorative edges | Small pieces | Specialty |
| Template work | Intricate cuts | Flush trim |
Since trim routers have lower power and limited depth capacity, I use them for light cuts rather than heavy hogging. You’ll appreciate their one-handed control and portability.
Always clamp your workpiece firmly, use sharp bits, and test cuts on scrap first. This approach produces consistent results and keeps you safe while achieving professional-looking decorative edges.
How to Install Bits and Set Cutting Depth

Now that you’ve chosen your router type, I’ll walk you through selecting the right bit, getting it securely installed in the collet (the part that holds the bit), and then adjusting your cutting depth so you’re ready to actually route.
You’ll learn how to make fine adjustments using precision wheels when available, which gives you that extra control for getting your depth exactly right. Think of this process like setting up a pencil in a sharpener; you need the bit in tight and at the correct height before you can do quality work.
Selecting And Installing Bits
Proper bit installation is where your router work begins—get this step right, and you’ll have better control and safer cuts. Let me walk you through this process.
First, I verify the bit-shank size matches your router collet (typically 1/4″ or 1/2″). Then I insert the bit and tighten it firmly with the included wrench. Once secured, I reattach the base.
Setting cutting depth comes next. I adjust the base height to control how far the bit extends, determining my cut thickness. A turning wheel gives me fine adjustments for exact measurements. I always route scrap pieces to confirm my depth before starting actual work.
This preparation prevents mistakes and produces professional results.
Adjusting Depth Settings
Once your bit’s locked in tight, you’ll need to set how deep it cuts into your wood. That’s where the depth adjustment wheel comes in. I always start by turning this wheel to position my bit at the desired cutting depth, typically between 1/8 and 1/4 inch for most projects.
Here’s the key difference: fixed-base routers require you to set the depth before powering on, while plunge routers let you lower the bit into the wood during operation. That flexibility is why many woodworkers prefer plunge routers for detailed work.
Before committing to your actual project, I recommend making test cuts on scrap wood. This simple step verifies your depth settings and helps you avoid mistakes. Start shallow and gradually increase depth across multiple passes. This prevents bit overload and tear-out.
Fine-Tuning With Precision Wheels
How do you actually get your bit sitting at exactly the right height? Many routers feature precision wheels that let you dial in your depth adjustment with excellent accuracy. I find this feature makes my routing work much more precise and less dependent on guesswork.
Here’s what makes precision wheels valuable:
- Fine-tuned control: You’ll adjust cutting depth in small increments, perfect for shallow decorative edges or controlled passes through thick material
- Repeatability: Once you’ve set your depth, you can reproduce that exact measurement on future projects
- Confidence building: No more second-guessing whether your router bits are positioned correctly
I always test-cut on scrap pieces first. This simple habit confirms my depth adjustment is spot-on before tackling actual projects. The precision wheel’s turning mechanism gives me the control I need for professional results.
Master These Core Routing Techniques

Since routing involves spinning bits at high speeds through wood, you’ll want to master a few fundamental techniques before tackling complex projects. I’ve found that understanding feed direction, moving counterclockwise on external edges and clockwise on internal ones, keeps you in control and prevents the bit from grabbing.
Understanding feed direction—counterclockwise on external edges, clockwise on internal ones—keeps you in control and prevents bit grabbing.
Start with basic edge profiles using an edge guide to follow your workpiece’s outline. This simple tool creates professional-looking bevels and rounded corners.
Next, explore guides and jigs. A circle jig lets you create perfect curved routing techniques, while template guides replicate intricate designs consistently. These aren’t shortcuts; they’re essential for accuracy.
Practice on scrap wood first. You’ll develop feel for bit speed and pressure, building confidence for real projects. Master these foundations, and you’re ready for advanced work.
Five Jobs Every Woodworker Should Know How to Route
Why do experienced woodworkers reach for their routers again and again? Because mastering five essential routing jobs helps you move from a beginner into someone who tackles projects with confidence.
Here’s what you’ll want to master:
- Edge profiling – Routing decorative edges on tabletops and shelves gives your work that polished, professional look
- Wood joining – Creating grooves and dadoes for joinery lets you build strong, invisible connections between boards
- Trimming laminates – Flush-routing laminate edges keeps them perfectly aligned with your substrate
I’ve found that practicing these three jobs builds your routing foundation. Start with shallow passes, maybe 1/8 inch deep, when removing heavy material.
Remember to move against the bit’s rotation direction. You’ll discover that routing becomes intuitive once you understand how bits interact with wood grain. These skills open doors to countless projects.
How to Avoid Router Injuries and Ruined Projects
What’s the difference between a router that runs smoothly and one that kicks back dangerously? Control. I’ve learned that safety and quality go hand in hand when routing.
| Safety Practice | Why It Matters |
|---|---|
| Clamp your workpiece firmly | Prevents movement and kickback |
| Keep hands clear of the bit path | Protects your fingers from spinning bits |
| Use two hands on two-handle routers | Gives you stability and control |
I always make multiple shallow passes instead of one deep cut. This reduces dust, prevents tear-out, and keeps me safer. Test cuts on scrap pieces let me verify depth and direction before touching my actual project.
Route counterclockwise on outside edges, clockwise on inside edges. This controls tear-out beautifully.


