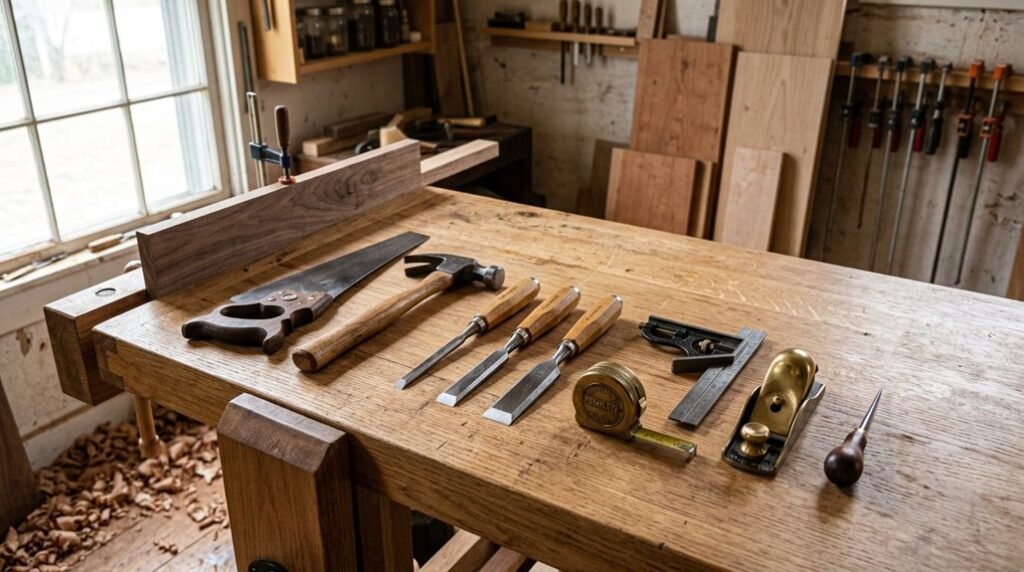
You might think you need a workshop full of expensive equipment before making your first cut, but I’m here to tell you that’s not true. Starting woodworking actually requires just seven core tools, and I’ve arranged them in the exact order you should buy them.
Here’s what surprised me most when I began: the right basic tools matter way more than having tons of them. Let me show you which ones will help you move from curious beginner to confident builder.
Protect Yourself First: Essential Safety Gear

Why do you think professional woodworkers look like they’re suiting up for a science experiment before they step into the workshop? They’re protecting what matters most: you.
Before you touch any tool, you’ll need three critical pieces of safety gear. First, grab properly fitting safety goggles with side shields. They’ll stop flying chips from damaging your eyes. Second, invest in an OSHA-compliant hearing protection device like ISOtunes to shield your ears from sustained workshop noise. Third, wear a high-quality respirator with replaceable filters to guard your lungs against sawdust inhalation.
Here’s the key: protect your eyes, ears, and lungs together before starting any cutting or sanding task. This trio works as your workshop safety foundation. You’re joining a community that takes this seriously.
Your First Saw: Why Beginners Start With a Miter Saw

Once you’ve got your safety gear locked in, how do you pick your first cutting tool without feeling overwhelmed by options? I’d recommend starting with a miter saw, your best choice for beginners.
Here’s why: A miter saw gives you precise cuts with minimal risk. Unlike circular saws, it won’t kick back at you because the blade’s path is fixed. You’re controlling the tool through a sturdy fence, not wrestling with it.
Start with a 7-1/4 inch stationary model. It’ll handle boards up to 6 inches wide, perfect for crosscuts and trim work. Want to upgrade later? A 10–12 inch sliding saw expands your capacity to 12–14 inches wide.
This progression keeps you safe while building confidence and skills.
Cutting Beyond Crosscuts: When You’ll Need a Circular Saw

Your miter saw handles crosscuts beautifully, but it can’t rip boards lengthwise or slice through large sheets of plywood. That’s where a circular saw comes in. I’ll show you why this tool completes your setup.
A circular saw tackles jobs your miter saw can’t:
- Rip cuts along board edges for narrower pieces
- Breaking down sheet material like plywood quickly and portably
- Straight crosscuts on large sheets when you use a straightedge guide
Here’s what matters: blade selection determines your results. Choose general-purpose blades for plywood, finer blades for melamine.
Always use a straightedge guide or track system. This prevents wandering cuts and keeps you safe. Start with a corded model for consistent power. Once you’re comfortable with technique and safety practices, you’ll understand why experienced builders trust this versatile tool.
Joining Wood Together: The Drill and Your First Fasteners

Once you’ve cut your wood pieces, you’ll need a way to join them together, and that’s where a cordless drill becomes invaluable. It lets you drive screws faster and cleaner than hammering nails by hand.
I’ll walk you through picking the right drill and the fasteners you’ll actually use on real projects, from basic wood screws in sizes like 1-1/4″ to 2-1/2″ up to specialized pocket hole screws that create invisible, solid joints. Getting these two pieces right sets you up for success on everything from simple boxes to more ambitious builds.
Drill Types And Selection
How do you actually hold pieces of wood together so they stay put? You’ll need a cordless drill, your most essential tool for joining wood.
I recommend starting with a drill-driver that has:
- A comfortable grip you can hold for extended periods
- A 12–20V battery platform that’s reliable and rechargeable
- Multiple torque settings to control how hard screws drive in
These features let you pilot holes and drive screws without splitting wood or stripping fasteners. Look for a reversible drill function too; it backs out mistakes easily.
Pair your drill with quality drill bits: twist bits for general wood work and brad-point bits for cleaner, more precise holes. Add a countersink bit to your collection so screw heads sit flush with your wood’s surface.
Fastener Basics For Beginners
What’s the point of having a drill if you don’t know which screws to grab first? I’ll walk you through the essentials.
Start with a basic mix: 1-1/4″, 2-1/2″, and 3″ screws for most projects. Add pocket-hole screws if you’re using a Kreg jig. It’s an excellent tool for creating clean joints.
Here’s the real trick: always drill pilot holes first. This prevents splitting, especially in hardwoods or near board ends. A countersink bit creates flush holes that stop tear-out and strengthen your joints.
Pair your drill with a cordless impact driver. It drives screws faster and reduces stripping in thick wood. You’ll notice the difference immediately.
Master these fastener basics, and you’re ready to join wood like a pro.
Mark It Right: Measuring and Layout Tools That Matter

Why do so many woodworking projects end up looking lopsided or misaligned? Poor marking and measurement. I’ve learned that accurate layout tools make a real difference between a project that fits beautifully and one that doesn’t.
Here’s what I recommend:
- 16–25 ft tape measure and straight edge – These measuring tools keep your dimensions accurate from start to finish.
- Marking gauge and combo square – A marking gauge creates repeatable shoulder lines, while a combo square handles 90° and 45° checks with precision.
- Pencil marks first – I start with pencils for visibility and easy erasing during layout tasks.
These layout tools strengthen your joinery accuracy and overall project fit. Investing in reliable measuring and marking equipment now sets you up for success as you build your skills and confidence.
Smooth Finishes: Sanding Tools and Dust Control
You’ll need the right sanding tools to create rough wood into glass-smooth surfaces that feel great and look professional. I’d recommend starting with a random orbital sander (like the reliable Bosch models) for fast, swirl-free material removal, then keeping sanding blocks handy for corners and detail work where a power sander can’t reach.
Since sanding creates serious dust that’ll clog your lungs and wreck your shop vac’s filters, you’ll want to connect your tools to a shop vac with dust management. A five-gallon dust separator acts like a bouncer, catching the heavy particles before they hit your filters.
Random Orbital Sander Essentials
A random orbital sander is pretty much the workhorse of smooth finishes. I’d argue it’s one of the first power tools that’ll really improve your woodworking. Here’s what makes it indispensable:
- Vibration control keeps your surface smooth and swirl-free, preventing those frustrating scratch marks
- Grit progression (80, 120, 180, 220) moves you from rough to fine, minimizing visible imperfections
- Dust collection paired with a shop vac protects your lungs and keeps your workspace clean
I recommend the Bosch model. It’s reliable and durable since 2015, making it perfect for beginners like us. Match your sander’s dust collection port to your vacuum for seamless compatibility. Good vibration control and low noise matter too.
When you invest in the right random orbital sander, you’re investing in professional-quality finishes that’ll impress anyone who sees your work.
Hand Sanding for Detail Work
Once your random orbital sander finishes the broad strokes, where do you go when tight corners and curved edges won’t cooperate? That’s where hand sanding takes over.
Sanding blocks are your precision tools for detail work. They let you tackle corners and edges your random orbital sander can’t reach, keeping surfaces flat and controlled. I use them with the same grit progression—80 through 220—that I’d use with power tools.
Here’s the key: match your block’s size to the area. Smaller blocks work better in tight spaces.
Don’t skip dust control during hand sanding either. Even hand work creates fine particles that irritate lungs. Keep a shop vac nearby and wipe surfaces frequently.
This combination of power sanding followed by hand finishing gives you professional results that machines alone can’t achieve.
Dust Management and Shop Vacs
Because sanding creates fine dust particles that damage your lungs and clog your tools, dust management isn’t optional—it’s necessary. I’d recommend investing in three key components:
- Shop vac – Connect this directly to your sander’s dust port for immediate collection
- Dust separator – A five-gallon bucket device that traps larger particles before reaching your vacuum filter
- Respirator – Wear a properly fitted mask with replaceable filters for maximum protection
This setup protects both you and your equipment. The dust separator significantly extends your shop vac’s suction power and filter life by removing debris before it clogs everything up.
You’ll also want OSHA-compliant hearing and eye protection while sanding. Together, these tools help you achieve that swirl-free finish while keeping your workspace clean and your lungs safe.
Build Your First Project: A Simple Beginner Planter Box
Your first woodworking project should be something you can actually finish and use, and that’s exactly what makes a planter box perfect.
Your first woodworking project should be something you can actually finish and use—and a planter box delivers exactly that.
You’ll need just two to four 1×6 or 1×8 boards joined with simple butt joints; basic joinery basics that teach you real skills. A miter saw handles straight cuts cleanly, while your drill/driver creates pilot holes for exterior screws reinforced with wood glue.
Here’s what makes this a true beginner win: you’re learning woodworking basics without complex techniques. Add drainage holes in the bottom, line it with landscape fabric, then finish with exterior paint or stain.
This planter box proves you belong in the workshop. You’ll create something functional, beautiful, and weather-ready while mastering essential beginner tools and joinery fundamentals.


