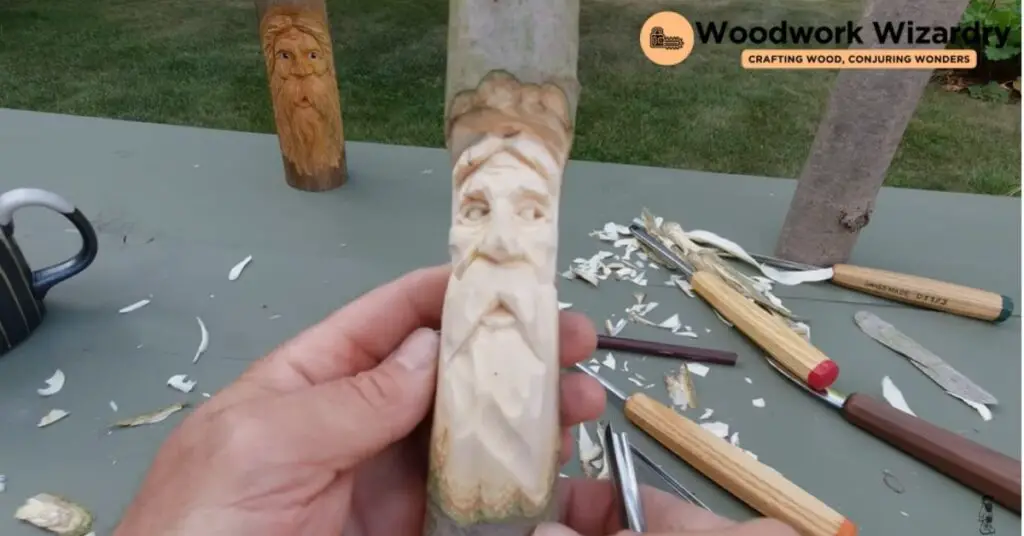
We’ve all admired the intricate beauty of wood carvings, haven’t we? From the delicate curves to the expressive faces, there’s something undeniably magical about bringing a piece of wood to life. Today, we’re diving into the enchanting world of carving a wood spirit. It’s a journey that combines artistry with the rustic charm of nature, and we’re excited to guide you through every step.
Carving a wood spirit isn’t just about shaping wood; it’s about capturing an essence, a whisper of the forest. Whether you’re a seasoned carver or picking up a chisel for the first time, we promise there’s joy and discovery in this craft. So, let’s roll up our sleeves and get ready to uncover the secrets of transforming a simple piece of wood into a captivating wood spirit. Join us as we explore the tools, techniques, and tips to make your wood carving adventure a success.
Essential Materials and Tools
Embarking on the journey to bring a piece of wood to life requires not only creativity but also the right set of materials and tools. Let’s dive into what you’ll need for carving a wood spirit, ensuring you have everything in place to start this rewarding endeavor.
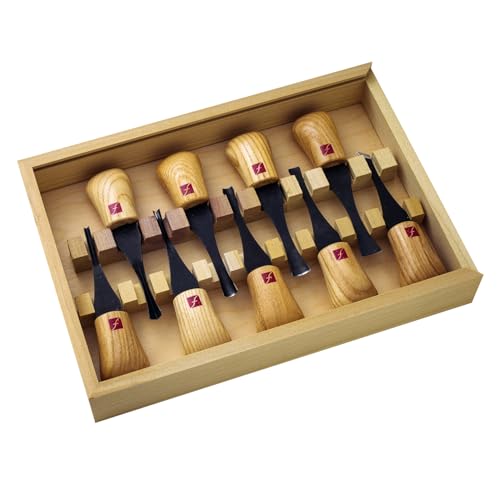
Wood Carving Gouges Chisels Kit Built for Comfort: Featuring lightweight Ashwood handles, these palm tools are ergonomically shaped to fit comfortably in your hand, allowing for extended carving sessions without fatigue.

Sharpening Strop for Spoon Carving Tools: the special design helps you make and keep your spoon carving tools always sharp. Regardless of your skill level, the paddle strop is suitable for all.

[Woodworking Chisel Set Comes with 4 Sizes] : 8mm(5/16")/12mm(1/2")/18mm(3/4")/25mm(1") . The size is clearly engraved on the blade, so you can clearly choose the size you need to carving.
Choosing the Right Wood
Softwoods like Basswood or Pine serve as the ideal choices for beginners due to their fine grain and ease of carving. These woods allow for detailed work without putting too much strain on the carving tools. If you aim for a more rugged, natural look, Cedar and Cypress can add an interesting twist to your wood spirit carving. The choice of wood impacts the final appearance and feel of your carving, thus selecting a block that resonates with your envisioned wood spirit is crucial.
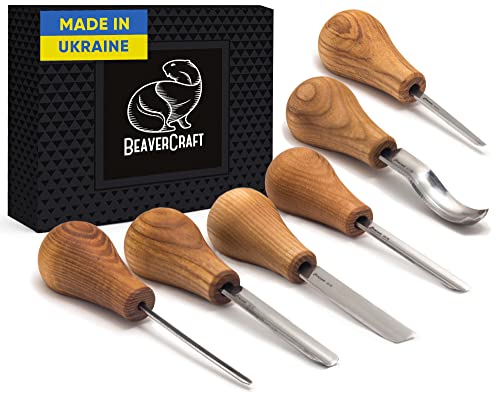
Selecting Carving Tools
Investing in quality carving tools significantly influences the efficiency and enjoyment of your wood carving process. The essential tools include:
- Gouges to hollow out larger chunks of wood, creating curves and depth.
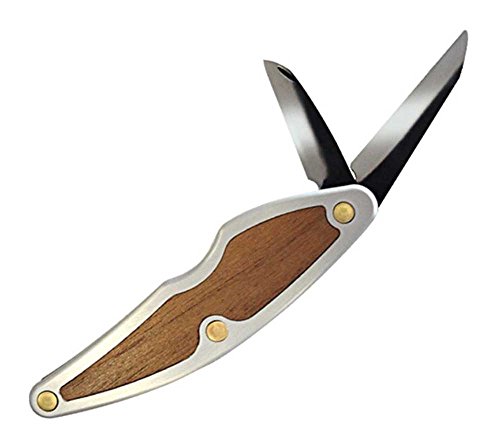
- Knives, specifically a detailing knife for intricate cuts and a whittling knife for rough shaping.
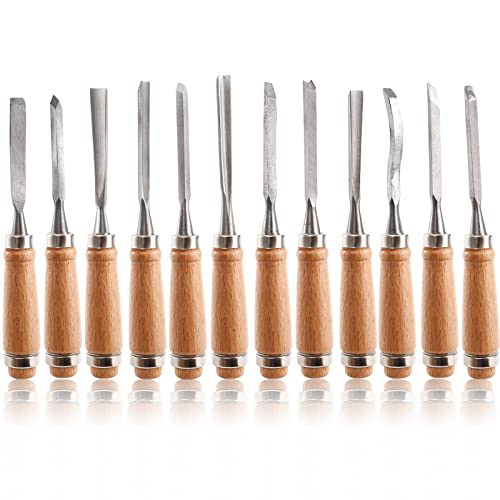
- Chisels for precise cuts and detailing, vital for defining features of the wood spirit.
- V-Tools for creating sharp lines and adding texture to your carving.
High-quality tools not only last longer but also provide a smoother carving experience, enhancing the detail and character of your wood spirit.
Safety Equipment
Prioritizing your safety while carving cannot be overstated. Necessary safety equipment encompasses:
- Gloves made of cut-resistant materials to protect your hands during the carving process.
- Carving glove for the hand holding the wood, providing grip and protection.
- Safety glasses to shield your eyes from wood chips and dust.
- Dust mask especially when sanding, to prevent inhalation of fine wood particles.
Equipping yourself with the proper safety gear ensures a safer, more comfortable carving experience, allowing you to focus on the creativity and craftsmanship of carving your wood spirit.
Preparing the Wood

Preparing the wood forms the foundation for any carving project. The right preparation ensures a smooth carving process and contributes significantly to the final outcome.

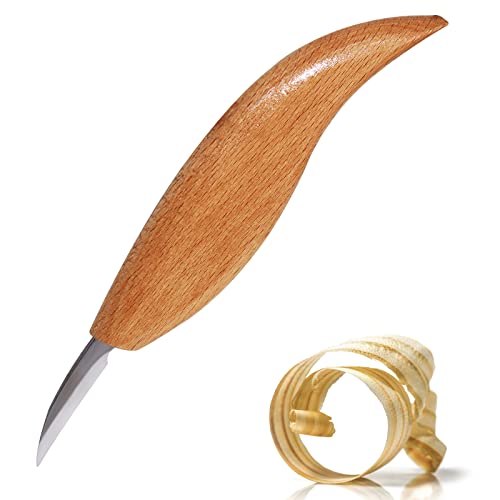
DIMENSIONS: 6 inch (15.3 cm) overall length with a blade length of 1.5 inches (3.8 cm) and a weight of 3.9 ounces

Wood Carving Knife of Great Comfort: the fine detail knife is suitable for making narrow cuts and detailing the wood carving project. The flexible blade is excellent for higher precision.
Dual Carving Blades: Features a 1.5″ detail blade and a 2″ roughing blade, giving you the flexibility to sculpt fine detail or remove material more aggressively.
Selecting the Right Piece
Selecting the right piece of wood is paramount. Look for a piece with minimal knots, as knots can make carving difficult and may break tools. Softwoods, like Basswood or Pine, are optimal choices for beginners due to their softer nature which makes them easier to carve. Wood grains should run uniformly along the piece; this consistency aids in predictability when carving intricate details like those found in wood spirits. For our project, a piece approximately 2 inches wide, 2 inches deep, and 8 inches long works well, offering sufficient space for detailed work without being unwieldy.
Creating a Workable Surface
Creating a workable surface involves preparing the wood block for carving. Begin by smoothing the surface with sandpaper, starting with a coarse grit and moving to finer grits for a smooth finish. This step is crucial for removing any rough spots that could snag tools or disrupt the carving flow. Once smooth, outline the basic shape of the wood spirit lightly with a pencil. This guide acts as a roadmap during the carving process, ensuring that key features like the eyes, nose, and mouth are proportionately spaced and located correctly. Designating the areas to be carved and those to be left raises helps visualize the final product and guides the carving tools along the intended path.
Sketching Your Wood Spirit Design
Drawing the design of your wood spirit emerges as a crucial step in the journey to bring your wooden creation to life. This process allows you to visualize the final piece and make adjustments easily before the carving begins.

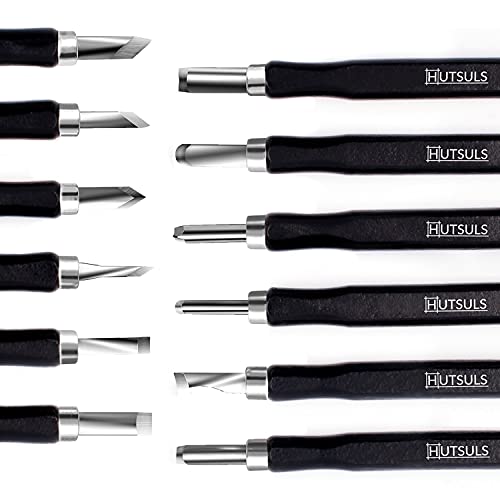
Premium CRV Steel Blades – Crafted from high-quality Chrome Vanadium (CRV) steel, each chisel is heat-treated for lasting sharpness and durability. The electrolytic coating prevents rust while ensuring a smooth cutting experience for intricate detailing

Woodcarving Tools Set: our package comes equipped with a comprehensive set of carving tools, including 2 triangular v shaped chisels, 1 angled gouge, 1 half round chisel, and 1 flat chisel, each measuring about 5.71 x 0.59 x 0.59 inches/ 145 x 15 x 15 mm (L x W x H), with the weight of about 0.53 ounce/ 15 g each; Blade sizes of about 1.5mm, 4mm, 6mm, 7mm and 10mm;This flourishing collection of tools provides you with the versatility to accomplish most carving projects

Package Information: the linocut tools set includes 5 pieces of triangular carving knives, the dimensions of a single carving knife are about 5.71 x 0.59 x 0.59 inches/ 145 x 15 x 15 mm(LWH); It is made of steel, iron (blade), and beech wood material, each chisel comes with a rubber boot to protect the blade from damage; There is also a canvas bag to store all the kits; Because of the handmade, the color of the knife and the shape of the handle are slightly different
Understanding Basic Wood Spirit Anatomy
To sketch a compelling wood spirit, familiarize yourself with its iconic features. Typically, a wood spirit consists of a face surrounded by flowing or rugged facial hair, leaves, or branches that merge into the wood’s natural form. Focus on the eyes, nose, and mouth, as these elements add character. For eyes, aim for deep, expressive shapes; a well-defined nose that emerges gracefully from the wood; and a mouth that can range from contemplative smiles to wide grins, depending on the spirit you wish to evoke. Incorporate elements like eyebrows, beards, and mustaches to frame the face, using lines to suggest texture and flow. Remember, asymmetry in these features often adds a more natural and captivating look.
Transferring the Design to Wood
After finalizing your sketch, the next step involves transferring the design onto your prepared wood block. Employ a graphite transfer paper if aiming for precision. Place the transfer paper between the wood surface and your sketch, and gently trace the design, ensuring all key outlines transfer clearly. If accessibility is a concern, you might also freehand draw directly onto the wood using a pencil, allowing for spontaneous adjustments. Ensure every line necessary for carving appears distinctly, yet avoid pressing too hard to prevent permanent indents that might hinder the carving process. This prepares the wood for the physical transformation, guiding your tools to achieve the envisioned result.
Basic Carving Techniques

After carefully sketching and transferring the wood spirit design onto the material, it’s time to dive into the carving process. This involves various techniques to shape the wood spirit, emphasizing the importance of removing material gradually and detailing for a realistic finish.

Protect Your Hand - Throw away the normal gloves and try to use our THOMEN cut resistant gloves. It is made from level 5 cut resistant material, protect your hands from injury, stronger than normal gloves. Let you enjoy cooking time.

Cut-Resistant Gloves for Hand Protection: Designed to safeguard your hands during various tasks, BeaverCraft safety gloves allow you to work without the fear of cuts or injuries.

HIGHEST CUT PROOF. Protect your hands from cuts and punctures while handling sharp metals, knife, blade, glass, plastic sheet, paper, construction materials, mandolin slicer, and cutting meat. Qualified ANSI Cut A5
Roughing Out the Shape
Start by establishing the basic shape of the wood spirit using gouges and a mallet or a sharp knife. Focus on removing larger chunks of wood to form the rough silhouette of the face. Direct cuts away from the body, ensuring safety and control over each removal. Consistency matters; maintain an even depth and pressure to avoid unnecessary gouges in the wood.
Adding Facial Details
Once the basic shape is set, switch to finer tools like detail knives and micro gouges for the facial features. Begin with the eyes, as they are central to the character of the wood spirit. Carve the eye sockets first, then the eyebrows, moving next to the nose and finally the mouth. Keep the tool movements precise, utilizing the tip for fine lines and the side for smoothing and rounding off areas.
Technique Tips for Realistic Features
For realistic features, adhere to a few key techniques:
- Use light strokes for detailed areas to avoid digging too deep into the wood.
- Create shadows and depth by undercutting certain areas like the eyelids and nostrils, which adds to the illusion of dimension.
- Employ stop cuts for defining edges sharply, particularly around the nose and eyebrows.
- Texture the beard and hair with a V-tool, mimicking natural hair flow patterns and adding depth.
Remember, patience plays a vital role in achieving realism. Take time with each feature, and frequently step back to view the overall progress. This methodical approach ensures the wood spirit’s features align harmoniously, capturing the essence and character intended in the initial design sketch.
Refining Your Wood Spirit
After we’ve sculpted the basic contours and details of our wood spirit, it’s time to refine its appearance, enhancing its features and texture for a more polished and lifelike finish.

Dual Protection & Anti-Fog Goggles:This respirator mask integrates safety goggles and a half face cover into one unit, providing all-around protection for your eyes and respiratory system. The goggles feature an anti-fog and anti-splash coating to ensure a clear vision during extended use in dusty environments like wood sanding and polishing.

Designed specially for average daily mask-wearing >8hrs per day professional /occupational use

Smoothing and Sanding
Smoothing the wood spirit’s surface begins with selecting the right sandpaper grits. Start with a coarse grit, such as 100, to remove any prominent carving marks and uneven areas. Work in the direction of the wood grain to avoid creating additional scratches. Gradually progress to finer grits, such as 220 and then 320, to create a smooth surface. For hard-to-reach areas like under the nose or deep eye sockets, use smaller tools like needle files or folded pieces of sandpaper. This step ensures a seamless base, highlighting the wood spirit’s facial features more distinctly.
Adding Texture and Depth
Enhancing the wood spirit’s texture involves strategic strokes and the application of varying pressures. Create hair or beard textures using a V-tool to carve fine lines that mimic the natural flow of hair. Overlap lines and vary their length for a more realistic effect. Employ a small U-gouge to add depth around the eyes and beneath the nose, creating shadows that impart a lifelike quality. For finer details, like wrinkles or the texture of the lips, lightly drag a sharp knife or a micro gouge over the wood, allowing the tool to follow the wood’s natural grain. Adding these textures and depths gives our wood spirit character, making it unique and vibrant.
Finishing Touches

After sculpting the wood spirit with care and bringing out its unique features, the next steps involve staining and sealing the wood to safeguard and accentuate its beauty.

Cr-V 60 Steel Blades: Each chisel in this set is meticulously crafted from Cr-V 60 chromium-vanadium steel, and heat-treated for enhanced durability, with a hardness range of 56-61 HRC. This ensures that the blades stay sharp and durable for long-lasting use, providing precise and clean cuts every time.
Specifications - 12 pcs wood carving chisel with an easy carrying leather bag. Enough variety of the tips in different 12 sizes-deep gouge, medium gouge, shallow gouge, narrow straight chisel, wide straight chisel, rounded chisel, 4 angled knives / chisels, parting tool, pinpoint tool. Our full size durable woodworking sets would be helpful tools in your happy wood carving time.
Gouge Set Includes: This woodworking set includes seven different gouges measuring #2 x 5/16, #3 x 3/8, #3 x 5/8, #5 x 9/16, #6 x 5/16, #8 x 3/8, #11 x 1/8 in addition to a 70 degree V-tool x 1/4 and 70 degree V-tool x 3/8.
Staining Your Wood Spirit
Staining acts as the bridge between carving and finishing, deepening the wood’s natural color and highlighting the intricate details of the wood spirit. Begin by choosing a stain that complements the wood type. Pine, for example, pairs well with lighter stains that enhance its grain without overpowering the details.
Apply the stain using a soft brush or cloth, working in sections to ensure even coverage. Follow the grain of the wood, allowing the stain to penetrate and reveal the depth of the carvings. It’s essential to wipe away excess stain to prevent blotchiness, which can obscure the wood spirit’s detailed features. After application, let the stain dry thoroughly, adhering to the recommended drying time on the stain’s packaging. This step concludes when the wood spirit showcases a rich, even tone, with its details pronounced more than before.
Sealing the Wood
Sealing is pivotal in preserving the wood spirit’s condition and appearance. A good sealant, like a polyurethane or beeswax, provides a protective layer against moisture and wear. Choose the sealant based on the desired finish, either matte for a natural look or gloss for a vibrant shine.
Apply the sealant with a steady hand, using a clean brush to reach into every nook and cranny. Pay particular attention to the facial features and other detailed areas, ensuring they are well-protected. Allow the first coat to dry completely, then assess the need for additional coats. Multiple thin coats are preferable to a single thick coat, as they adhere better and are less prone to drips or brush marks.
Once the final coat dries, the wood spirit will not only possess a protective barrier but also have an enhanced sheen that brings out every carved detail. This marks the culmination of the carving process, leaving the wood spirit ready to display its full splendor.
Troubleshooting Common Issues
In the journey of creating a wood spirit, you might encounter a few snags along the way. Addressing common issues swiftly ensures the beauty of your creation shines through.


Precision 1.5″ Blade: Features a straight 1.50″ (38 mm) high-carbon steel blade with a very fine point ideal for ultra-narrow cuts and fine detailing.
Sharp and Precise Blade: Designed with a fine, razor-sharp edge that ensures smooth and accurate cuts, perfect for detail work in wood carving and chip carving projects.
Solving Grain Problems
Grain direction represents a key factor in carving smoothly. Sometimes, your tool may catch or tear the wood unexpectedly, indicating a grain-related issue. To overcome this, always carve with the grain, not against it. Recognize the wood’s grain direction by observing its lines and patterns. If resistance persists, consider changing your carving angle or using a different tool. For stubborn areas, employing a sharp, small V-tool can help navigate tricky grain patterns effectively. Sanding lightly in the direction of the grain aids in smoothing out any remaining roughness without compromising the wood spirit’s details.
Fixing Mistakes in Carving
Mistakes during carving can range from minor slips to significant gouges. Small errors often blend into the final piece with strategic deepening of surrounding areas or converting them into texture marks. For deeper cuts, use wood filler matching the project’s wood type, apply it carefully to the mistake, and after it dries, re-carve the corrected area. In situations where a piece of wood is mistakenly removed, consider gluing it back using wood glue. Ensure the adhesive is specifically designed for woodworking to achieve a seamless repair. Once the glue sets, continue carving with light, gentle strokes to minimize stress on the repaired section. Remember, patience and a bit of creativity can turn almost any mistake into a unique feature of your wood spirit.
Displaying Your Wood Spirit

After meticulously carving, staining, and sealing your wood spirit, showcasing it properly is the next step to ensure it commands the admiration it deserves.

Wood Carving Kit 23Pcs: Our wood carving kit provides everything that beginner or professional needs, 4 large carving knives, 5 small detail knives, 9 basswood blocks, polishing compound, leather strop, gloves, and an instruction manual. And all knives are organized in a portable bag for convenience.

Package Information: the linocut tools set includes 5 pieces of round mouth carving knives, the dimensions of a single carving knife are about 5.71 x 0.59 x 0.59 inches/ 145 x 15 x 15 mm(LWH); It is made of steel, iron (blade), and beech wood material, each chisel comes with a rubber boot to protect the blade from damage; There is also a canvas bag to store all the kits; Because of the handmade, the color of the knife and the shape of the handle are slightly different
Let's Get Carving: Bring out your inner creativity & try making crafts with the beginner carving kit. Hutsuls carving wood tools set is a great choice for beginners & kids to start carving on your own
Mounting Options
Selecting the right mounting option enhances the visibility and appeal of your wood spirit. Consider the following approaches based on the character and size of the finished piece:
- Wall Hanging: Secure a hook to the back of the wood spirit for easy wall mounting. This method works well for larger pieces, drawing the eye upward.
- Stand Display: Employ a stand for smaller wood spirits. Perfect for displaying on shelves or tables, stands offer flexibility in positioning.
- Outdoor Placement: If using weather-resistant sealant, display your wood spirit outdoors, such as attaching it to a tree or garden post for a mystical touch.
- Incorporating into Furniture: Integrate your wood spirit into furniture pieces like bookshelves or mantelpieces for a unique, custom look.
Care and Maintenance
Proper care prolongs the life and beauty of your wood spirit. Here are essential tips for maintaining your piece:
- Regular Dusting: Use a soft, dry cloth or brush to remove surface dust. This prevents buildup that can obscure details over time.
- Avoid Direct Sunlight: Prolonged exposure to sunlight can fade the stain and damage the wood. Display your piece in a location away from direct sunlight.
- Maintain Humidity Levels: Excessive dryness or humidity can cause the wood to crack or warp. Keep your wood spirit in an environment with stable humidity.
- Periodic Re-Sealing: Consider reapplying sealant every few years to protect the wood from moisture and damage. It keeps the wood spirit looking fresh and well-preserved.
By following these mounting and care guidelines, you ensure that your wood spirit remains an enchanting focal point for years to come.
Conclusion
We’ve walked through every step to bring a wood spirit to life, from the initial sketch to the final seal. It’s a journey that’s not just about crafting something beautiful but also about connecting with the material and the story it tells. Remember, each shaving and stroke adds character, transforming a simple piece of wood into a mesmerizing masterpiece. Caring for your wood spirit ensures it remains a cherished piece, captivating the eyes and hearts of all who see it. Let’s keep the chisels sharp, the creativity flowing, and our spirits intertwined with the wood we shape. Happy carving!
Related Posts:
- Top Beginner-Friendly Woods: Find Your Perfect Match for Woodworking
- Top 10 Best Woods for Turning: Softwoods to Exotics
- Ultimate Guide: How to Carve a Wood Spirit – Techniques & Care
- Prevent Splitting: How to Keep Green Wood Intact
- Ultimate Guide: How to Oil a Mini Chainsaw for Peak Performance
- Easy Guide: How to Untangle a Chainsaw Chain Safely & Quickly
- Is Woodworking Hard? Debunking Myths & Mastering the Craft
- What Is a Mandrel? Exploring Its Types and Industrial Applications
- Why Is Teak Wood So Expensive? Unveiling the Reasons

Protect your hand from cuts and abrasions---The high performance cut resistant material HDPE is adopted and the gloves is awarded with the high EN388:2003 level 5 (EN388:2016 Level C) cut resistance certification. 10 times stronger than normal gloves.
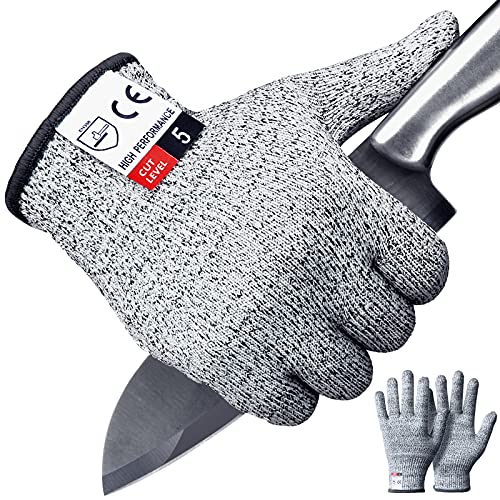
[KEEP YOUR HANDS SAFE] - Do you still use ordinary gloves when working or cooking? Throw them away and try using our Apaffa cut resistant gloves. It is made of level 5 cut resistant material, protects your hands from 99% of injuries, 10 times stronger than ordinary gloves.

【High Level of Protection】The ProGuard ANSI A9 cut resistant work Gloves provide the top-tier protection, boasting the high cut resistance rating available. Each pair features state-of-the-art yarn technology, ensuring 360° reliable hand protection from extreme cutting hazards