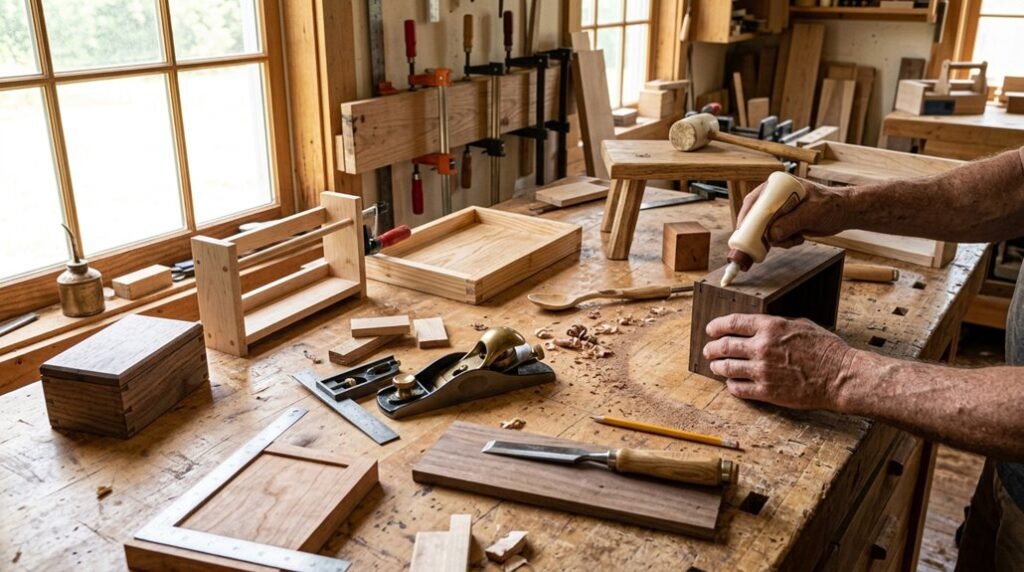
If you’ve ever thought building furniture was reserved for master craftspeople, I’ve got news for you—it’s not. I’m going to show you seven manageable projects that’ll improve your outdoor space while teaching you real skills.
We’re talking cedar planters, storage crates, and garden carts that you can actually complete in two days. But here’s where it gets interesting: each one teaches you something new that opens doors to bigger projects. Let me break down where to start.
Start Simple: Build a Garden Planter for Herbs or Vegetables
A garden planter is one of the easiest woodworking projects you can tackle this weekend, and I’d argue it’s one of the most rewarding. You’ll join countless gardeners who’ve discovered how satisfying it is to grow your own herbs and vegetables.
A planter doesn’t require fancy tools or expensive materials. I’d recommend using rot-resistant wood like cedar, which intrinsically withstands weather and moisture. Most planters measure around 24 inches long, 12 inches wide, and 12 inches deep; perfect for herbs or shallow-rooted vegetables.
The beauty is that you can customize your planter for your space. Build a simple box for your patio, a raised bed for your deck, or even a vertical trellis combo that saves space while adding privacy. Straightforward assembly means you’ll be planting by Sunday afternoon.
Add Seating: A Sturdy Wooden Bench for Your Patio

Why settle for lawn chairs when you can build a bench that will last for years? I’m going to show you how to create a sturdy wooden bench perfect for your patio.
This woodworking project is beginner-friendly and takes just a few hours. You’ll need basic tools like a saw, drill, sandpaper, and measuring tape. The assembly involves straightforward joinery that doesn’t require advanced skills.
- Durable timber – naturally weather-resistant wood that holds up outdoors
- Optional staining – customize your bench’s color and add extra weather protection
You’ll have functional outdoor seating that combines quick construction with lasting quality. The bench seats multiple people comfortably and becomes a weekend gathering spot. Whether you’re new to woodworking or looking for a practical project, this bench delivers results without complexity.
Grow Upward: DIY Trellis for Climbing Vines and Flowers

Most gardens could use some vertical space, and that’s exactly where a trellis comes in handy. I’ve found that building a trellis is one of the easiest weekend projects you can tackle.
Building a trellis is one of the easiest weekend projects to maximize vertical garden space.
A trellis supports climbing plants like vines and roses, creating interesting vertical displays in flat garden areas. You’ll want to consider your space’s dimensions; typically 4 to 8 feet tall works well for most gardens.
Here’s what makes this project doable:
- Materials: Bamboo or pressure-treated wood resist rot and last longer
- Design options: Mix materials for visual texture and weathered appeal
- Installation: Mount it freestanding or directly to walls
The straightforward construction means you’ll finish this project in a single afternoon, then watch your climbing plants grow upward.
Make Hauling Easier: Lightweight Garden Cart on Wheels

Once your garden’s growing upward with that trellis, you’ll realize you’re spending half your time walking back and forth hauling tools, soil, and plants around the yard.
That’s where a lightweight garden cart comes in. I’ll walk you through building one that’ll make your gardening routine easier:
- Sturdy frames support heavy loads without weighing you down
- Durable wheels navigate tight garden spaces effortlessly
- Modular design adjusts for different tool sizes
- Beginner-friendly assembly takes just a weekend
This garden cart reduces multiple trips, saving your energy for actual planting. The straightforward plans use accessible materials you’ll find locally.
With step-by-step guidance, you’ll construct a maneuverable cart that handles fertilizer, supplies, and whatever else you’re moving. You’re not just building a tool; you’re joining gardeners who work smarter, not harder.
Attract Wildlife: Modern Birdhouse With Drainage and Easy Cleaning

I’ve designed this birdhouse to keep your feathered friends happy and healthy, which means tackling three critical elements: a smart drainage system that prevents water from pooling inside, cleaning access features that let you maintain the interior without tearing apart your work, and wildlife-friendly specs like proper ventilation holes and entrance sizing for specific bird species.
You’ll notice the floor sits slightly angled with small corner gaps. This isn’t decoration; it’s functional drainage that stops rot and mold from damaging the structure or harming nesting birds. By the time you’re done, you’ll have mastered practical joints and understand how thoughtful design makes maintenance straightforward rather than frustrating.
Drainage System Design
Because water buildup inside a birdhouse can damage nests and create unhealthy conditions for chicks, you’ll want to incorporate smart drainage into your design from the start.
I’ve found the best approach combines several simple techniques:
- Sloped floor: Angle the interior floor 1-2 degrees toward one corner to guide water naturally
- Drain holes: Place 3-4 small holes (about ¼ inch) in the lowest corner to prevent standing water
- Removable tray: Install a sliding tray at the base for effortless cleaning and drainage monitoring
- Drip edges: Add exterior trim that directs rainwater away from the entrance hole
I recommend using cedar or exterior plywood; these materials resist moisture better than standard lumber. The removable tray system makes weekend maintenance straightforward. You’re creating a self-draining system that protects your feathered visitors while keeping cleaning simple.
Cleaning Access Features
How do you keep your birdhouse fresh without disturbing the birds inside? The answer lies in smart cleaning access features built right into your design.
I recommend installing a hinged roof or removable side panel. This lets you inspect and clean the interior without opening the main entrance where birds nest. A removable floor, secured with simple wooden pegs or clips, makes debris removal effortless.
Here’s what works best:
- Hinged roof: Swings open for quick inspections
- Side panel access: Reaches corners easily
- Removable floor: Slides out for thorough cleaning
Space your cleaning access features about 1–2 inches from edges for comfortable handling. This approach keeps your birdhouse welcoming while protecting its residents. You’ll maintain a healthy environment that birds want to call home.
Wildlife-Friendly Specifications
While a birdhouse might look pretty sitting in your garden, what really matters is whether the birds actually want to live there. That’s where wildlife-friendly specs come in. I’ve found that building a birdhouse with the right features is important for attracting healthy birds to your yard.
Here’s what I focus on:
- Drainage holes at the bottom prevent water from pooling and causing moisture damage
- Ventilation slots near the roof keep temperatures comfortable during warm months
- Easy-access cleaning doors let you remove debris annually without stressing residents
- Proper entrance hole sizing (1.25–1.5 inches) matches specific bird species you’re targeting
When you include these specifications, you’re not just building shelter. You’re creating a genuinely welcoming home that birds trust. That’s the real goal of this weekend project.
Display More Plants: Tiered Plant Stand for Small Spaces
Ever wondered why plant lovers cram so many pots into tight apartments and balconies? A tiered plant stand solves this puzzle by stacking plants vertically. I’ve found that building one isn’t complicated—you’ll need basic joinery skills and common woods like pine.
The beauty of a tiered plant stand is efficiency. Instead of spreading pots across your floor, you’re using wall space smartly. Three or four shelves in a narrow footprint display dozens of plants without eating up precious square footage.
You can construct this project over a weekend using affordable materials. Pine costs less than hardwoods, and upcycled wood works great too. Finish it with stain, paint, or clear sealant to protect against moisture and match your décor. Your small space suddenly becomes a thriving plant gallery.
Hide the Mess: Cedar Storage Crate for Cushions and Gear
When you’re building an outdoor storage crate, cedar is your best friend because it inherently resists rot and weathering, meaning your crate won’t fall apart after a few rainy seasons. I’d recommend selecting cedar boards that are at least ¾-inch thick and checking them for any splits or knots before you start cutting, since quality wood makes construction easier and your finished crate more durable.
Your cushions and gear will stay protected from moisture and UV damage when stored in a well-sealed cedar crate, which you can customize to fit your specific items, like a 2-foot by 3-foot base for standard patio cushions.
Cedar Selection and Durability
Why’s cedar such a popular choice for outdoor storage projects? I’ll tell you, it’s practically built for durability. Here’s what makes cedar stand out:
- Rot-resistant wood that naturally repels moisture and decay
- Insect protection without chemical treatments
- Workable grain that cuts cleanly for weekend builds
- Long-lasting appeal that weathers beautifully over time
When I’m selecting cedar, I consider both grain pattern and scent. The grain affects appearance; tighter grains look more refined, while varied patterns add character. Cedar’s natural aroma is a bonus that actually helps deter pests in your storage crate.
For a cushion-sized crate (roughly 36″ × 24″ × 18″), cedar holds up through repeated opening and closing. Its stability means your gear stays protected through seasons of patio use without warping.
Weatherproof Storage Solutions
Your cedar crate’s real test comes when it faces rain, sun, and temperature swings; that’s where proper weatherproofing turns a nice weekend project into a storage solution that’ll last years, not months.
Here’s what makes cedar storage crates weather-resistant: Cedar naturally resists rot, but you’ve got to help it along. Use exterior-grade screws instead of regular ones—they won’t rust and weaken your joints. Apply waterproof sealant into every corner and crevice where moisture sneaks in.
For maximum protection, finish with UV-protective stain. This shields the wood from sun damage that causes fading and cracking. Sand everything smooth first—rough wood traps water.
Your cushions, tools, and gym gear stay dry and protected. That’s the payoff for a few extra hours of prep work.


