Think of your template like a recipe card. If it’s damaged or unclear, everything you make turns out wrong. I’m going to show you how to build templates that’ll last through hundreds of projects without warping, fraying, or losing their crisp edges.
The key isn’t complicated, but it does involve choosing the right material and protecting it properly. Here’s what separates amateur templates from professional-grade ones.
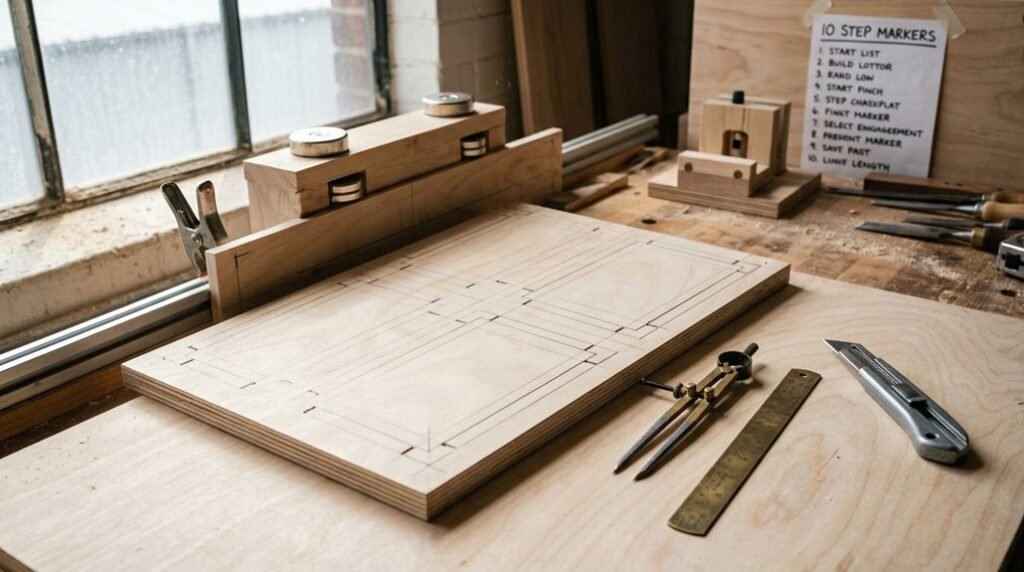
Choose Hardboard or Baltic Birch for Durability

What makes a template last through dozens of projects instead of wearing out after a few uses? The material you choose is important.
I recommend hardboard as your go-to option. It’s made from compressed wood pulp with linseed oil, creating a surface that resists warping and gives you crisp, clean edges, exactly what you need when routing repeatedly. Hardboard’s density means router bits won’t dig in or damage it easily.
Baltic birch runs a close second. Unlike standard plywood or MDF, Baltic birch has fewer voids (empty spots), which prevents pilot bearings from catching and damaging your template edges.
For maximum longevity, seal hardboard edges with glue size or super glue. This simple step greatly extends your template’s life, letting you tackle project after project without replacement.
Mark Center Lines and Registration Points

Once you’ve selected your hardboard or birch template material, you’ll want to mark clear reference lines that’ll guide your shaping and help you line everything up perfectly when you use the template later. I start by drawing center lines on both the template and the actual wood stock, using a sharpie on the template face and edges, then mirroring those marks with pencil on your workpiece so they match exactly.
Adding registration points (small marks or holes) around the edges gives you anchor spots to realign your template if you need to flip it, rotate it, or use it again on another project.
Alignment For Accurate Placement
How do you make sure your second, third, or tenth copy of a template comes out exactly like the first? Registration, the precise alignment of your template to the workstock, is your answer.
I align my layout lines directly to the workbench surface or vise-block before transferring. This simple step reduces movement and keeps everything steady.
Here’s what I do:
- Mark center lines on both template and stock with sharpie and pencil
- Use clear cross hairs as visual guides for consistent placement
- Keep alignment marks visible throughout rough-cutting and final fitting
- Position registration points at strategic corners for quick, repeatable setup
- Label templates with date and project details for tracking accuracy
When I maintain these registration points throughout the entire process, my duplicates match perfectly. You’ll join the community of woodworkers who trust their templates because they’ve invested in proper alignment from the start.
Centerline Transfer Methods
The foundation of reliable template duplication rests on marking centerlines, those invisible highways that guide your template and stock into perfect alignment. I mark centerlines on my template face and edges with a sharpie, then mirror those marks onto the stock with a pencil. This dual-marking system keeps everything honest.
I also use registration points like cross hairs to anchor my work. Think of them as signposts that say “you’re here.” When I reattach templates with carpet tape, these marks keep the pattern transfers accurate.
Here’s my process: mark centerlines on the template first, transfer them to stock second, then secure everything before routing. This sequence prevents drift and guarantees consistent results across multiple parts. Your templates become reliable partners, not mystery boxes.
Registration Point Marking Techniques
Building on those centerlines I just described, registration points turn vague guidelines into actual targets you can hit every single time.
I mark registration points using cross hairs (Line 1 and Line 2) plus a 45-degree Line 3 on my template. These aren’t random marks; they’re strategic guides that help me recreate complex curves accurately across multiple parts.
Here’s what makes registration points work:
- Cross hairs create intersecting reference lines for precise alignment
- The 45-degree angle catches curves that vertical and horizontal lines miss
- Multiple points prevent templates from shifting during transfer
- Marked points on both template and stock allow you to repeat the registration process accurately
- Clear labeling saves time when you return to the project later
When I transfer these registration points from template to stock using a sharpie and pencil, I’m building a system that works project after project.
Why Registration Prevents Transfer Errors

When you’re cutting multiple identical pieces from a template, even tiny shifts in position can ruin your work. Here’s why registration matters: it locks your template and stock together, preventing those costly mistakes.
| Problem | Solution |
|---|---|
| Misaligned cuts | Cross hairs guide placement |
| Drifting position | Center marks keep alignment true |
| Repeated errors | Mirrored stock marks prevent flipping |
| Lost accuracy | Registration holds everything steady |
I’ve learned that imperfections transfer 100% to your final product. If your template’s off by just 1/16 inch, every piece you cut inherits that error. That’s why precise registration is non-negotiable.
You’ll join countless woodworkers who’ve discovered that taking time upfront saves frustration later. Mark alignment points, use bench surfaces for simple jobs, or build complex setups for production runs. Registration isn’t just technical; it’s your quality guarantee.
Cut and Sand Your Template Shape

How do you create a precise template that’ll guide perfect cuts every time? You cut carefully and sand smartly.
Start by rough-cutting your shape with a band saw or jigsaw. Get close to your line, but don’t overshoot that’s the key. Next, refine those edges by hand to match your exact profile. Once you’re satisfied, transfer that final shape onto your template material using the same tool settings for consistency.
Now comes the final step: smooth everything with an oscillating sander. This reaches your desired final size while keeping edges crisp and sharp.
Your template-shaping checklist:
- Rough-cut with band saw or jigsaw
- Refine edges by hand
- Use radius templates for curves
- Sand with oscillating sander
- Maintain edge crispness throughout
This approach helps your templates work reliably, project after project.
Refine Edges and Curves for Routing

Once you’ve got your template shape roughed out and sanded smooth, you’re ready to prepare it for routing. That’s where edge refinement really matters. I’ll walk you through why this step separates amateur templates from professional ones.
Your router bit needs smooth, predictable edges to follow accurately. Any bumps or irregularities transfer directly to your workpiece. Use files to knock down high spots, then fine-tune with progressively finer sandpaper grits, such as 120 to 220.
Smooth template edges ensure accurate router tracking. Files and progressive sanding eliminate imperfections that transfer to your workpiece.
Pay special attention to curves. I recommend working slowly along curved sections, feeling for consistency with your fingertip. Sharp inside corners should be slightly radiused (gently rounded) so your router bit can track smoothly without jamming.
This precision investment helps your templates guide bits consistently across multiple projects.
Register and Adhere Your Template
Why does template placement matter so much? Precise positioning helps you create identical parts every time. I’ll show you how to secure your templates properly so they won’t shift during cutting.
When working with templates, follow these essential steps:
- Align your template directly on the workbench surface or vise-block for stability
- Use carpet tape to reattach templates securely between reproductions
- Keep templates visible and accessible by labeling them with dates and project names
- Drill a storage hole in each template for organized hanging and future reference
- Rough cut your stock close to the pattern line, leaving it visible for final fitting
This registration method prevents frustrating mistakes. Your templates become reliable tools you’ll use repeatedly, building consistency across all your woodworking projects.
Transfer Your Pattern to Workstock
The actual process happens when you move your template’s design onto the actual wood you’ll be cutting. I grab a pencil and carefully trace around my template onto the stock, keeping my line visible for later fitting. Here’s what I do next:
My Transfer Process:
- Sketch the pattern lightly so I can see it clearly
- Rough-cut close to the pencil line; don’t cut right on it yet
- Keep that line visible; it’s your safety net for accuracy
Once I’ve rough-cut, I reattach the template using carpet tape. This repositionable adhesive lets me line everything up perfectly without permanent damage.
Then I secure my workpiece in a vise-block on a stable surface. This stability matters because my hands stay steady for consistent, accurate cuts throughout the project.
Rough-Cut Oversize for Safety
Before you bring out your final shaping tools, I like to start with a bandsaw to remove the bulk of waste material, cutting about ¼ inch away from my pencil line. This approach keeps you safe and sets up success for precise finishing.
Start with a bandsaw to remove bulk waste, cutting ¼ inch from your pencil line for safe, precise finishing.
Here’s what makes this step important for building quality templates:
- Minimizes sanding work by leaving minimal material to remove
- Prevents bandsaw accidents by keeping fingers away from the blade’s danger zone
- Maintains accuracy when you leave the line visible for reference
- Speeds up refinement since you’re not fighting excessive waste
- Creates consistent results across multiple template copies
I’ll use a vise-block to hold my workstock steady during cutting. This registration technique keeps everything aligned perfectly. You’re not rushing toward final size yet; you’re establishing a safe, controlled foundation for hand-sanding and spindle-sander work ahead.
Trim With Router or Hand Tools
Once your template’s been rough-cut close to the line, you’ve got two solid ways to finish it: a router with the right bit setup, or hand tools if you prefer more control.
I’ll show you how to pick the best router bit for clean edges and how to use hand tools like files and sandpaper to get that precision you need. Either way, you’re aiming for smooth, flat surfaces that’ll guide your flush-trim bit accurately every single time.
Router Bit Selection And Setup
How do you get clean, accurate cuts from a template without constantly adjusting your setup? The key to success lies in choosing the right router bit and setting it up correctly.
I recommend using a bearing-guided router bit with your template. The bearing rides against your template edge, guiding the bit precisely. Here’s what matters:
- Match your template thickness to the bearing size for proper clearance
- A flush-trim bit works best for reproducing parts from templates
- Mount the guide bearing directly on the router for stability
- Your template material, whether 1/8″ or 1/4″ hardboard, affects how the bearing sits
- Test your setup on scrap wood before routing your actual stock
This approach removes guesswork from the process. Once dialed in, you’ll reproduce identical parts repeatedly without adjustment frustration.
Hand Tool Finishing Techniques
After your router bit has done the laborious task with that bearing-guided setup, your template still needs some refinement work before it’s truly ready for production runs. I’ve found that hand tools give me control that machines can’t always provide.
When you’re trimming those final edges, you’ll want to follow the wood grain direction, think of it like petting a cat the right way. Work slowly with chisels or block planes, taking light passes to minimize tear-out. Sand afterward with fine-grit paper, moving along the grain surface.
| Tool | Best For | Grain Direction | Pressure | Result |
|---|---|---|---|---|
| Chisel | Detail edges | With grain | Light | Clean cut |
| Block plane | Long edges | With grain | Moderate | Smooth finish |
| Sanding block | Final smoothing | With grain | Gentle | Polish |
| Hand file | Curves | Mixed | Variable | Refined shape |
| Scraper | Tearout areas | Against grain | Medium | Controlled removal |
This finishing approach keeps your templates accurate and durable for countless projects ahead.
Seal Edges and Date Your Template
Why do some templates last for years while others fall apart after a few projects? The answer lies in protecting your templates’ edges.
I’ve learned that sealing edges dramatically extends template life. Here’s what I do:
- Apply shellac or glue size to all edges, reducing moisture absorption that causes warping
- Use super glue for hardening vulnerable spots prone to wear
- Maintain consistent bearing clearance by preventing edge deterioration during repeated router use
- Resist delamination through protective coatings that keep layers bonded together
- Add dating information to track design progress and reuse history across projects
When I seal my templates properly, they stay reliable across multiple jobs. The edges remain crisp, tear-out decreases during finishing, and I can confidently reuse them season after season. This simple step makes templates last longer, turning them from disposable items into lasting workshop investments.


