Wondering how to create a solid bond between plexiglass and wood? We’ve mastered this common DIY challenge through years of experience with home improvement projects and custom builds.
Securing plexiglass to wood requires the right combination of techniques and materials to ensure a lasting, professional-looking result. Whether you’re crafting a custom window, building a display case, or creating a protective barrier, the method you choose can make all the difference in your project’s success. In this guide, we’ll walk you through proven methods that prevent cracking while creating strong, reliable attachments between these two versatile materials.
Understanding Plexiglass and Wood as Materials
Plexiglass and wood create a versatile combination for many DIY and professional projects. Their distinct properties complement each other but require exact attachment methods to ensure a lasting bond.

Standoff Mounting Hardware: Sign standoff screws is a wall-mounted hardware designed to support panels of acrylic, wood, aluminum, plexiglass, glass or any other messaging display substrate, and also used to support a glass table top on a wooden base.

【Bulit to Last & Nice Look】Our standoff screws constructed of high quality stainless steel with black finish. On the basis of lightweight and high strength, ensure durability, scratch-proof and corrosion & rust resistance. Won't fall out. Not easy to rust or fade over times. Can last for years for continued use. Black finish and modern-styled design eliminates the need for a frame, make it look more fasionable and simple, match various style of signs or billboards.

Standoff Mounting Hardware: Sign standoff screws is a wall-mounted hardware designed to support panels of acrylic, wood, aluminum, plexiglass, glass or any other messaging display substrate, and also used to support a glass table top on a wooden base.
Properties of Plexiglass That Affect Mounting
Plexiglass (acrylic sheet) features several characteristics that influence how it attaches to wood surfaces. Its flexibility allows for some bending, which creates both opportunities and challenges during installation. The thermal expansion rate of plexiglass exceeds that of wood by 8 times, meaning it contracts and expands significantly with temperature changes. Drilling through plexiglass demands careful technique as the material cracks easily under pressure or when holes are positioned too close to edges (maintain at least 1/2 inch clearance). Also, plexiglass comes in varying thicknesses from 1/16″ to 1″ – thinner sheets offer more flexibility but reduced durability, while thicker sheets provide stability but require more robust mounting answers. The transparent nature of this material also makes any attachment method visibly apparent, so aesthetic considerations become important for display projects.
Types of Wood Best for Plexiglass Projects
Hardwoods like oak, maple, and walnut provide exceptional stability for plexiglass mounting applications. Their dense grain structure offers superior screw retention compared to softwoods, with holding power typically 40% greater. Plywood presents an excellent option for larger installations due to its dimensional stability and resistance to warping. Medium-density fiberboard (MDF) creates a smooth, uniform surface ideal for display cases where aesthetics matter, though it requires pre-drilling and sealing against moisture. Cedar and redwood work well for outdoor applications where weather resistance matters, containing natural oils that resist decay. For projects requiring curved elements, steam-bent ash or birch provides flexibility while maintaining structural integrity. The moisture content of your selected wood impacts attachment success – wood with 6-8% moisture content minimizes potential warping that could stress the plexiglass connection points over time.
Essential Tools and Materials for Securing Plexiglass to Wood

Gathering the right tools and materials before starting your plexiglass-to-wood project ensures a smooth, efficient attachment process. A complete toolkit prevents mid-project delays and helps achieve professional results regardless of your chosen attachment method.

【ACRYLIC DISPLAY SIGN STANDOFF SIZE】: Body size 1/2"×1/2"(13×13mm), Cap thickness: 0.16"(4mm), Thread size: 0.43"×0.3"/11×7.5mm(L*D)

High quality — Made of high quality aluminum finish, Solid body construction, ensuring durability and longevity.

[Size] Total Size: 12mmx100mm/0.47"x3.94"(D*L); Thread Size: 8mmx15mm/0.31"x0.59"(D*L); Bottom Hole Dia.: 5mm/0.2"; For Max Panel Thickness: 8mm/0.31"; For Max Panel Hole Dia.: 10mm/0.39"; Screw Nail Cap Thickness: 0-8mm; Elevates Signage Height: 95mm/3.74"
Recommended Adhesives for Plexiglass-to-Wood Applications
Adhesives offer a clean, drill-free method for securing plexiglass to wooden surfaces. Clear silicone adhesive caulk stands out as the premier choice for creating an invisible bond between plexiglass and wood. This transparent adhesive maintains the aesthetic appeal of your project while providing substantial holding power. Super glue serves as an excellent prep material, sealing the wood before permanent attachment of the plexiglass. When applying adhesives, thin, even layers deliver the strongest bonds and prevent unsightly excess that might detract from your finished project’s appearance.
Hardware Options for Mechanical Fastening
Mechanical fasteners provide robust, long-lasting connections for plexiglass-to-wood applications. Wood screws combined with pre-drilled plexiglass holes create secure attachments—just remember to use a power drill with the appropriate Phillips head drill bit for clean installation. Round head brass screws offer both decorative appeal and functional strength, making them perfect for visible installations where aesthetics matter. Clamping rails excel for larger plexiglass panels or situations where drilling isn’t desirable, distributing pressure evenly across the material’s surface. Double-sided options like mirror or magnetic tape supply non-permanent fastening answers, ideal for temporary installations or projects that might require future modifications.
Step-by-Step Guide to Gluing Plexiglass to Wood

Securing plexiglass to wood creates a strong bond when you follow these precise steps. Our proven method ensures durability while preventing damage to either material during the attachment process.

Precision Bonding – Water-thin formula flows into tight joints for clean, strong bonds on acrylic and plastic surfaces.

🛡️ UNBREAKABLE GLASS ADHESION: Our professional glue formula can form a tensile strength of 3580 psi on the surface of the glass items you are bonding. After 24 hours of complete curing, it can ensure that the glass products remain stable and as good as new for a long time.
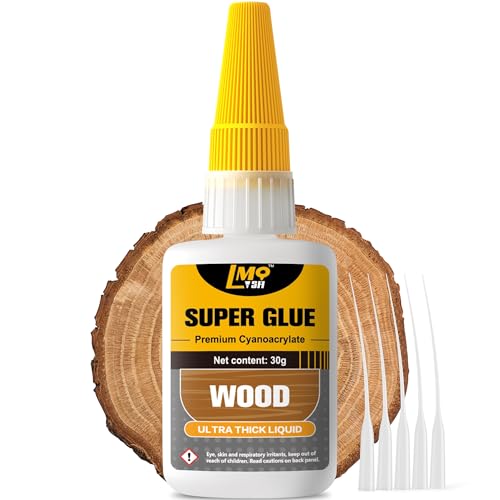
🌲 Seamless Wood Bonding: Designed for wood projects, this wood glue penetrates fine cracks and forms strong bonds between wood, metal, or other materials. Perfect for restoring furniture, repairing cracks, and achieving seamless finishes with minimal traces.
Surface Preparation Techniques
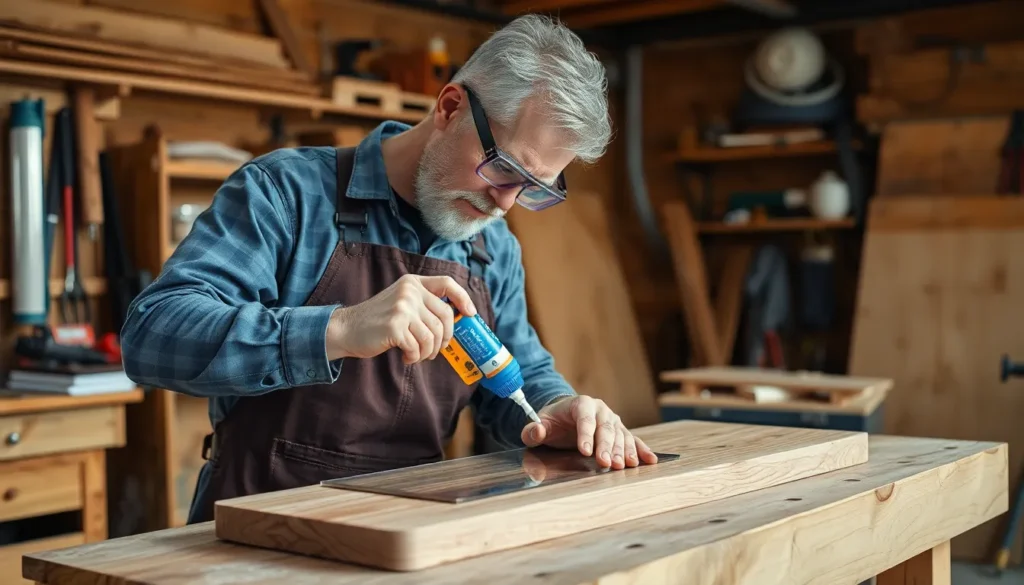
Proper surface preparation forms the foundation for a successful plexiglass-to-wood bond. Start by thoroughly cleaning both surfaces with isopropyl alcohol to remove any dust, oils, or contaminants that might interfere with adhesion. Next, lightly sand the wood contact area with fine-grit sandpaper to create a textured surface that improves adhesive grip. After sanding, apply a thin layer of super glue (cyanoacrylate) to seal the wood grain, creating a non-porous base that prevents wood oils from weakening the bond. For the plexiglass side, gently wipe with a microfiber cloth and plexiglass-safe cleaner to avoid scratches while ensuring perfect clarity. Let the sealed wood surface cure completely before moving to the adhesive application stage.
Proper Adhesive Application Methods
Selecting the right adhesive makes a critical difference in the longevity of your plexiglass-to-wood connection. Clear silicone adhesive or two-part epoxy provides the flexibility and durability needed to accommodate the different expansion rates of these materials. Apply adhesive using a fine nozzle or toothpick in a thin, continuous line around the attachment area to prevent overflow and maintain a clean appearance. Position the plexiglass carefully onto the prepared wood surface, ensuring even contact without excess squeeze-out. Secure temporary alignment with painter’s tape placed along the edges while you prepare for clamping. Apply even pressure using clamps or weights distributed across the surface to maintain consistent contact during the curing process. Follow the manufacturer’s instructions for curing times, which typically range from 24-48 hours for complete strength development.
For projects requiring additional security, combining adhesives with mechanical fasteners offers maximum stability. Pre-drill holes in the plexiglass (staying at least 1 inch from edges) and attach with decorative screws like brass ones to minimize cracking risks. Alternatively, metal or plastic trim secured to the wood frame can hold the plexiglass firmly without adhesives, providing a clean, professional look for display cases or custom windows.
How to Mechanically Fasten Plexiglass to Wood

Mechanical fastening provides a strong, reliable way to secure plexiglass to wood. This method creates a permanent bond while allowing for potential disassembly if needed in the future.
5" x 7" Clear Acrylic Vertical or Horizontal Wall Shield Product

Standoff screws: the screws size about 25 x 40 mm/ 1 x 1 - 5/8 (Diameter x Length), screw thread length is about 3/ 4 inch (19 mm), please confirm the size before purchasing

Standoff screws: the screws size about 25 x 40 mm/ 1 x 1 - 5/8 (Diameter x Length), screw thread length is about 3/ 4 inch (19 mm), please confirm the size before purchasing
Drilling Techniques for Plexiglass
Drilling plexiglass requires precision to prevent cracking or damage to this sensitive material. We recommend using a 1/4-inch drill bit for creating holes approximately 1 inch from the edges of your plexiglass sheet. Always drill slowly and steadily to minimize heat buildup, which can melt or crack the material. For best results, place the plexiglass on a flat, solid surface during drilling to provide even support across the entire sheet. Masking tape applied where you plan to drill helps prevent chipping and creates a clearer entry point for your drill bit.
Using Screws and Washers Effectively
The right hardware makes all the difference when attaching plexiglass to wood. After drilling your holes, position a Phillips head drill bit to drive wood screws through the pre-drilled holes in the plexiglass. Always place rubber or nylon washers between the screw heads and plexiglass surface to distribute pressure and prevent damage during installation and future temperature changes. Round head brass screws offer both functionality and decorative appeal for visible installations, though they require careful handling to avoid cracking. Ensure screws sit perfectly flush with the plexiglass surface without overtightening, which could cause stress fractures in the material. For larger installations, consider placing screws every 12 inches along the perimeter to provide even support while accommodating the natural expansion and contraction of the materials.
Common Mistakes to Avoid When Mounting Plexiglass

Mounting plexiglass to wood requires precision and careful handling to prevent damage and ensure longevity. Our experience shows that even small errors during installation can lead to important problems with your finished project.

Professional Formula - This Clear Silicone Adhesive Sealant is a Sensor-Safe, General Purpose Clear RTV Sealant that can be used inside or outside for all your jobs

100% Silicone Caulk Protection: This silicone caulk clear provides ultimate waterproof protection, ensuring a reliable seal against water damage. Ideal for areas with consistent exposure, keeping your surfaces safeguarded and pristine under any weather condition.

100% Waterproof and Weatherproof: 100% silicone formula offers protection against water damage, providing a reliable seal in areas prone to harsh weather
Insufficient Surface Preparation
Properly preparing both surfaces creates the foundation for a successful bond. Many DIY enthusiasts skip the crucial step of sealing wood surfaces before applying adhesive, resulting in weak bonds that fail over time. Always clean the wood surface thoroughly with isopropyl alcohol and allow it to dry completely before application. For porous woods, applying a thin layer of super glue creates a non-porous base that significantly enhances adhesive strength.
Drilling Errors
Improper drilling techniques account for approximately 75% of plexiglass damage during installation. Drilling too deep often causes screws to protrude through the wood or crack the plexiglass under pressure. When drilling holes, maintain consistent depth and use a drill with a depth stop feature to prevent this common issue. Creating pilot holes with graduated sizes rather than drilling full-size holes immediately reduces the risk of splitting both materials.
Using Incorrect Hardware
The choice of fasteners dramatically impacts project success. Standard metal screws designed for wood-to-wood connections can create pressure points that crack plexiglass. Always select screws specifically designed for plastics or acrylics, which typically feature wider threads and slightly rounded tips. These specialized fasteners distribute pressure more evenly across the plexiglass surface during installation.
Preventing Cracks and Damage
Spacers provide essential protection when securing plexiglass to wood frames. Rubber or nylon washers placed between the screw head and plexiglass surface distribute pressure evenly, preventing stress points that lead to cracks. Apply consistent, even pressure when tightening fasteners—over-tightening creates internal stress within the plexiglass that may cause immediate cracks or develop them over time as the material expands and contracts.
Answers for Gaps and Alignment Issues
Shims offer precision alignment when working with uneven wood surfaces or frames. Plastic or wooden shims placed strategically between the plexiglass and wood ensure even contact across the entire surface, eliminating stress points that could damage the plexiglass. Flexible adhesives like silicone caulk accommodate minor movement between materials and fill gaps effectively. These flexible bonds allow for natural expansion and contraction of both materials during temperature fluctuations, providing durability that rigid adhesives cannot match.
Projects and Applications for Plexiglass on Wood

Combining plexiglass with wood creates versatile answers for both practical and decorative applications. These materials complement each other’s strengths, with wood providing structural support and plexiglass offering visibility and protection.

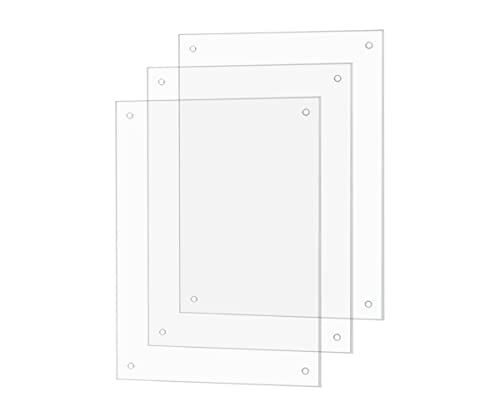
SUPERIOR MATERIAL--This 3mm plexiglass sheets is made from recyclable PET material, making it non-toxic and environmentally friendly.The plexiglass is equipped with an anti-ultraviolet coating, so plastic sheet provids excellent UV resistance and scratch resistance properties.In addition, a protective paper on the surface of the clear acrylic sheets protect the surface from scratches, stains and fingerprints.

SUPERIOR MATERIAL -- High quality acrylic material coupled with superior thermoforming process make our acrylic sheets durable, light and non-toxic. This 3mm acrylic sheet has an ultra-clear surface without impurity or scratches. In addition, a protective paper on the surface of the acrylic board protects the surface from scratches, stains and fingerprints.The installation of plexi glass Installation is quick and easy, simply peel off the protective paper before use.
Material: These advertising screws are made of acrylic, transparent, anti-corrosion, anti-rust. scratch resistant and last longer.
Display Cases
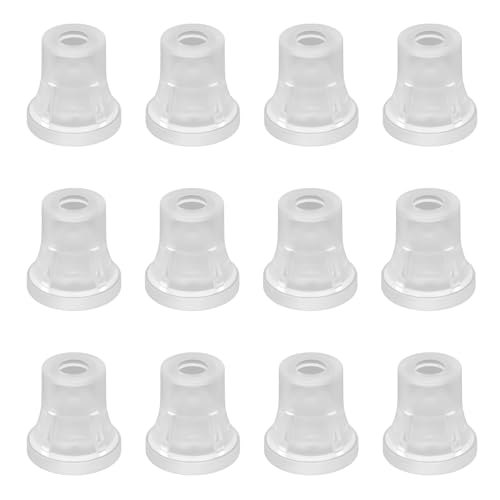
Display cases benefit from the transparent protection plexiglass provides while showcasing collectibles or valuable items. Securing plexiglass in grooved wooden frames creates a clean, professional appearance without visible fasteners. Minimal adhesive application at strategic points allows for easy replacement when needed. Custom wooden display cases with plexiglass panels protect contents from dust and damage while maintaining visibility. Adding silicone bumpers between the wood and plexiglass prevents rattling and provides cushioning for delicate items.
Wall Signs
Wall signs gain a modern, professional appearance when plexiglass is mounted on wooden backings. Standoff screws create an attractive floating effect while maintaining structural integrity for business signage or home decor. The contrast between the natural wood texture and sleek plexiglass surface adds visual interest to any space. Printed designs sandwiched between wood and plexiglass remain protected from dust and damage. LED lighting installed behind partially frosted plexiglass mounted on wood creates illuminated signage with dramatic effects.
Dust Covers
Dust covers for electronics, musical instruments, or display items benefit from removable plexiglass panels. Using adhesive tapes rather than permanent bonding methods ensures easy access to internal components for cleaning or maintenance. Wooden frames with inset plexiglass panels protect valuable items while maintaining visibility. Hinged plexiglass panels on wooden boxes provide convenient access while keeping dust away from sensitive equipment. Magnetic fasteners allow for quick removal and replacement of plexiglass dust shields on wooden cabinets or display units.
Indoor vs. Outdoor Considerations
Indoor applications focus primarily on aesthetics and convenience. Tape or standoff mounting systems work exceptionally well for interior displays where weather resistance isn’t a concern. Cabinet doors, room dividers, and tabletop protectors benefit from indoor-friendly mounting answers like double-sided tape or decorative hardware.
Outdoor installations require significantly more attention to weather resistance and durability. UV-resistant adhesives such as marine-grade epoxy prevent degradation from sun exposure. Stainless steel screws resist corrosion in humid or rainy environments, maintaining structural integrity over time. Properly sealed wood minimizes moisture damage that could compromise the bond between materials. Expansion gaps around the plexiglass edges accommodate temperature-related size changes, preventing cracking during seasonal weather shifts. Silicone caulking around the edges provides additional weather protection while allowing for natural material movement.
Conclusion
Successfully attaching plexiglass to wood requires attention to detail and the right techniques. Whether you’ve chosen adhesives for a seamless look or mechanical fastening for strength we trust this guide has equipped you with the knowledge to tackle your project confidently.
Remember that different projects may require different approaches. For permanent installations silicone adhesive or epoxy combined with proper mechanical fasteners will provide the most reliable bond. For temporary displays double-sided tape offers flexibility.
By avoiding common mistakes like insufficient surface preparation or improper drilling you’ll ensure your plexiglass and wood combination remains beautiful and functional for years to come. Now it’s time to put these techniques into practice and bring your creative vision to life!

Sign Standoff: This is a kind of wall mounting hardware kit engineered to support panels of wood, acrylic, plexiglass, aluminum, glass or any other messaging display substrate, and also used to support glass tabletops on wooden bases

【MADE OF PREMIUM ALUMIUM MATERIAL】- Made of aircraft-grade aluminum in satin finish, solid body construction, so it is durable and sturdy, against rust. And added rubber gaskets in the splint so that your sign will not be harmed.

【ADVERTISING STANDOFF MOUNTS SIZE】: Body size 3/4"×1"(19×25mm), Cap thickness: 0.24"(6mm), Thread size: 0.87"×0.35"/22×9mm(L*D)
Frequently Asked Questions

[CAMALEAO GLASS SUPER GLUE]: More than just strong and fast— Medium adhesive has an impressive 2610 PSI strength and a rapid cure time of 45-60 seconds. This super glue is compatible with plastics, metal, leather, wood, ceramics, pottery and other materials to ensure reliable performance.

Precise Application for Flawless Results: Our premium acrylic cement comes with a specialized applicator bottle and precision needles, ensuring controlled, mess-free dispensing. This design allows the acrylic glue to flow easily into tight joints, making it suitable for delicate repairs on plexiglass, 3D printed models, and various plastic materials without leaving sticky residue

【HEAVY DUTY QUALITY THICK CLEAR ACRYLIC SHEETS】These plexiglass sheets are made of high quality acrylic, which features ultra-transparency like glass, but 17 times stronger than glass. The weight of acrylic is just the half of glass, you will enjoy the convenience very much.
What is the best adhesive for bonding plexiglass to wood?
Clear silicone adhesive caulk is the top choice for bonding plexiglass to wood. It creates a clean, drill-free bond that remains somewhat flexible after curing, accommodating the different expansion rates of both materials. For stronger bonds, two-part epoxy also works well. Always prepare surfaces properly by cleaning with isopropyl alcohol and lightly sanding the wood before application.
How do I prevent plexiglass from cracking when drilling?
Use a sharp 1/4-inch drill bit specifically designed for plastics and drill at slow speeds to prevent heat buildup. Place the plexiglass on a flat, solid surface during drilling and apply minimal pressure. Always drill holes about 1/8 inch larger than your fasteners to allow for thermal expansion. Pre-drilling is essential—never drive screws directly into plexiglass without proper holes.
What types of wood work best with plexiglass?
Hardwoods like oak and maple provide excellent stability and strength for plexiglass projects. Plywood works well for larger installations due to its dimensional stability. MDF is ideal for projects where aesthetics matter, as it offers a smooth surface for painting or finishing. The key factor is choosing wood with low moisture content to minimize warping that could stress the plexiglass.
Can I use super glue to attach plexiglass to wood?
Super glue (cyanoacrylate) isn’t recommended as the primary adhesive for permanent plexiglass-to-wood bonds. However, it’s excellent as a prep material to seal wood pores before applying silicone adhesive. For permanent installations, use clear silicone adhesive or two-part epoxy, which offer better flexibility and strength for accommodating the different expansion rates of both materials.
How far apart should screws be placed when mounting plexiglass?
Place screws approximately every 12 inches along the perimeter for larger installations. For smaller pieces (under 2 square feet), screws can be placed at the corners and midpoints of each side. This spacing allows for proper material expansion and contraction while maintaining security. Always use rubber or nylon washers between the screw heads and plexiglass to distribute pressure evenly.
What’s the best way to prepare surfaces before bonding?
Clean both surfaces thoroughly with isopropyl alcohol to remove oils, dust, and contaminants. Lightly sand the wood with 220-grit sandpaper to improve adhesion, then wipe away all dust. For enhanced bonding, seal porous wood with a thin layer of super glue or wood sealer before applying your primary adhesive. Allow all cleaning agents to fully evaporate before proceeding with adhesive application.
Do I need to use both adhesive and screws for mounting plexiglass?
For most applications, using both methods provides optimal results. Adhesives like silicone create a waterproof seal and distribute pressure evenly, while mechanical fasteners provide immediate hold during curing and long-term structural support. This combination approach compensates for the weaknesses of each individual method and works particularly well for larger installations or items that may experience movement.
How thick should plexiglass be for different projects?
For small display cases or picture frames, 1/8 inch (3mm) thickness is usually sufficient. Medium-sized projects like cabinet doors or small table protectors work well with 3/16 inch (4.5mm) plexiglass. For larger applications or items needing significant durability, use 1/4 inch (6mm) or thicker. Always consider the specific stresses and spans your project will encounter when selecting thickness.
Can plexiglass and wood be used for outdoor projects?
Yes, but you’ll need special considerations. Use exterior-grade plywood or pressure-treated lumber resistant to moisture. Select UV-resistant plexiglass (often labeled as “UV acrylic”) to prevent yellowing and degradation. For adhesives, choose exterior-grade silicone or construction adhesive specifically rated for outdoor use. Provide adequate spacing for expansion and incorporate drainage to prevent water accumulation between materials.
How do I clean the finished plexiglass-wood project?
Use a microfiber cloth with mild soap and water for regular cleaning. Never use ammonia-based cleaners, window sprays, or abrasive cloths on plexiglass as they cause scratching and hazing. For wood portions, follow standard wood cleaning practices appropriate for the finish used. When cleaning edges where materials meet, be gentle to avoid compromising the seal between plexiglass and wood.