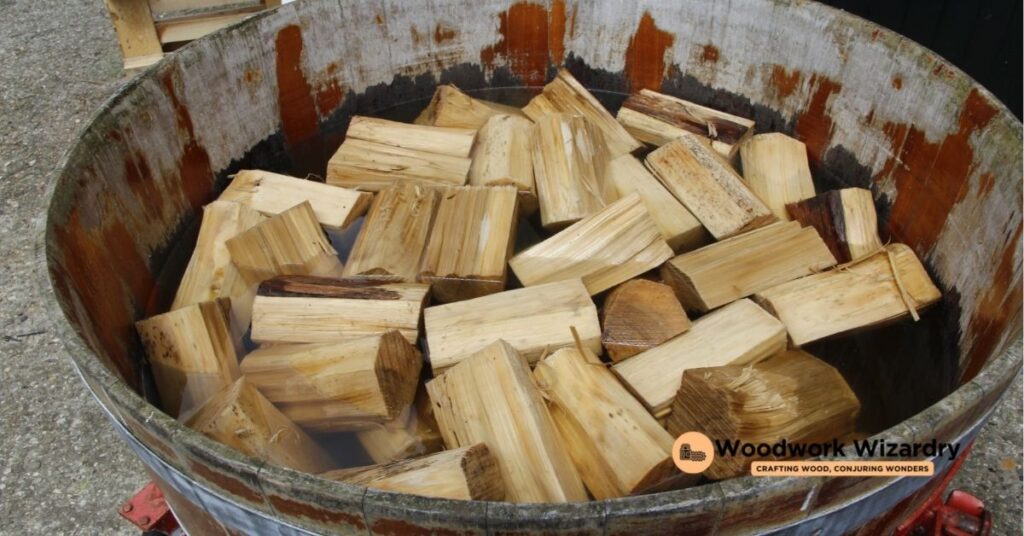
Ever wondered how those stunning curved wooden pieces in furniture and art installations are made? Well, we’re diving into the fascinating world of bending wood, a technique that’s as intriguing as it sounds. Bending wood isn’t just about brute force; it’s an art that requires patience, precision, and, most importantly, the right amount of soaking time.
Finding the sweet spot for how long to soak wood can feel like a mystery. Too little, and the wood snaps; too much, and it might become too pliable or even start to rot. We’re here to shed light on this crucial step, ensuring your woodworking project turns out just as you envisioned. So, let’s get into the nitty-gritty of transforming rigid wood into beautiful, curved creations.
Understanding the Basics of Bending Wood
Bending wood is a technique as old as woodworking itself, yet it remains a mystery to many. Let’s demystify the process with a clear look at the fundamentals. Our exploration into the soaking aspect of bending wood reveals it’s more than just dunking timber into water. It involves understanding the wood’s fiber structure and how water interacts with these fibers to make them more malleable.
First off, the type of wood matters immensely. Hardwoods like oak and walnut require more soaking time compared to softer woods such as pine or cedar. Hardwoods, densely packed with fibers, need ample time to absorb water, making them flexible enough to bend without breaking.
The thickness of the wood plays a crucial role as well. Thinner pieces absorb water faster, reducing the required soaking time. Conversely, thicker pieces demand longer durations in water to achieve the same level of pliability. For most projects, the wood thickness ranges from 1/8 inch to 3 inches, influencing soaking times dramatically.
Temperature also affects the soaking process. Warmer water penetrates wood fibers more quickly than cold water, speeding up the soaking time. However, it’s essential not to use boiling water, as it might damage the wood fibers, making them too weak to hold a bend.
After considering these factors, we recommend a general soaking period ranging from several hours to a few days, contingent on the wood’s type, thickness, and the water temperature. Experimentation plays a key role; starting with a minimum soak time and gradually increasing it based on the wood’s response can yield the best outcomes.
This understanding lays the foundation for effectively bending wood, ensuring projects turn out as envisioned, with beautifully curved features without the frustration of cracks or breaks. By appreciating these basics, we’re better equipped to navigate the complexities of wood bending, leading to successful and satisfying woodworking projects.
Preparing Wood for Bending
Following a thorough understanding of the importance of soaking wood for bending, it’s crucial to delve into the preparation process. Preparing wood for bending begins long before the soaking starts. The journey to achieving beautiful, curved wood creations encompasses several key steps.
Selecting the Right Wood Type is the first step in the preparation process. Different woods have differing fiber structures, affecting their ability to bend. For instance, woods like oak and ash are known for their flexibility and strength, making them ideal choices for bending.
Determining the Correct Thickness plays a critical role in the bending process. Generally, the thinner the wood, the easier it bends. However, the required thickness largely depends on the desired curvature and the specific project needs. A balance must be struck between maintaining strength and achieving flexibility.
Cutting to Rough Shape is an essential pre-soaking step for efficiency and precision. Trimming the wood to a shape close to the final product reduces waste and makes the bending process smoother. This step also allows for a more focused soaking, as only the parts of the wood needing to bend are prepared.
Softening the Fibers through careful soaking is where precision comes into play. The duration of soaking varies, typically ranging from a few hours to several days, depending on the wood type, thickness, and desired flexibility. Warm water accelerates the softening process, but it’s imperative not to rush this step as the quality of the bend depends on the thoroughness of preparation.
Throughout these preparation steps, it’s essential to keep in mind the end goal: achieving a smooth, flawless bend in the wood. Each step, from selecting the right type of wood to meticulously soaking it, lays the groundwork for successful wood bending. With patience and attention to detail, we can ensure that our woodworking projects not only meet but exceed our expectations.
How Long Do You Need to Soak Wood to Bend It?
Building on the importance of preparing wood for bending, it’s crucial to identify the optimal soaking time, which hinges on a variety of factors. A common question we encounter is, “How long do you need to soak wood to make it pliable enough for bending?” Well, the answer isn’t one-size-fits-all, but we’ll guide you through the principles to consider for achieving the best results.
Firstly, the type of wood plays a significant role in determining soaking time. Hardwoods, such as oak and walnut, generally require more time than softwoods like pine or cedar. For hardwoods, soaking could extend from 24 to 72 hours, ensuring the water penetrates deeply into the wood’s fibers. Softwoods may only need 12 to 24 hours. However, these timelines can vary based on the wood’s density and age.
Furthermore, thickness plays a pivotal role. Thinner strips of wood might only need a few hours to become pliable, whereas thicker pieces could require several days of soaking. A good rule of thumb is allowing at least one day of soaking for every 1/4 inch of thickness.
The temperature of the water can also affect soaking time. Warm water accelerates the softening process, reducing the needed soak time. However, ensure the water is not too hot, as excessively high temperatures can weaken the wood’s structure.
Lastly, consider your project’s specific requirements and test as necessary. Occasionally, soaking times may need adjustments based on trial and error to achieve the desired flexibility without compromising the wood’s integrity.
In summarizing, there’s no universal soaking time suitable for all wood-bending projects. The wood type, thickness, and water temperature are key factors that influence how long the wood should soak. Taking these into account, along with a bit of experimentation, will help you find the perfect balance for your project. Remember, patience is your best tool in the art of wood bending.
After Soaking – Steps to Successfully Bend the Wood
Once we’ve determined the optimal soaking time for our wood bending project, considering factors like wood type, thickness, and water temperature, it’s crucial to follow a series of steps for successful wood bending. Our patience in soaking the wood prepares us for the next stage, which requires precision and care.
- Heat the Wood: Applying heat to the soaked wood makes it more pliable. Steam bending is a popular method, where the wood is exposed to steam for a period that depends on the wood’s thickness. Generally, an hour of steaming for each inch of thickness is a good rule of thumb.
- Prepare the Bending Form: Before heating the wood, we ensure our bending form is ready. This form should match the desired shape and curve of our final piece. Clamps and straps should also be on hand to secure the wood during bending.
- Bend the Wood Gradually: After heating, we quickly and carefully bend the wood around our form. It’s necessary to apply consistent pressure to avoid snapping the wood. Working slowly, we adjust the wood to the form, securing it with clamps or straps.
- Secure and Cool Down: Once the wood conforms to the bending form, we leave it clamped in place to cool and dry. This drying period can vary but generally takes at least 24 hours. For thicker pieces, it might be longer to ensure the wood retains its new shape.
- Unclamp and Fine-tune: After the cooling period, we remove the clamps. The wood should retain the bent shape. Sometimes, minor adjustments or sanding may be needed to achieve the perfect finish.
Following these steps, patience is key in ensuring we successfully bend wood to our desired shape. Each project might require adjustments based on the wood type and thickness, but adhering to this process, we’ll achieve our goal of beautifully bent wood pieces.
Caring for Bent Wood
Once we’ve successfully bent the wood to our desired shape, ensuring it remains in perfect condition over time becomes paramount. Taking care of bent wood involves several key steps that guarantee its longevity and maintain its aesthetic appeal. Firstly, sealing the wood is critical. Applying a high-quality sealant protects the wood from moisture and external elements, significantly reducing the risk of warping or cracking as the wood ages. We recommend using a sealant that’s compatible with the wood type, ensuring it doesn’t react negatively with the natural oils present in the wood.
Secondly, storing the bent wood properly plays a crucial role in preserving its shape and integrity. If the wood isn’t being immediately used in a project, we suggest storing it in a cool, dry place away from direct sunlight. Exposure to extreme temperatures or humidity can cause the wood to warp, undoing all the hard work done in bending it. Additionally, laying the wood flat or supporting it adequately prevents any unwanted bending or distortion over time.
Regular maintenance is also essential for bent wood care. This includes checking for any signs of damage, such as cracks or splits, and repairing them promptly to prevent further deterioration. A routine inspection lets us address minor issues before they become more significant problems.
Lastly, cleaning the wood regularly with a soft, damp cloth helps to remove dust and debris, keeping the surface looking pristine. Avoid using harsh chemicals or abrasive cleaners as they can damage the wood’s finish. If the wood starts to look dull or the finish wears off, a light sanding followed by a fresh coat of sealant can restore its original luster.
By following these steps, we ensure that our beautifully bent wood remains in the best possible condition for years to come, retaining its shape, strength, and aesthetic appeal.
Conclusion
We’ve walked through the journey of soaking wood for bending, underlining the essence of patience and precision in every step. By choosing the right wood, soaking it adequately, and following through with careful bending and maintenance, we ensure our woodwork retains its form and grace. Remember, the beauty of bent wood lies not just in its curve but in the care we invest in it post-bending. Let’s keep crafting, maintaining, and admiring our wood creations with the knowledge that every piece tells the story of the effort and love we’ve poured into it. Happy woodworking!
Related Posts:
- Spray Polyurethane Flawlessly with an Airless Sprayer: A How-To Guide
- Sanding Between Coats of Shellac: A Must for Smooth Finishes?
- Optimal Soaking Time for Bending Wood: A Complete Guide
- DIY Guide: How to Make Wood Filler with Sawdust for Perfect Finishes
- Quiet Your Workspace: Tips on How to Reduce Table Saw Noise Effectively
- Miter Saw Showdown: 10 Inch vs 12 Inch – Which Suits Your Project?
- Mortise vs Firmer Chisel: Discover the Key Differences


