Diving into the world of wood carving can feel like stepping into a forest of possibilities. It’s an art form where every chip and shave brings you closer to creating something uniquely yours. Whether you’re looking to craft a personalized gift, decorate your home with handmade art, or simply explore a new hobby, wood carving offers a rewarding path for creative expression.
We’re here to guide you through the basics, ensuring you start your wood carving journey on the right foot. From selecting the right tools and materials to mastering simple techniques that yield impressive results, we’ll walk you through everything you need to know to begin transforming blocks of wood into works of art. Let’s embark on this creative adventure together, one carve at a time.
Essential Tools and Materials
Embarking on a wood carving journey requires gathering the right tools and materials. We’ll explore the essentials, ensuring you’re well-prepared to start creating.
Choosing the Right Wood
Selecting the appropriate wood greatly influences the carving process and the final product. Softwoods, such as pine, cedar, and basswood, offer less resistance to cutting, making them ideal choices for beginners. Their fine grain and softer nature facilitate easier shaping and detailing. Basswood, in particular, stands out for its light color and minimal grain, providing a smooth surface that’s perfect for carving.
Basic Wood Carving Tools
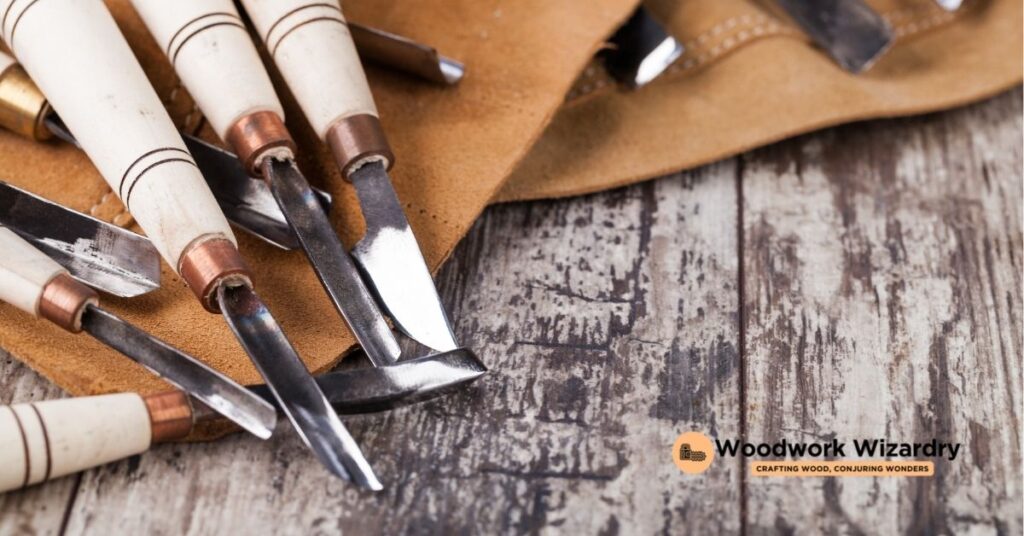
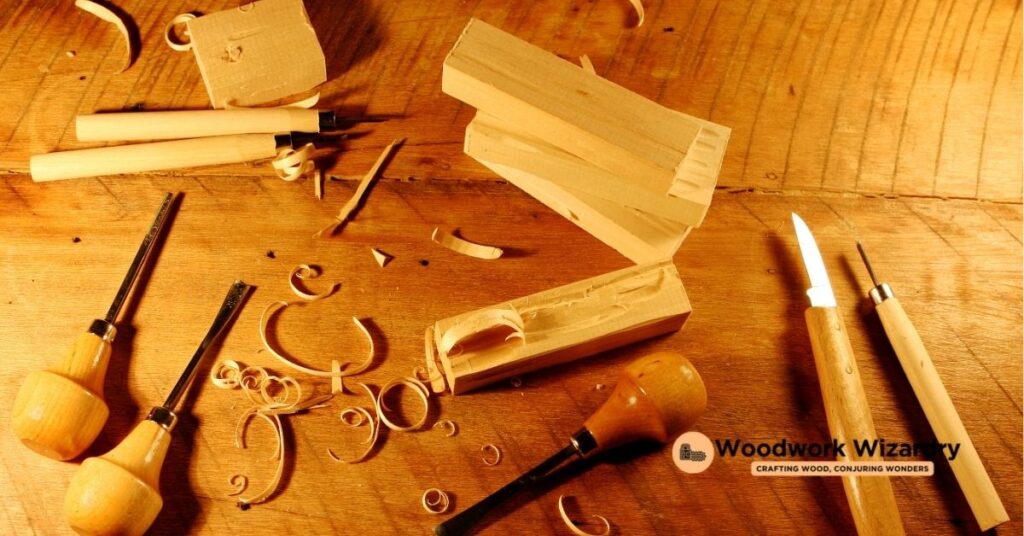
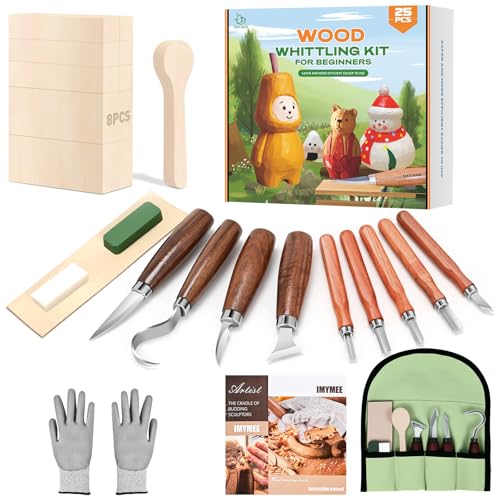
Equipping yourself with basic wood carving tools lays the foundation for successful projects. A diverse set of tools assists in detailed carving and shaping:
- Carving knives are crucial for detailed work, allowing precision in cuts and designs.
- Gouges come in various shapes and sizes for creating curves and hollows. A few essential gouges include the U-gouge and V-gouge.
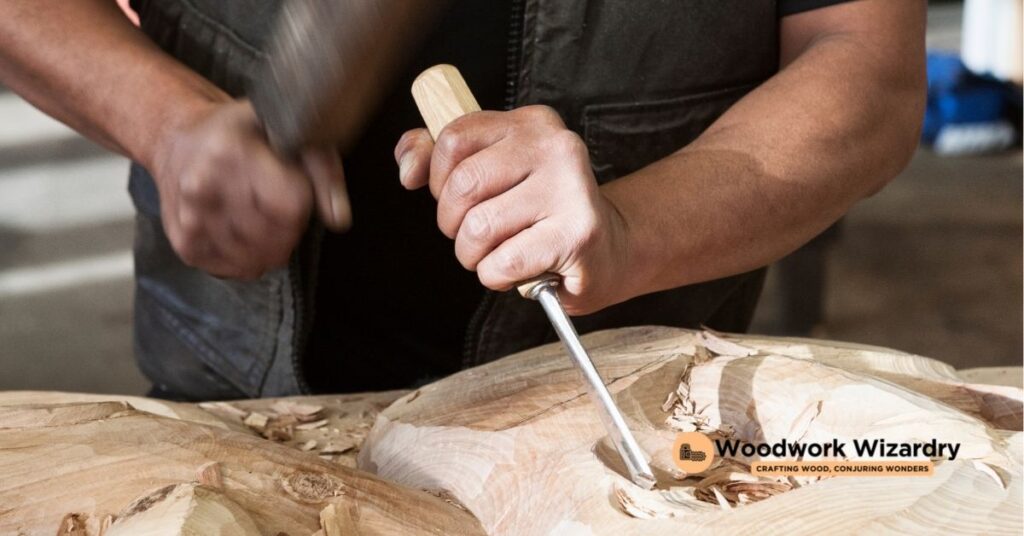
- Chisels, used with mallets, remove larger wood chunks and shape the wood.
- Wood rasps and files refine the wood’s surface and smoothen rough edges.
Crafting intricate designs or simply learning basic cuts, these tools accommodate a broad range of techniques.
Safety Equipment
Prioritizing safety ensures a pleasant and injury-free wood carving experience. Essential safety gear includes:
- Protective gloves prevent cuts and offer grip.
- Safety goggles shield eyes from wood chips and dust.
- Dust masks protect against inhalation of fine wood particles.
Adhering to safety practices, wearing the right equipment, you can enjoy wood carving while minimizing risks.
Preparing Your Workspace
After selecting the right tools and wood for beginners, setting up a dedicated workspace is the next critical step. This setup plays a pivotal role in ensuring safety and enhancing carving experiences.
Setting Up a Carving Bench
Choose a sturdy bench that remains stable under pressure. Stability is key when applying force during carving sessions, as it prevents unwanted movements that could lead to mistakes or injuries. Ideally, the bench’s height should allow for comfortable working without straining the back or shoulders. If possible, secure a woodworking vise to the bench to firmly hold the wood in place. This setup increases accuracy and provides freedom to carve from different angles without repositioning the wood frequently.
Lighting and Ventilation
Good lighting is crucial in wood carving. Natural light is best; however, if not available, install bright, focused lights above the workspace. Aim for lights that mimic daylight to reduce eye strain and accurately reveal the wood’s true color and texture nuances. Ventilation is equally important to maintain a healthy working environment. Carving generates wood dust, which can be harmful if inhaled over time. Ensure the workspace is well-ventilated, preferably with windows or an air filtration system to remove dust particles from the air. If the space lacks proper ventilation, wearing a dust mask adds an extra layer of safety, protecting the lungs from fine wood particles.
Basic Wood Carving Techniques
Transitioning from selecting the right tools and workspace setup, we now delve into the heart of wood carving – mastering the basic techniques. These foundational skills lay the groundwork for transforming a piece of wood into a work of art.
Making Your First Cuts
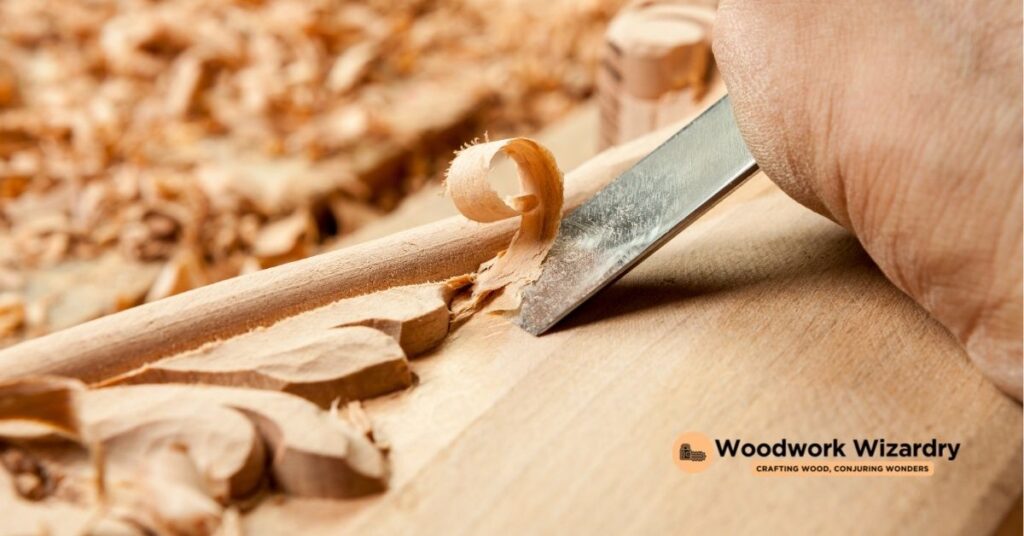
Initiating the carving process, we focus on making the first cuts with precision and confidence. Start with a shallow cut, holding the carving knife at a slight angle to the wood’s surface. Applying gentle pressure, push the blade forward along the wood grain, not against it, for smoother cuts. Practice straight, stop, and push cuts on a scrap piece of wood. Regularly sharpen your tools to maintain clean and effortless cuts, ensuring safety and precision in every stroke.
Learning Different Carving Strokes
Exploring various carving strokes broadens the repertoire of techniques at our disposal. The following are essential for beginners:
- Stop cuts, where we make a perpendicular incision to create a boundary for subsequent cuts, prevent overcarving.
- Sweeping strokes, ideal for removing larger wood pieces, guided along the curvature of the wood.
- V-cuts, which we achieve by angling two cuts to meet at a point, great for detailed work and creating shadows.
- Familiarizing oneself with these and practicing regularly helps in efficiently controlling the carving process and achieving desired outcomes with ease.
Shaping and Smoothing Techniques
After defining the basic form through carving strokes, we shape and smooth the wood to bring out its final form and texture. Implement the use of gouges and chisels for removing larger wood chunks and shaping the workpiece. The goal here is to refine the rough cuts, gradually working towards the final shape. Next, incorporate rasps and sandpaper for smoothing surfaces and edges, starting with coarser grits and progressing to finer ones for a smooth finish. Utilizing these techniques allows for the gradual transformation of a rough wood piece into a polished work, ready for finishing touches.
Step-by-Step Beginner Project
Building on the foundational skills, materials, and tools covered earlier, let’s dive into a step-by-step beginner project that will help solidify your wood carving techniques.
Selecting a Simple Project
Selecting a simple project is crucial for beginners to gain confidence and skill. A great starting point is a basic geometric shape, like a cube or sphere, or a simple object such as a spoon or a small figurine. These projects require minimal tools and offer a practical way to practice basic carving cuts, shaping, and detailing without being overwhelming.
Transferring Your Design to Wood
Once the project is selected, the next step involves transferring your design onto the wood. For geometric shapes or straightforward projects, sketching directly onto the wood with a pencil works well. If your project is more detailed, like a figurine, use transfer paper. Lay the paper, design side down, onto the wood, and use a stylus or pen to trace over your design, ensuring it transfers clearly onto the wood surface. This step ensures precision during the carving process.
Rough Cutting and Shaping
Begin with rough cutting and shaping to form the general outline of your project. Use a saw for removing large chunks of excess wood, then switch to a roughing gouge or knife to start shaping. Work your way around the project, focusing on getting the basic shape rather than details. It’s important to constantly rotate the wood to work from the best angle, minimizing the risk of splitting or removing too much material.
Detailing and Finishing Touches
After achieving the desired shape, move onto the detailing phase. Switch to finer tools like detail knives, veiners, and smaller gouges. Start adding the intricate features, textures, or patterns that will bring your project to life. Remember, patience is key in this phase as it’s easy to remove but impossible to add wood back. Once detailing is complete, use sandpaper starting with a coarser grit and moving to a finer grit to smooth out the surface. Finally, applying a finish, such as oil or wax, will protect the wood and enhance its natural beauty.
Finishing Your Wood Carving
After carefully sculpting your piece, the final steps will significantly enhance its beauty and durability. Let’s explore how to perfectly sand and apply finishes, ensuring your wood carving stands out and lasts for years.
Sanding and Smoothing
Begin sanding your work with coarser grits of sandpaper and progressively move to finer grits for a smooth finish. Start with a 100-grit sandpaper, ideal for removing any rough areas and major imperfections. Sand in the direction of the wood grain to avoid creating scratches that are difficult to remove. Once the major flaws disappear, switch to 200-grit sandpaper, refining the smoothness of the wood surface further. For the final touch, use 400-grit sandpaper, which leaves the wood incredibly smooth and ready for finishes or sealants. During sanding, periodically wipe the surface with a damp cloth to remove dust, providing a clear view of any remaining imperfections.
Applying Finishes and Sealants
Selecting the right finish or sealant depends on the intended use and desired aesthetic of your carving. For a natural look, linseed oil or tung oil enhance the wood’s natural colors and grain patterns, while providing protection against moisture. Apply a thin coat using a brush or a clean cloth, allow it to penetrate for about 10 to 15 minutes, then wipe off any excess oil. If a more durable finish is preferred, especially for items handled frequently, consider using polyurethane or shellac. These finishes add a protective layer that resists water, scratches, and dents. Apply the polyurethane or shellac with a fine-bristle brush, following the direction of the grain, and allow it to dry completely before applying a second coat. Always sand lightly between coats with fine-grit sandpaper to ensure a smooth, even finish. After the final coat, give the piece plenty of time to cure fully before handling.
Maintenance of Tools
Maintaining your wood carving tools ensures their longevity and effectiveness in every project. Following a proper cleaning, sharpening, and storage routine prevents damage and maintains precision in your work.
Cleaning and Sharpening Your Tools
Begin cleaning your tools immediately after use. Remove wood chips and dust with a soft brush, then wipe the blades with a clean rag dipped in mineral oil to prevent rusting. For gouges and chisels, employ a whetstone for sharpening. Start with a coarse stone to grind out any nicks or flat spots, followed by a finer stone to hone the edge to a sharp finish. Keep the blade at a consistent angle to the stone, ensuring even sharpening along the curve of the tool. Applying honing oil to the stone helps in smoothing the sharpening process, leading to a finer edge. For intricate tools like V-tools or small gouges, consider using slipstones or a rotary tool with a sharpening attachment for precision.
Storing Your Tools Properly
Storing your tools properly preserves their condition and readies them for the next use. First, ensure they are completely dry and clean to avoid rust and corrosion. Use individual tool rolls or a wooden toolbox for organization, which helps in preventing the tools from knocking against each other and keeps them sharp longer. Insert the blades into a block of wood or a holder to protect their edges if a toolbox isn’t available. For long-term storage, lightly coat the metal parts with machine oil, which acts as a barrier against moisture and rust. Place the toolbox or rolls in a dry, cool place, avoiding areas with significant temperature fluctuations to prevent wooden handles from cracking or warping.
By adhering to these maintenance practices, your tools remain in top condition, ensuring that each carving session is productive and enjoyable.
Troubleshooting Common Problems
Moving forward from ensuring our tools are in top condition, let’s address how to tackle some common issues that arise during the wood carving process.
Dealing With Cracks and Splits in Wood
Encountering cracks and splits in wood can be disheartening, but there are efficient ways to manage this challenge. Applying thin cyanoacrylate (CA) glue directly into the cracks serves as an immediate fix by sealing and reinforcing the area. For larger splits, mixing sawdust from the same wood type with wood glue to create a paste provides a matching fill that, once sanded, blends seamlessly with the surrounding area. Maintaining a controlled environment minimizes wood stress, reducing the likelihood of future cracks. Using humidifiers or dehumidifiers to regulate air moisture proves effective in preserving the integrity of wood projects.
Fixing Mistakes in Carving
Mistakes are part of the learning curve in wood carving. Filling minor unintended cuts with a mixture of wood glue and sawdust from the project ensures the filler matches the original wood, making corrections nearly invisible after sanding and finishing. For deeper gouges, gluing a small piece of wood, known as a patch, that matches the grain and color of the project allows for carving into the corrected area as if it were part of the original wood. Regularly stepping back to review the carving from different angles assists in identifying discrepancies early on, making them simpler to correct. This proactive approach reduces the complexity of fixing mistakes, ensuring a more enjoyable carving experience.
Advanced Tips for Beginners
Building on the foundation of wood carving techniques, tool maintenance, and troubleshooting, let’s explore ways to elevate your skills further.
Moving on to More Complex Projects
Transitioning to more elaborate projects offers the perfect opportunity to challenge and refine your wood carving skills. Begin by selecting designs with a mix of straight lines and curves, such as animal figures or intricate patterns. Practice sketching your project on paper before transferring it to wood. This preparation ensures familiarity with the design, which translates into smoother carving. Mastering the art of depth and shadow within your carvings comes next. Experiment with varying the depth of your cuts to create more dynamic and realistic pieces. Graduating to complex projects necessitates patience and an understanding that mistakes offer valuable learning opportunities.
Incorporating Different Materials
Expanding your repertoire by incorporating different materials into your wood carving projects can significantly enhance the visual appeal and uniqueness of your work. Try adding accents with metals, such as copper or brass, for shimmering details. Embedding these metals into carved grooves can transform a simple piece into an exquisite artifact. Working with stones and gems introduces colors and textures not found in wood. Small stones can be inlaid into the wood to mimic eyes or other intricate details. Remember, integrating different materials requires careful planning and experimentation with adhesives and techniques suitable for both wood and the added elements.
Conclusion
We’ve journeyed through the basics of wood carving, from the initial steps to tackling more intricate projects. Our dive into tool care, troubleshooting, and advanced techniques has equipped us with the knowledge to enhance our craft. Remember, patience and persistence are your best tools. As we continue to explore and experiment, let’s embrace every mistake as a learning opportunity. Here’s to creating beautiful pieces and the endless possibilities that wood carving offers. Let’s keep carving our path, one chip at a time.
Related Posts:
- Top Carving Woods: Best Picks for Beginners to Pros
- Top 5 Best Woods for Spoon Carving: Insights & Maintenance Tips
- Explore Different Types of Wood Carving: Techniques & Projects
- Beginner’s Guide: Mastering Wood Carving Techniques & Fixes
- Exploring Wood Carving: Techniques, Benefits, and Beginner’s Guide
- Beginner’s Guide to Wood Carving Hobby: Tips, Safety, and Community










![Whittling for Beginners: Step-by-Step Projects to Carve from Wood [Spiral-bound]](https://m.media-amazon.com/images/I/51E8GLjaQFL._SL500_.jpg)


