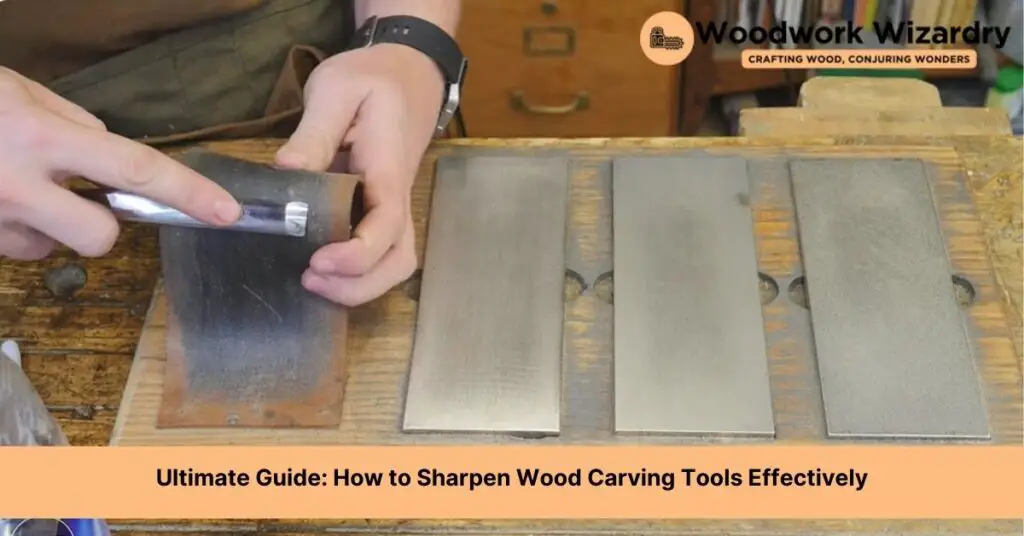
As we delve into the world of wood carving, we quickly realize that the secret to creating those intricate designs and smooth finishes isn’t just in the skill of our hands but also in the sharpness of our tools. Sharpening wood carving tools might seem daunting at first, but it’s a crucial step that can’t be overlooked. It’s the difference between a project that looks professional and one that looks like a rough draft.
We’ve all been there, struggling with a blunt chisel or gouge, getting more frustrated by the minute. It’s not only inefficient but can also be dangerous. That’s why we’re here to guide you through the process of sharpening your wood carving tools, ensuring they’re always in the best condition to bring your visions to life. Let’s get those tools sharp and your carving experience smoother.
Necessary Materials and Tools
To ensure your wood carving tools are always in optimal condition, having the right materials and tools for sharpening is essential. Here’s what you’ll need:

Sharpen your V, sweep and U gouges to a razor's edge. The coarse texture left from a hard Arkansas stone creates fragile speaks on the edge which tend to break down more quickly as the tools is being used.
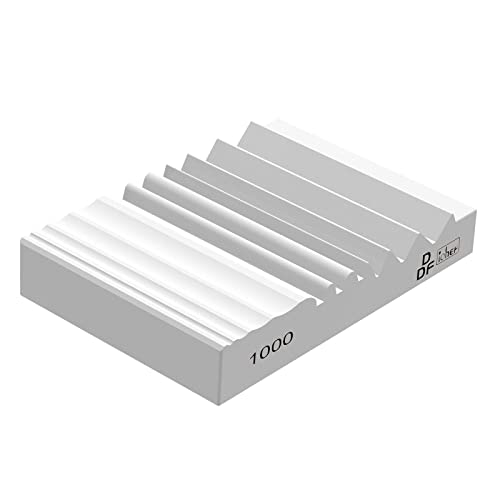
◎ High Quality Material: The carvers sharpener is made of premium white corundum, which is corrosion resistant, heat resistant and durable. Professional grade quality is to get the sharpest edge of your tools.

Carving tool sharpeners have 2 sides, wavy (varying widths) and a flat side, use wavy (varying widths) side to sharpen lathe tools, wood carving tools, wood chisels and gouges with different contours. Use flat side to sharpen hatchet, kitchen knives, scissors, or other normal straight blades
Sharpening Stones
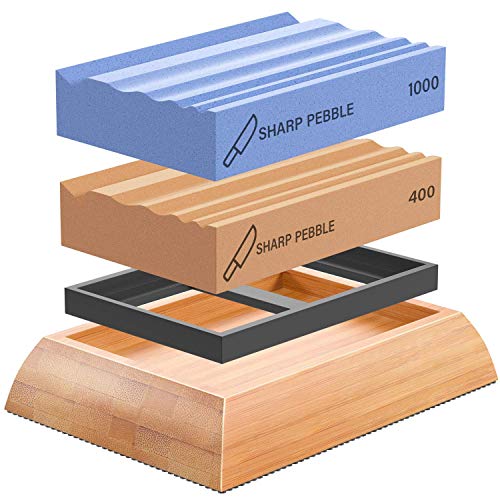
Select sharpening stones with different grits. Begin with a coarse grit to remove any nicks or imperfections and move to a finer grit for polishing the edge. Typically, starting with a 400-grit stone to reshape or repair the blade and finishing with a 1000- to 2000-grit stone for a sharp edge proves effective.
Honing Oil or Water
Use Honing Oil or Water on the sharpening stone, depending on the type of stone you have. Water stones require water, while oil stones need honing oil. These lubricants reduce friction and heat buildup during sharpening, protecting both the tool’s blade and the stone’s surface.
Leather Strop
Implement a Leather Strop post sharpening to polish the blade and remove any remaining burrs. This step is crucial for achieving an exceptionally sharp edge. Glide the tool’s edge along the strop, away from the cutting edge, to refine and straighten it.
Protective Gloves
Wear Protective Gloves throughout the sharpening process to safeguard your hands against cuts. Quality gloves made from materials like leather or cut-resistant fabric offer protection while allowing for dexterity and a good grip on the tools.
Preparing Your Sharpening Station

Creating an efficient sharpening station is pivotal for achieving the finest edges on your wood carving tools. Let’s look at how to select the perfect workspace and organize your essential tools and materials effectively.

Made with superior silicon carbide, the 400 grit side is suitable for any daily sharpening, such as repairing the knives with big cutting edges, and polishing the knives, the 1000 grit will help you to make the knives more smooth after using the 400 grit
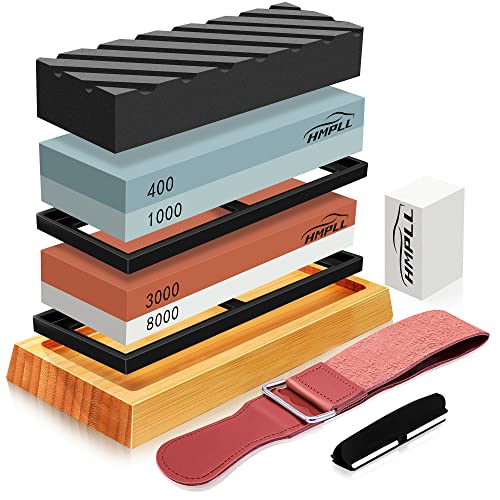
Professional Whetstone: 2 whetstones have difference grit which are 400/1000 and 3000/8000. The grit is accurate. 4 sides grit are satisfy with any knife blade needs. 400/1000 grit is typically used to repair knives with chipped edges and sharpen dull knives. 3000/8000 grit used to refine the edge and provide extra fine finish/polish on your blades.
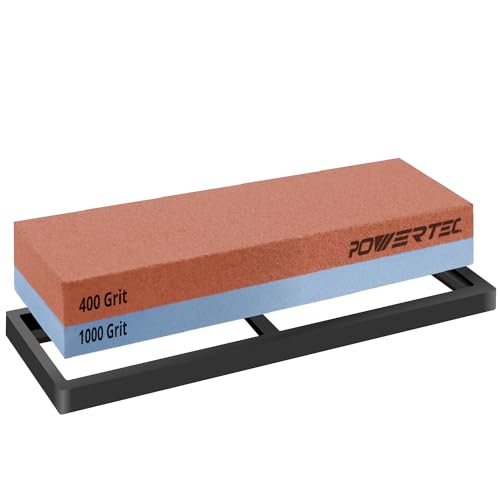
INCLUDES: (1) Whetstone Sharpening Stone and (1) Non-slip Rubber Base
Choosing the Right Workspace
Selecting an appropriate workspace is crucial for safety and convenience while sharpening wood carving tools. The ideal space is well-lit, ensuring every detail on the tools is clearly visible during the sharpening process. Ample lighting, such as natural daylight or a bright benchtop lamp, helps in identifying blemishes and scratches on the tool’s surface that require attention. A sturdy workbench or table offers a stable platform, preventing tools from slipping and ensures precise control during sharpening. Ensure the workspace is spacious enough to accommodate all sharpening tools and materials without clutter, allowing for free movement and accessibility.
Organizing Tools and Materials
Effective organization streamlines the sharpening process, making it a smoother experience. Begin by placing sharpening stones in order of grit from coarse to fine on the workspace. This sequence aids in gradually refining the tool’s edge with each stone. Keep honing oil or water close at hand to lubricate the stones before use, depending on their type. A leather strop, positioned within easy reach, is essential for the final polishing step, helping to remove any microscopic burrs from the blade’s edge. Store protective gloves nearby to ensure hand safety is always a priority during the sharpening. By organizing these items logically, transition between different sharpening stages becomes seamless, enhancing efficiency and safety.
Step-by-Step Guide on How to Sharpen Wood Carving Tools

After preparing the sharpening station as outlined, we move on to the actual process of sharpening wood carving tools. This step-by-step guide ensures tools achieve a razor-sharp edge, resulting in more precise cuts and a safer carving experience.
NATURAL & SAFE: Our Knife Blade oil is composed of 100% natural food-safe ingredients to provide worry-free use. While also providing superior protection for kitchen knives, pocket knives, and more

HONING SOLUTION – Smith’s Honing Solution features built-in stone cleaning agents and rust corrosion inhibitors and it can be used on all sharpening stones. This non-petroleum-based honing oil will prevent your sharpening stones from clogging.
Food Safe Certified - Made in USA facilities, contains no harmful ingredients
Cleaning the Tools
Begin by thoroughly cleaning the tools to remove any debris or rust. Use a soft cloth dipped in soapy water for general cleaning and a rust remover for any stubborn rust patches. Dry tools completely before proceeding to the next step. Clean tools guarantee an effective sharpening process without impurities hindering the stone’s surface.
Starting with Coarse Stones
Initiate sharpening with coarse stones when the tool’s edge is notably dull or damaged. Hold the tool at the appropriate angle to its bevel and glide it across the stone in smooth, consistent strokes. Maintain the angle consistently to avoid altering the tool’s bevel. This step quickly reshapes the edge, preparing it for finer sharpening.
Moving to Finer Stones
Transition to finer stones to refine the edge created with the coarse stone. Using the same technique, guide the tool across the stone, ensuring even contact with the bevel. Finer stones smooth the edge further, enhancing its sharpness. The gradual progression from coarse to fine stones is crucial for achieving a sharp, durable edge.
Honing with a Leather Strop
After sharpening with stones, proceed to honing with a leather strop. Apply honing compound to the strop if desired, to aid in the removal of any burrs and polish the edge. Draw the tool away from the edge across the strop in controlled strokes. This action polishes the edge to a mirror finish and ensures the sharpest possible edge.
Testing the Tool’s Sharpness on Wood
Conclude the sharpening process by testing the tool’s sharpness on a piece of scrap wood. Carve into the wood; a sharp tool will cut smoothly with minimal effort. This test not only confirms the tool’s readiness for use but also provides a tangible sense of satisfaction from achieving a professionally sharpened edge.
Tips for Maintaining Sharpness

After sharing the process for achieving a professionally sharpened edge on wood carving tools, let’s focus on maintaining that sharpness. This will ensure tools are always ready for use, extending their life and making carving more enjoyable.

Double-Sided Leather Strop: Features a smooth side and a suede side to meet different stropping needs — perfect for refining and polishing your blade edge

Leather Strop for Knife Sharpening: for beginners and professionals that like honing to keep woodcarving tools razor sharp. Use both sides of the carving knife strop to maintain a needed cutting edge.

Leather Strop with a polishing compound for stropping and polishing all your knives. The smooth side of the leather strop is used with a polishing compound while the rough one can be used even without it.
Regular Honing
Honing tools regularly prevents the need for frequent thorough sharpenings. Integrate honing into your carving routine to keep edges in prime condition. For best results, use a fine honing stone or leather strop after every few uses. This light touch-up maintains the edge’s sharpness, reducing the workload on coarser stones and preserving the tools’ fine cutting edges. Make sure to hon lightly without applying excessive pressure, ensuring uniform contact with the edge across the honing surface.
Proper Storage of Tools
Storing tools properly plays a crucial role in maintaining their sharpness. Avoid tossing tools into a box where they can jostle against each other and become dull. Invest in a tool roll or create individual slots in a storage box for each tool. This separation prevents the blades from touching, reducing the risk of damage. For added protection, consider applying a light coat of oil on the tools before storing them to guard against rust and corrosion. Ensure the storage area is dry and free from extreme temperature changes to keep your wood carving tools sharp and ready for your next project.
Troubleshooting Common Sharpening Issues

In the journey of maintaining sharp wood carving tools, encountering issues along the way is common. Let’s explore solutions to some of the most frequent challenges.

Protect your hand from cuts and abrasions---The high performance cut resistant material HDPE is adopted and the gloves is awarded with the highest EN388:2003 level 5 (EN388:2016 Level C) cut resistance certification. 10 times stronger than normal gloves.

SNUG AND COMFORTABLE FIT: Nylon-Spandex material conforms to hand shape enabling detailed work while maintaining manual dexterity while working

4-Stage Precision Sharpening for All Blades: Longzon 4-Stage Knife Sharpener is designed to meet all your sharpening needs—effortlessly sharpens stainless steel, kitchen knives, scissors, and pocket knives. The 4-stage design (Scissors, coarse grinding, fine grinding and precision Grinding) quickly repairs, restores, and polishes dull blades, turning blunt knives into sharp, precise tools in seconds. Perfect for home kitchen use, it’s the ultimate solution for all your blade sharpening needs.
Uneven Edges
Achieving evenly sharp edges ensures precision in carving details. If you notice unevenness in your tool’s edges, the issue often lies in maintaining a consistent angle during the sharpening process. To rectify this, we adhere to a consistent sharpening angle for each tool. Utilize angle guides or jigs to support this precision. Start with coarse stones to reshape the edge, then transition to finer stones to refine it. Performing light, consistent strokes across the entire length of the blade helps in achieving uniformity. Monitoring progress frequently allows for adjustments before moving to the next finer grit.
Over-Polishing
Over-polishing, or excessively honing the cutting edge, can lead to a tool that’s too smooth, reducing its effectiveness in cutting through wood. To avoid this, focus on polishing just enough to achieve a sharp edge without going overboard. After sharpening on a fine stone, finalizing the edge with a leather strop should suffice. Limit stropping strokes to a few per side to maintain sharpness without rounding the edge. Remember, the goal is a sharp edge, not merely a shiny one. Keep tools functional by stopping once you achieve the desired sharpness, checking your progress with test cuts in scrap wood.
Alternative Methods of Sharpening
Exploring other techniques can further enhance your wood carving tools’ sharpness. Let’s delve into alternative methods that achieve precision edges.
Innovative Sharpening Stones: Our groundbreaking gouge sharpening stone comes with multiple grooves for sharpening Lathe Tools, Wood Carving Tools, Wood Chisel and Gouges with different contours. No more pain and hassle for trying to sharpen contoured woodworking tools & chisels on a flat whetstone

【COMPLETE SHARPENING SYSTEM FOR WOODWORKING】 This comprehensive chisel sharpening kit includes a honing guide jig, a double-sided 400/1000 grit diamond sharpening stone, a non-slip stone base, an angle guide, a hex key, and a storage pouch. It provides everything needed for precise sharpening of chisels and plane blades, from coarse repair to fine honing, keeping your woodworking tools in optimal condition

Carving tool sharpeners have 2 sides, wavy (varying widths) and a flat side, use wavy (varying widths) side to sharpen lathe tools, wood carving tools, wood chisels and gouges with different contours. Use flat side to sharpen hatchet, kitchen knives, scissors, or other normal straight blades
Using a Power Grinder
Opt for a low-speed power grinder to avoid overheating, which can lead to the loss of temper in your tools’ steel. Begin by ensuring the grinder’s tool rest is adjusted to a precise angle, aligning with your tool’s bevel. Gently press the tool against the spinning wheel, using light, consistent pressure. Move the tool back and forth across the wheel to prevent creating grooves in both the wheel and the tool. Cooling the tool frequently in water ensures the steel does not overheat. This method suits reshaping or repairing damaged edges before refining them with finer sharpening stones or a strop.
Sharpening with Sandpaper
Sharpening with Sandpaper, also known as the “scary sharp” method, offers a versatile and affordable alternative. Attach a sequence of sandpaper with gradually finer grits to a flat surface. Start with coarse grits for shaping the bevel or removing nicks, progressing to finer grits for honing the edge to a mirror finish. Secure the sandpaper on a flat surface, such as a piece of glass or a marble tile, ensuring it won’t slip. Draw the tool’s bevel across the sandpaper, maintaining the correct angle consistently to avoid altering the shape. This technique provides an inexpensive way to achieve a fine edge, requiring only sandpaper, a flat surface, and water or mineral oil for lubrication.
Conclusion
We’ve walked through the essentials of keeping our wood carving tools in top shape. From setting up a dedicated sharpening station to exploring both traditional and innovative sharpening methods we’ve got everything covered. Remember that maintaining the sharpness of our tools isn’t just about improving our craftsmanship—it’s also about ensuring our safety. With regular honing and proper storage our tools will stay ready for any project we dream up. Let’s embrace these practices and make every carving experience smoother and more enjoyable. Here’s to many more successful wood carving projects ahead!
Related Posts:
- Ultimate Guide: How to Cut Logs into Lumber with a Chainsaw
- DIY Guide: How to Make a Chainsaw Mill & Optimize Performance
- How to Build a Chainsaw Winch: DIY Guide & Innovations
- Ultimate Guide: How to Sharpen Wood Carving Tools Effectively
- Ultimate Guide: How to Use a Chainsaw Mill Efficiently & Safely

Premium Quality: Not all sharpening stones are created equal. We only import & source premium quality material for the manufacturing of our Whetstones. Our proprietary composition of Aluminum Oxide, CBN Superabrasive along with sharpening compounds provides you with a superior cutting performance. Don't be fooled by identical-looking cheap knife sharpening stones

【Complete Knife Sharpening Stone Kit】You don't need to be a Pro to sharpen your blades, all you need is the right tools & technique. All the sharpening tools you need are here, one affordable set for you: 400/1000 & 3000/8000 grit whetstone; Coarse flattening stone; Non-Slip Bamboo base; Knife sharpening angle guide; Leather strop, a simple instruction manual about how to use and what does every component do.

Premium Quality Sharpening Stone Materials: Quality White Corundum, 400/1000 and 3000/8000 knife sharpening stones suitable for most grinding operations, 4 types of grit work well with expensive or budget-friendly stainless steel kitchen knives


