We’ve all been there, standing in front of a piece of plain plywood, imagining the rich, warm colors it could display with just a bit of effort. Staining plywood can transform it from a simple sheet of wood into a masterpiece of color and texture, enhancing its natural beauty and adding a personal touch to any project. But if you’re like us, the process might seem a bit daunting at first. Don’t worry, we’ve got you covered.
Let’s dive into the world of staining plywood together. We’ll guide you through each step, ensuring you have all the tips and tricks at your fingertips to achieve that perfect finish. From selecting the right stain to the final touches, we’re here to make the process as smooth and enjoyable as possible. So, grab your brush and let’s get started on this exciting journey to bring out the best in your plywood projects.
Materials and Tools Needed

Selecting the right materials and tools is crucial for staining plywood efficiently and safely. Below, we outline the essentials to help you prepare.
Choosing the Right Stain for Plywood
Identifying the optimal stain for your plywood project depends on the desired finish and wood type. Oil-based stains penetrate deeply, offering rich colors and durability, making them ideal for projects that will endure frequent handling or exposure to elements. For quicker drying times and easier cleanup, consider water-based stains. They provide a wide range of colors and are better for indoor projects. If seeking a more natural look with added protection, gel stains act as a viable option because they don’t drip and offer a more controlled application, suitable for detailed work.
Necessary Tools for Application
Gathering the correct tools ensures a smooth staining process. The fundamental tools include:
- Brushes: Natural bristle brushes work best for oil-based stains, while synthetic brushes are ideal for water-based stains.
- Rags: Cotton rags aid in wiping off excess stain and help achieve a more even coat.
- Sandpaper: Multiple grits, starting from 120 to as fine as 220, are necessary for prepping the surface before staining and between coats.
- Painter’s tape: Useful for protecting edges or areas where the stain is not desired.
- Stir sticks: Ensure the stain is thoroughly mixed before application.
Safety Gear
Prioritizing safety during the staining process is paramount. Essential safety gear includes:
- Gloves: Nitrile or latex gloves protect your hands from stains and chemicals.
- Respirator mask or dust mask: A respirator mask is critical when working with oil-based stains to avoid inhaling fumes; a dust mask is suitable for sanding.
- Safety glasses: Protect your eyes from splashes and dust particles.
- Apron or old clothes: Protect your clothing from stain splashes.
With these materials, tools, and safety measures in place, you’re well-equipped to begin the staining process, ensuring a smooth application and stunning results.
Preparing the Plywood
Proper preparation of the plywood is crucial for a successful staining project. This step ensures that the stain applies evenly and enhances the overall appearance of the finished product.
Sanding the Surface
Start by sanding the plywood to create a smooth surface. Use a medium-grit sandpaper, such as 120-grit, for the initial pass. Sand in the direction of the grain to avoid scratches that detract from the final appearance. After the first pass, switch to a finer-grit sandpaper, like 220-grit, for a second sanding. This finer sanding removes any remaining imperfections and prepares the plywood for staining.
Cleaning Dust and Debris
Once sanding is complete, remove all dust and debris from the plywood surface. Employ a tack cloth or a soft, lint-free cloth slightly dampened with denatured alcohol. Wipe the plywood thoroughly, ensuring no dust remains. Dust left on the surface can interfere with stain absorption, leading to an uneven finish.
Applying Pre-Stain Conditioner
Applying a pre-stain conditioner is essential, especially if using soft or porous plywood. The conditioner helps in achieving an even stain distribution by reducing blotchiness. Apply the pre-stain conditioner with a clean brush or cloth, following the manufacturer’s recommendations. Allow the conditioner to penetrate the wood for the suggested time, typically 5 to 15 minutes, before wiping off any excess. This step is pivotal for ensuring the stain applies evenly, providing a better finish after staining.
Selecting the Right Stain

After diligently preparing the plywood through sanding, dusting, and conditioning, the next crucial step involves choosing the optimal stain for the job. Let’s delve into the types of stains available and their unique benefits.
Oil-Based Stains
Offer deeper penetration into the wood, oil-based stains stand out for their rich, vibrant colors. They provide ample working time due to their longer drying periods, making them an excellent choice for beginners. Highlighting the wood’s natural grain, oil-based stains also offer enhanced durability once cured. Ideal conditions for their application include well-ventilated areas, given their potent odor and chemical composition.
Water-Based Stains
Characterized by their quick drying time, water-based stains ensure a faster completion of projects. They emit less odor and are easier to clean up, requiring only soap and water. These stains come in a variety of hues, making them versatile for different design preferences. Water-based stains are environmentally friendlier, reducing exposure to harmful solvents. They are best used when time is of the essence and for projects indoors where ventilation might be restricted.
Gel Stains
Gel stains possess a thicker consistency compared to other varieties, offering more control over the staining process. This property minimizes drips and runs, facilitating a more uniform coat especially on vertical surfaces. Gel stains are forgiving, allowing for application without the need for extensive surface preparation. They work exceptionally well on plywood and other porous woods, evening out color distribution and mitigating blotchiness. For projects requiring precision and ease of use, gel stains are a prime choice.
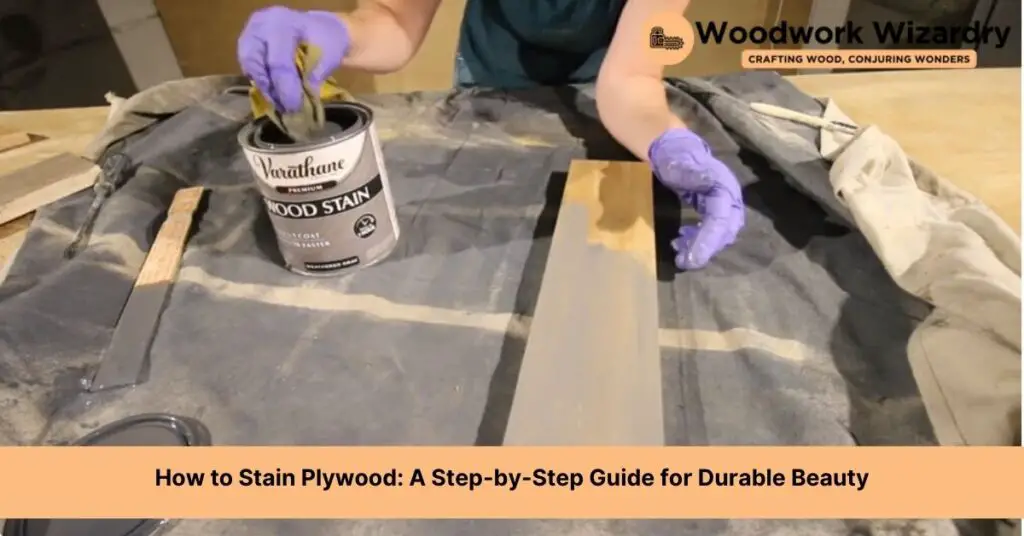
Applying the Stain
Following the selection of the right stain and preparation of the plywood, it’s time to apply the stain, the step that brings out the beauty of the wood.
Stirring the Stain Thoroughly
Begin by stirring the stain thoroughly to ensure all the pigment and solvent are well mixed. Unlike shaking, stirring prevents air bubbles, which could mar the finish. Dip the stir stick to the bottom of the can and stir in a circular motion, scraping the stick against the can’s bottom and sides to incorporate all components.
Using a Brush or Rag for Application
Apply the stain using a clean brush or lint-free rag. For oil-based stains, a natural bristle brush works best, while water-based stains apply well with synthetic bristles. Alternatively, a rag can provide a more controlled and even coat, especially helpful in reaching intricate areas or for a lighter application. Begin at one end and work systematically across the surface to avoid lap marks.
Wiping Away Excess Stain
After allowing the stain to penetrate the wood for the time specified by the manufacturer, usually between 5 to 15 minutes, wipe off any excess with a clean, lint-free cloth. Wipe in the direction of the wood grain to achieve an even finish. Removing excess stain prevents tackiness and ensures the wood dries evenly.
- Test the stain on a scrap piece of wood or an inconspicuous area to check for color accuracy and desired effect.
- Maintain a wet edge by applying stain to small sections at a time, blending edges as you go to avoid uneven saturation.
- Apply additional coats for a darker finish, allowing adequate drying time between coats as directed by the stain manufacturer.
- Keep your workspace well-ventilated to aid in drying and to reduce exposure to potentially harmful fumes.
By following these steps and tips, we ensure a successful and beautiful staining project that highlights the natural beauty of plywood with a professional and appealing finish.
Drying and Curing the Stain

After applying the stain to the plywood and achieving the desired finish, the next critical steps are drying and curing. Ensuring these processes occur under optimal conditions affects the durability and appearance of the stained wood.
Ideal Conditions for Drying
Drying the stained plywood properly demands attention to temperature, humidity, and airflow. Temperatures should range between 65°F and 75°F for ideal drying. Humidity levels are best kept between 50% and 70% to avoid prolonging the drying time or causing uneven drying. Adequate ventilation helps in evenly distributing air around the plywood, promoting uniform drying without the stain drying too fast or too slow. If the drying conditions deviate significantly from these guidelines, the drying time may increase, or the finish may suffer.
Timeframe for Curing
The curing process, while it closely follows drying, refers to the time it takes for the stain to fully harden and achieve its final durability and color. For oil-based stains, expect a curing time of approximately 72 hours. Water-based stains typically cure faster, usually within 24 to 48 hours. Gel stains fall in the middle range, requiring about 48 to 72 hours to cure completely. During this period, avoid placing anything on the surface of the plywood or subjecting it to any stress that could damage the finish. After the curing period passes, the plywood is ready for further finishing touches like a protective topcoat or for use in your project.
Troubleshooting Common Staining Issues
Staining plywood can sometimes lead to unexpected results. We understand these challenges and are here to offer solutions to the most common staining issues.
Blotchy or Uneven Stain
To tackle blotchy or uneven stain areas, start by applying a pre-stain wood conditioner. This step balances the plywood’s ability to absorb the stain uniformly, reducing the likelihood of blotchiness. If blotches appear after staining, lightly sand the affected area with fine-grit sandpaper. Follow this by reapplying the stain in a thinner coat. Achieving uniformity might require repeating these steps, especially on plywood with varying grain patterns.
Stain Not Adhering to the Plywood
Stain adhesion problems frequently arise from surface contaminants or improper surface preparation. Ensure the plywood is thoroughly cleaned of any dust, oils, or residue before attempting to reapply stain. Sanding the surface lightly to open up the grain can also improve stain absorption. Applying a thin coat of stain and wiping away the excess after a few minutes encourages better adhesion. Test the stain on a small, inconspicuous area to ensure the issue is resolved before proceeding with the entire surface.
Light Spots or Missed Areas
Addressing light spots or missed areas requires careful attention. Gently sand the lighter areas to help open the wood grain for more stain. Apply an additional coat of stain to these spots, blending into the surrounding areas for a seamless appearance. Using a soft cloth or sponge applicator ensures a smooth application, avoiding hard lines between treated and untreated sections. Monitor the color closely against the rest of the project to achieve a consistent finish.
Finishing Touches

After the stain has properly dried and cured, the next step is to add the finishing touches to ensure the longevity and enhance the beauty of the plywood.
Applying a Top Coat for Protection
Applying a top coat is crucial for protecting the stained plywood from wear, tear, and environmental elements. Options include polyurethane, varnish, or lacquer, each offering different levels of protection and aesthetic finishes. We recommend applying at least two coats for optimal durability. Ensure the first layer is fully dry before adding the second. If using water-based products, expect quicker drying times, while oil-based options might require longer.
Sanding Between Coats
Sanding lightly between coats ensures a smooth finish and promotes better adhesion of the additional coat. Use fine-grit sandpaper, such as 220-grit, and sand in the direction of the grain to avoid scratches that might mar the surface. This step removes any imperfections or dust nibs caught in the first coat, preparing the surface for the next layer. After sanding, wipe down the surface with a tack cloth to remove all dust.
Final Cleaning and Polishing
Once the final top coat has dried, the last step involves cleaning and polishing the plywood to bring out its full beauty. Using a soft, lint-free cloth, gently clean the surface to remove any residual dust or particles. For a high-gloss finish, consider applying a furniture polish or wax, following the product’s instructions for the best results. Allow the polish to dry, then buff the surface with a clean cloth to achieve a desired shine. This step not only enhances the aesthetic appeal but also adds an extra layer of protection.
By following these finishing touches, the stained plywood will not only look professional but will also be better equipped to withstand use and maintain its beauty over time.
Conclusion
We’ve walked through the journey of staining plywood from start to finish. By now, you’ve got the know-how to select the right stain, prepare your plywood, and apply it with care. Remember, the key to a stunning finish lies in patience and attention to detail. Whether it’s choosing between oil-based or water-based stains or applying that final protective top coat, every step matters. Let’s not forget the importance of drying and curing—these are crucial for a durable and professional-looking outcome. So, grab your tools, follow the steps we’ve outlined, and you’re on your way to transforming any plywood project into a masterpiece. Here’s to creating something beautiful and lasting!
Related Posts:


