When we’re tackling the great outdoors or simply taking care of our backyard, a chainsaw is our go-to tool for quick and efficient cutting. But to keep it running smoothly, knowing how to measure the chainsaw bar chain is crucial. It sounds like a task reserved for professionals, but trust us, it’s something we can all do with a little guidance.
Measuring the chainsaw bar chain might seem daunting at first, but it’s an essential skill that ensures we’re using our equipment safely and effectively. Whether we’re replacing a worn-out chain or upgrading our chainsaw, getting the measurements right is key. So, let’s dive into this together, and we’ll show you how simple it can be. With our step-by-step approach, we’ll have you measuring like a pro in no time.
Understanding Chainsaw Bar Chain Measurements
Having precise measurements of the chainsaw bar chain optimizes the tool’s performance and ensures safety during operation. In this part of our guide, we dive deeper into why these measurements matter and the terminology involved.
Why Accurate Measurements are Important
Accurate measurements extend the lifespan of a chainsaw and maintain its effectiveness. A chain that fits perfectly reduces wear on the chainsaw’s motor and bar, improving the cutting experience. If the chain is too tight or too loose, it could lead to dangerous situations, including the risk of the chain snapping during use. By ensuring measurements are correct, users minimize the risks and enhance the efficiency of their work. Whether replacing an old chain or upgrading the chainsaw, accurate measurements ensure compatibility and peak performance.
Key Terms You Need to Know
Understanding the terminology is crucial for accurately measuring chainsaw bar chains. Here are the key terms:
- Pitch: The distance between three consecutive rivets divided by two, indicating the chain’s size. Chains with a pitch of 3/8 inch are common for general use.
- Gauge: The thickness of the drive links that fit into the chainsaw bar’s guide. Gauges can range from 0.043 inches to 0.063 inches.
- Drive Links: The parts of the chain that fit into the guide bar to propel the chain around it. Counting the drive links helps determine the length of the chain required for a specific chainsaw.
- Bar Length: The length of the chainsaw bar, which determines the size of the chain needed. This is measured from the tip of the bar to where it enters the chainsaw casing.
Understanding these terms ensures that users can select the right chain for their chainsaw, balancing the chainsaw’s efficiency with safety concerns.
Preparing to Measure Your Chainsaw Bar Chain
To achieve accurate measurements of your chainsaw bar chain, preparation is key. This process guarantees that you select the right chain, ensuring your chainsaw operates at peak performance.
Materials Needed
- Tape Measure: Provides length measurements, crucial for determining the bar’s size.
- Caliper: Offers precise measurements of chain pitch and gauge.
- Chainsaw Manufacturer’s Guide: Contains specifications for pitch, gauge, and drive link count, aiding in selecting matching chains.
- Gloves: Protect hands during the measurement process.
- Clean Cloth: Helps in cleaning the chainsaw, allowing for clearer measurement points.
- Pen and Paper: Essential for noting down measurements and comparing with manufacturer recommendations.
- Disconnect the Chainsaw: Ensure the chainsaw is off and disconnected from any power source to prevent accidental startups.
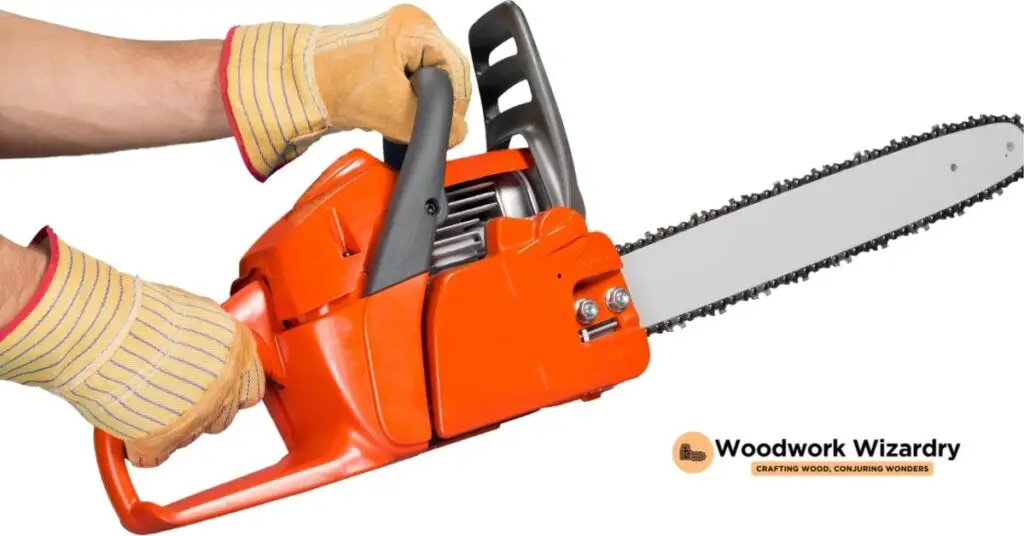
- Wear Protective Gloves: Thick gloves protect fingers from sharp chain edges during handling.
- Clear the Work Area: Remove any clutter to provide a safe, stable surface for taking measurements.
- Handle Chainsaw with Care: Even when disconnected, the chainsaw can cause injuries. Careful handling is mandatory.
- Follow Manufacturer’s Safety Guidelines: Refer to the chainsaw’s manual for any specific safety instructions provided by the manufacturer.
Step-by-Step Guide to Measuring the Chainsaw Bar
In carrying forward the emphasis on precision for optimal tool performance and safety, we delve into the practical steps for measuring the chainsaw bar and its chain. These measures ensure the selection of the appropriate chain, reinforcing efficiency and extending the equipment’s lifespan.
Measuring the Bar Length
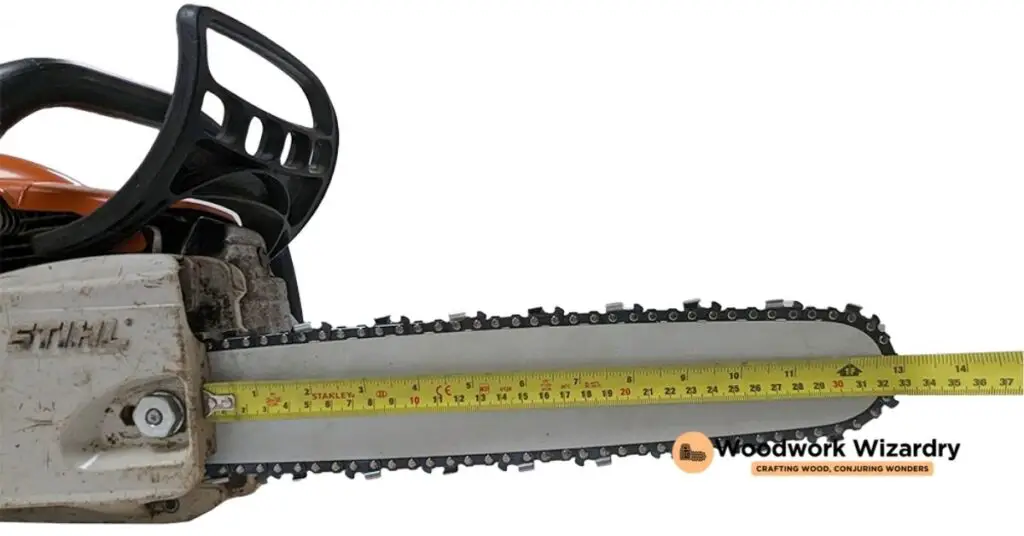
To measure the bar length, stretch a tape measure from the tip of the bar to the point where it enters the chainsaw’s casing. Record this measurement as the bar length, rounding up to the nearest even number in inches. Typically, chainsaw bars range between 16 inches and 36 inches. Precision in this step ensures compatibility with the right chain size.
Determining the Chain Pitch
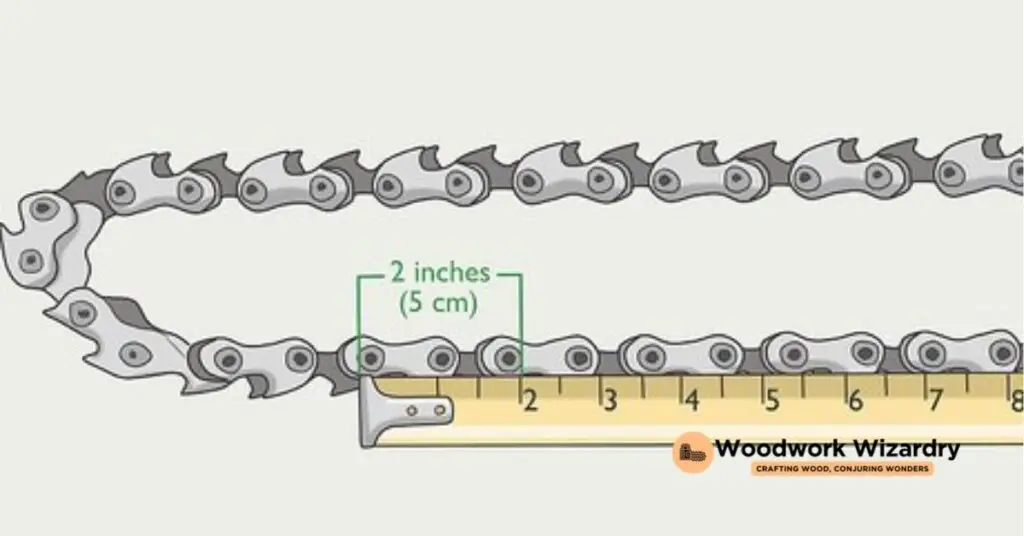
Identifying the chain pitch requires measuring the distance between three rivets on the chain and then dividing this value by two. The pitch, typically measured in inches, indicates the size of the chain. Common pitches include 1/4 inch, .325 inch, 3/8 inch, and .404 inch. This metric is crucial for ensuring smooth operation as it aligns with the sprocket’s size, dictating the chain’s fit and performance on the bar.
Identifying the Chain Gauge
Lastly, the chain gauge requires the use of a caliper for accurate measurement. The gauge reflects the thickness of the drive links where they fit into the bar groove. Measurements commonly range from .043 inch to .063 inch. Proper gauge identification prevents operational issues, ensuring the chain moves smoothly around the bar without being too loose or tight. By using the caliper, accuracy in this measurement supports optimal chainsaw function and safety.
How to Measure Chain Drive Links
Measuring chain drive links accurately complements our earlier efforts to ensure the selection of the right chainsaw chain. This process directly influences the chain’s fit and performance on the chainsaw bar.
Finding Drive Link Count
To find the drive link count, start by removing the chain from the chainsaw. Ensure the chainsaw is powered off and the chain brake is engaged for safety. Lay the chain flat on a work surface, making it easier to count each drive link. Drive links are the parts of the chain that sit in the groove of the chainsaw bar. They appear as flat, shovel-shaped links on the underside of the chain. Count each drive link individually, proceeding along the length of the chain until you reach the starting point.
- Use Bright Lighting: Position the chain under adequate lighting to distinguish each drive link clearly. Good visibility prevents miscounts, ensuring an accurate tally.
- Mark the Starting Point: Use a marker or a piece of tape to identify the first link you count. This method avoids confusion and ensures you don’t count any link more than once.
- Employ a Counting Aid: If available, use a counting aid like a small handheld counter or tally counter. This tool can help keep track of each drive link as you count, especially useful for chains with a high number of links.
- Double-Check Your Count: After reaching the end, count the links again to confirm the number. A second count ensures accuracy, crucial for selecting a chain with the correct drive link count.
By following these steps and tips, we ensure the chain drive link count is precise. Accurate drive link measurement supports optimal chainsaw operation, complementing the measurements of bar length, chain pitch, and chain gauge obtained earlier. This comprehensive approach guarantees a well-fitting, efficient, and safe chainsaw chain selection.
Troubleshooting Common Measurement Mistakes
Understanding how to accurately measure the chainsaw bar and chain is crucial, but mistakes can happen. Here, we’ll address common errors and how to correct them, ensuring your chainsaw operates safely and efficiently.
Misreading the Bar Length
Misreading the bar length occurs often due to not starting from the right point. Always measure from where the bar exits the chainsaw’s casing to the farthest tip of the bar. Ensuring the tape measure is straight and not angled, provides an accurate bar length. Remember, if the bar is worn and has been filed down, this may affect the measurement. Comparing your measurement with manufacturer specifications can validate your findings. Correct measurements of the bar length guarantee the chain fits perfectly, optimizing the chainsaw’s performance.
Incorrect Pitch or Gauge Identification
Identifying the pitch or gauge incorrectly compromises the chain’s fit, potentially causing damage or operational inefficiency. For the pitch, measure between three consecutive rivets, then divide this measurement by two to get the pitch. Viewing these small parts might require a magnifying glass or digital caliper for accuracy. For the gauge, use a precise caliper to measure the width of the drive link where it fits into the chainsaw bar. Manufacturers often stamp the gauge size on the bar, offering a quick way to verify your measurements. Accurate pitch and gauge identification ensures the chain aligns properly with the chainsaw bar and sprocket, maintaining optimal performance and safety.
Caring for Your Chainsaw to Maintain Measurement Accuracy
Regular Maintenance Tips
Maintaining the chainsaw in top condition ensures the accuracy of measurements remains constant over time. Here’s how to keep your chainsaw well-maintained:
- Clean the Bar and Chain After Each Use: Removal of debris and sawdust prevents build-up that can alter the chain’s fit on the bar.
- Lubricate the Chain Regularly: Consistent lubrication reduces wear on the chain and bar, maintaining the original measurements.
- Check for Wear: Inspect the bar and chain for signs of wear. If the bar is worn unevenly, it can affect the chain’s alignment and measurement.
- Sharpen the Chain Consistently: A sharp chain ensures accurate cuts, reducing the likelihood of measurement deviations caused by uneven wear or damage.
- Tighten the Chain as Needed: A properly tensioned chain is essential for accurate measurements. Adjust the tension to prevent slippage or sagging.
When to Seek Professional Help
Sometimes, despite our best efforts, professional intervention becomes necessary to maintain or restore measurement accuracy. Look for these signs:
- Uneven Cutting Patterns: If the chainsaw begins to cut unevenly or appears to struggle through material it once handled easily, it may indicate a measurement issue requiring professional calibration.
- Visible Damage to the Bar or Chain: Significant damage, such as deep nicks or bent bars, often requires the expertise of a professional to repair or replace components.
- Frequent Chain Tension Adjustments: Constantly having to adjust the chain’s tension might suggest a deeper issue with the chainsaw’s bar or sprocket alignment.
- Difficulty in Fitting New Chains: Should new chains not fit despite being the correct size according to your measurements, it’s advisable to consult with a professional to ensure the chainsaw bar hasn’t warped or worn unevenly.
Attending to these maintenance and repair needs ensures your chainsaw remains in peak condition, preserving the accuracy of measurements and extending the life of your equipment.
Frequently Asked Questions
Moving forward from our discussion on the importance of precise measurement and proper maintenance of the chainsaw for optimal performance and safety, we encounter several questions that are frequently asked by users. Let’s tackle some of these inquiries to provide further clarity and aid in better chainsaw upkeep.
How Often Should I Measure My Chainsaw Bar and Chain?
Measure the chainsaw bar and chain whenever you notice signs of wear or after significant usage periods. Ideally, checking the measurements after every 10 to 12 hours of operation ensures that the chainsaw operates efficiently and safely. Regular checks help in identifying the need for adjustments or replacements before any serious damage occurs.
What Is the Easiest Method to Measure the Pitch of a Chainsaw Chain?
The easiest method to measure the pitch of a chainsaw chain involves measuring the distance between any three consecutive rivets and then dividing by two. For example, if the measurement from the center of the first to the center of the third rivet is 0.75 inches, the chain’s pitch is 0.375 inches. This method offers a quick and straightforward way to determine the pitch, which is crucial for selecting the correct replacement chain.
Can I Use a Different Gauge Chain on My Chainsaw Bar?
Using a different gauge chain than what your chainsaw bar is designed for is not recommended. The gauge refers to the thickness of the drive links and needs to match the bar’s groove width exactly. A mismatch can lead to increased wear, decreased performance, and potential safety hazards. Always match the chain gauge to the bar specifications to ensure proper fit and function.
How Do I Know If My Chainsaw Chain Is Too Worn to Sharpen?
A chainsaw chain might be too worn to sharpen if you notice the following indicators: the drive links are severely worn or damaged, the cutters have little to no material left for removal, or the chain stretches beyond the bar’s adjustability. In such cases, replacing the chain is the safer and more efficient option to maintain the chainsaw’s optimal performance.
When Should Professionals Look at My Chainsaw?
Professionals should look at your chainsaw if you experience uneven cutting patterns, visible damage to the bar or chain that you cannot fix, frequent chain tension adjustments, or difficulty in fitting new chains. These issues often point to underlying problems that require expert knowledge and tools to resolve. Seeking professional help ensures your chainsaw remains in top condition and prolongs its lifespan.
Conclusion
We’ve walked through the essentials of keeping your chainsaw in top shape by focusing on accurate measurements and regular maintenance. Remember, understanding the nitty-gritty of your chainsaw’s bar and chain not only boosts its performance but also ensures your safety. Don’t wait for signs of wear and tear to become glaring issues. Instead, make these checks a part of your routine. And when things seem a bit out of your depth, don’t hesitate to call in the pros. Here’s to many more years of safe and efficient chainsaw use!
Related Posts:
- Can You Put a Longer Bar on Your Chainsaw? Compatibility & Installation Guide
- Step-by-Step Guide: How to Adjust Chainsaw Carburetor for Optimal Performance
- Ultimate Guide: How to Clean Your Chainsaw Carburetor for Peak Performance
- Safe Hedge Trimming: How to Cut Hedge with Chainsaw & Avoid Mistakes
- Ultimate Guide: How to Measure Chainsaw Bar Chain for Optimal Use
- How to Start a Poulan Chainsaw: A Step-by-Step Guide
- Understanding Chain Pitch: Essential for Smooth Machinery Operation
- Beginner’s Guide to Chip Carving: Tools, Techniques, and Tips

