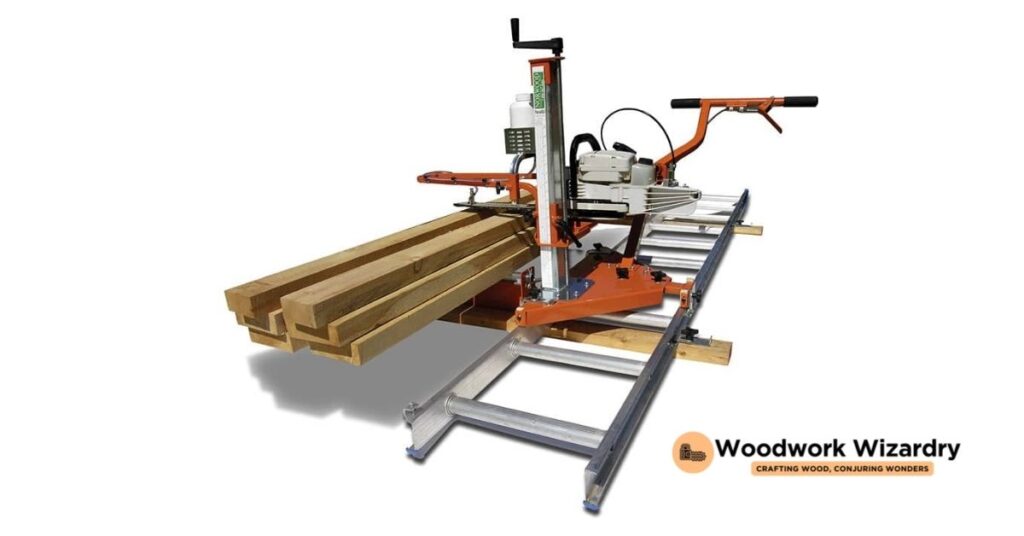
In our journey to embrace the DIY spirit, we’ve stumbled upon an incredibly rewarding project: building our own chainsaw mill. It’s not just about saving money, though that’s a significant perk. It’s about the satisfaction of turning raw lumber into something beautiful and functional with our own hands. Whether you’re an experienced woodworker or a curious beginner, making a chainsaw mill is a fantastic way to challenge yourself and enhance your skills.
We’ll guide you through the essentials, from the tools you’ll need to the step-by-step process. And don’t worry, we’ve made sure to keep things simple and straightforward because we believe everyone should have the chance to tackle this project. So, let’s roll up our sleeves and dive into the world of chainsaw mills. Together, we’ll explore how to transform a basic chainsaw into a highly effective milling machine, opening up endless possibilities for your woodworking projects.
Understanding the Basics of a Chainsaw Mill
Embarking on the journey of building a chainsaw mill requires a solid foundation of what it entails and the benefits it offers. This section delves into the basic concepts and advantages to ensure everyone starts on the right foot.
What Is a Chainsaw Mill?
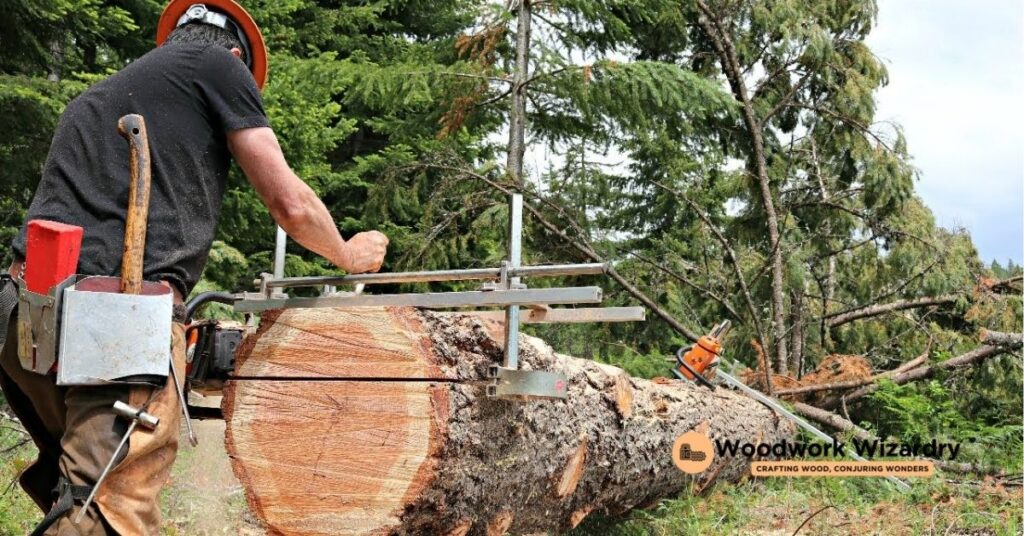
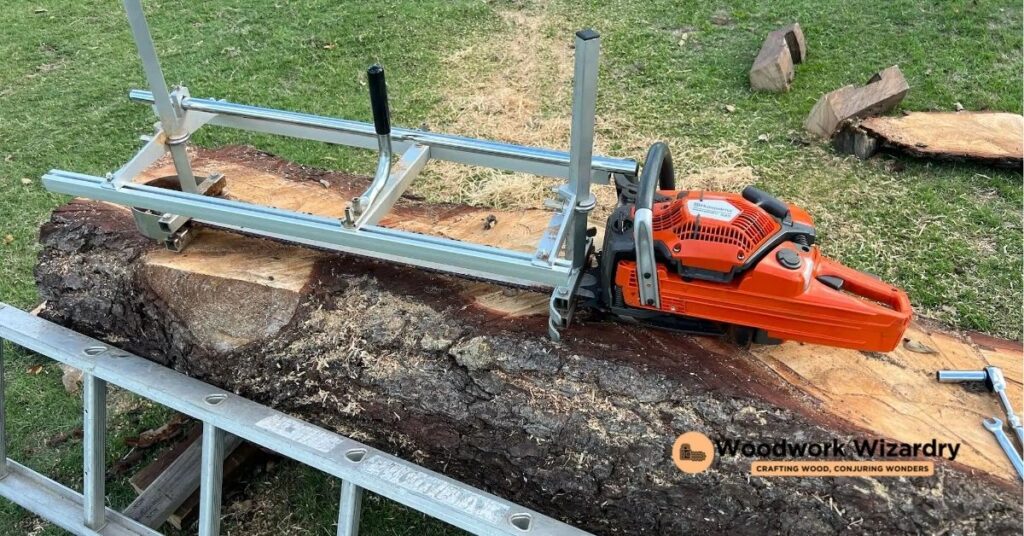
A chainsaw mill, at its core, is a tool that allows the conversion of logs into lumber or planks by using a chainsaw. The mill guides the chainsaw blade through the wood at a controlled depth, making it possible to cut wide sections of timber. Unlike traditional sawmills, a chainsaw mill is portable, can be operated by a single person, and does not require a fixed location. This tool comprises a framework that attaches to the chainsaw bar, a guide rail to ensure straight cuts, and it provides the ability to adjust the depth of the cut.
Advantages of Using a Chainsaw Mill
Compactness and Portability stand out as the primary advantages. Users can transport their chainsaw mill to virtually any location, making it ideal for milling lumber in remote areas or on properties where logs are too large to move easily.
Cost-Effectiveness is another significant benefit. By investing in a chainsaw mill, individuals save on the costs associated with having lumber professionally milled or purchasing pre-cut materials. This DIY approach also allows for customized milling, catering to specific project requirements.
Flexibility in Milling offers users the freedom to cut lumber to desired dimensions that might not be readily available in the market. Whether it’s creating beams, planks, or slabs, a chainsaw mill adjusts to various sizes and shapes, catering to unique woodworking projects.
Lastly, an often overlooked advantage is the Opportunity for Skill Development. Operating a chainsaw mill requires practice and fosters a deeper understanding of woodworking techniques and wood characteristics. Users enhance their skills with every log milled, gaining valuable experience in lumber production and woodworking.
Materials and Tools Needed
Building a chainsaw mill requires specific materials and tools. We’ll detail everything needed to ensure you have a complete list before starting.
Materials List
- Aluminum Square Tubing: Forms the frame of the mill, providing strength and rigidity.
- Steel Flat Bars: Used for the guide rail supports to maintain the chainsaw’s straight path.
- Adjustable Chain Tensioner: Ensures the chain remains tight during cuts, improving accuracy.
- Mounting Brackets: Secure the chainsaw to the mill frame.
- Bolts and Nuts: Various sizes for assembling the mill frame and attaching components.
- Thick Plywood: Serves as a base for the mill, adding stability during operations.
- Welding Machine: Joins metal parts, specifically the frame and the guide rail supports.
- Drill with Various Bits: Creates holes for bolts to assemble the mill and attach the chainsaw.
- Measuring Tape: Guarantees accuracy in measurements, ensuring the mill operates correctly.
- Metal Grinder: Smooths welded joints and cuts metal to the correct lengths.
- Wrench Set: Tightens and loosens bolts, allowing for assembly adjustments.
- Square and Level: Ensures the mill frame and guide rails are perpendicular and level for precise milling.
Step-by-Step Guide to Making a Chainsaw Mill
Embarking on this DIY project unfolds an engaging journey, delving into the craft of building a chainsaw mill from ground up. With the right materials and tools in hand, as discussed earlier, we’re set to guide you through each crucial step.
Planning and Design
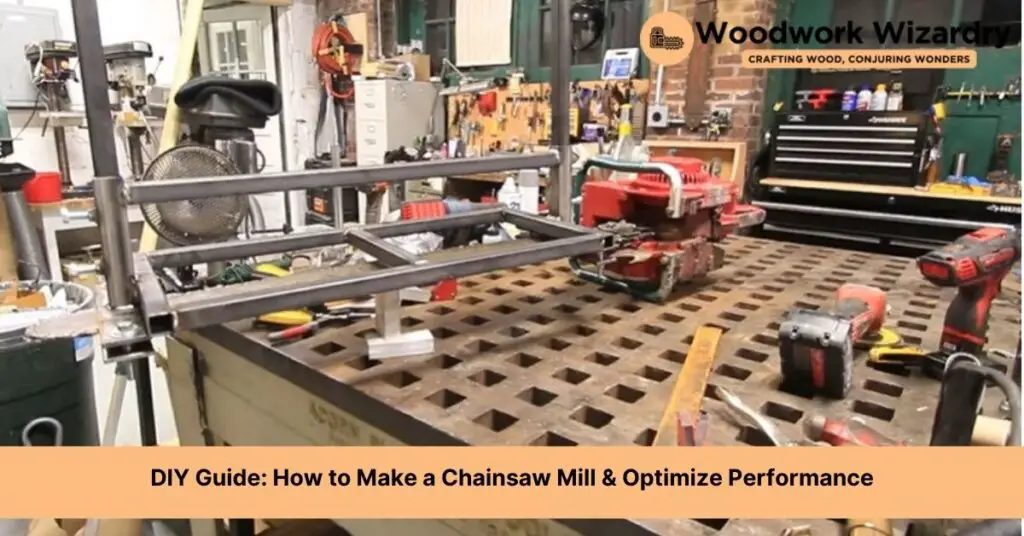
Embarking on a thorough planning phase guarantees the success of constructing a personalized chainsaw mill. Begin by deciding on the mill’s size, which directly correlates with the chainsaw bar’s length and the maximum log diameter you intend to cut. Sketching a detailed blueprint aids in visualizing the end product, ensuring all components like the aluminum square tubing for the frame and steel flat bars for the guide rails are accurately proportioned. Measurements need precision, for they directly impact the mill’s functionality and compatibility with your chainsaw.
Constructing the Frame
Building the frame forms the backbone of your chainsaw mill, requiring meticulous attention to detail. Cut the aluminum square tubing according to the measurements specified in your design. Weld the pieces together to form a sturdy frame, taking care to keep everything aligned correctly; using a square and level proves indispensable here. After welding, smooth all welds with a metal grinder to prevent any lumber from snagging on rough edges during milling operations. This step establishes a robust foundation, ready to support the chainsaw and guide rails effectively.
Mounting the Chainsaw
Mounting the chainsaw onto the frame involves precision to ensure secure and accurate cuts. Start by attaching the mounting brackets to the chainsaw bar, positioning them so that the chainsaw sits balanced on the frame. Incorporating an adjustable chain tensioner allows for fine-tuning the chain’s tightness, a critical aspect for efficient and smooth cutting. Double-check all connections and ensure the chainsaw is firmly secured to the frame, preventing any movement during operation. This step transforms the setup into a functional chainsaw mill, poised for its first log.
Adding Safety Features
Safety remains paramount in any DIY project, especially when dealing with powerful tools like chainsaws. Equip the chainsaw mill with a blade guard to protect against accidental contact with the moving chain. Installing a lock-off button on the chainsaw throttle can prevent unintended activation. Additionally, attaching a kickback protection device minimizes the risk further. Before using the mill, always wear personal protective equipment, such as safety glasses, hearing protection, and gloves. These safety enhancements ensure a secure environment, allowing you to focus on the joy of milling lumber safely and effectively.
By following these steps meticulously, we forge not only a functional chainsaw mill but also gain an immense sense of achievement through this DIY journey.
Operating Your Chainsaw Mill Safely
Safety is our top priority when operating a chainsaw mill. Ensuring proper measures and precautions can make the milling process both efficient and safe. Let’s focus on the best practices for operating your chainsaw mill with a commitment to safety.
Personal Protective Equipment (PPE)
Utilizing the correct Personal Protective Equipment (PPE) is crucial. The ensemble includes several key items:
- Hearing Protection: Loud noise from the chainsaw can lead to hearing loss over time. Opt for earmuffs or earplugs.
- Eye Protection: Safety glasses or face shields prevent sawdust and debris from entering the eyes.
- Hand Protection: Gloves protect the hands from vibrations and cuts. Select gloves with a firm grip and cut-resistant materials.
- Leg Protection: Chainsaw chaps or pants resists cuts and offer an additional layer of protection.
- Footwear: Steel-toed boots provide protection against heavy falling objects and ensure a stable grip on uneven surfaces.
- Headgear: A helmet with a face shield guards against head injuries and flying debris.
Chainsaw Handling Tips
Effective chainsaw handling is critical for safety. Keep these tips in mind:
- Inspect the Chainsaw: Before use, check the chainsaw’s condition, ensuring the chain is sharp and the tension is correct.
- Maintain a Stable Stance: Plant your feet firmly on the ground, keeping a balanced posture during operation.
- Operate with Both Hands: Always use both hands to control the chainsaw. This ensures stability and control.
- Be Aware of Kickback: Kickback occurs when the chainsaw’s nose or tip touches an object unexpectedly. To minimize this risk, never cut with the tip and always stay focused on the task.
- Clear the Area: Ensure the workspace is free from tripping hazards and unnecessary materials. Adequate space allows for safer operation.
- Follow Manufacturer’s Instructions: Adhere to the chainsaw manual’s safety guidelines for use, maintenance, and emergency procedures.
By wearing the right PPE and practicing effective chainsaw handling, we can operate our chainsaw mill safely, maximizing productivity while minimizing risks. Safety first ensures that we enjoy woodworking projects for years to come.
Maintenance and Care
Following the detailed instructions on constructing and operating a chainsaw mill safely, we now turn our attention to maintaining your chainsaw mill for longevity and peak performance. Proper maintenance not only prolongs the life of the chainsaw mill but also ensures it operates efficiently with each use.
Regular Cleaning and Lubrication
Regular cleaning and lubrication are fundamental to maintaining a chainsaw mill. After each use, remove sawdust, dirt, and debris from all parts of the mill, including the chainsaw itself, the guide bar, and the milling attachment. Use a soft brush or compressed air for cleaning tight spaces and a damp cloth for the exterior surfaces. Apply lubricating oil to the chain and the guide bar to prevent rust and reduce friction. Check the chainsaw’s oil reservoir to ensure it has enough oil for the chain’s lubrication during cutting operations. Lubricating moving parts keeps them operating smoothly and extends the lifespan of the mill.
Blade Sharpening and Replacement
A sharp blade is crucial for efficient cutting and safety. Inspect the chainsaw blade regularly for dullness or damage. Use a round file matching the chain pitch size for sharpening the cutting teeth, maintaining the prescribed angle for optimal cutting efficiency. For chains that are too worn or damaged for sharpening, replace them with new ones that match the manufacturer’s specifications. Blade maintenance, including timely sharpening and replacement, reduces the physical effort required to cut and minimizes wear on the chainsaw motor and milling attachment. Keep an extra chain on hand to ensure continuity of work without downtime.
Troubleshooting Common Issues
After ensuring your chainsaw mill is properly constructed and maintained, you might still encounter some issues during operation. Identifying and resolving these common problems can help maintain the efficiency of your chainsaw mill, allowing for smooth and precise cuts every time.
Chainsaw Won’t Start
- Check the Fuel Tank: Ensure the fuel tank is filled with fresh gasoline if the chainsaw fails to start. Old or stale gasoline can hinder the starting process.
- Inspect the Spark Plug: Remove and examine the spark plug for signs of wear or damage. Replace the spark plug if it appears fouled or worn out.
- Clean the Air Filter: A clogged air filter restricts airflow to the engine, preventing it from starting. Clean or replace the air filter to improve air intake.
- Examine the Carburetor: Carburetor issues can also prevent starting. If comfortable, adjust the carburetor settings; otherwise, seek professional help for tuning or repairing the carburetor.
- Sharpen the Chain: A dull chain leads to uneven and irregular cuts. Sharpen the chain regularly to ensure it remains capable of making smooth cuts.
- Adjust the Chain Tension: A chain that’s too loose or too tight can result in imprecise cuts. Adjust the chain tension to the manufacturer’s specifications for optimal performance.
- Check for Worn Parts: Over time, parts of the chainsaw mill, like the guide bar or sprockets, may wear down. Inspect these parts for wear and replace them if necessary.
- Ensure Proper Alignment: Misalignment of the chainsaw mill’s frame can cause uneven cuts. Verify that the frame and the guide rails are perfectly aligned for accurate milling.
By addressing these common issues, we optimize our chainsaw mill’s performance, ensuring reliable and precise woodworking projects. Regular checks and adjustments help avoid disruptions, keeping our workflow smooth and efficient.
Alternatives to a DIY Chainsaw Mill
Constructing a chainsaw mill presents a rewarding endeavor, yet alternative routes exist for those seeking different solutions. Exploring these options provides insight into the broader world of portable milling.
Purchasing a Pre-made Chainsaw Mill
Investing in a pre-manufactured chainsaw mill serves as a straightforward alternative, eliminating the complexities of DIY construction. Manufacturers offer a range of chainsaw mills that accommodate various bar lengths and wood sizes. Opting for a pre-made version ensures precision-engineered components and potentially warranty coverage. This option suits individuals aiming for immediate use without the time investment required for building a mill from scratch.
Other Types of Portable Mills
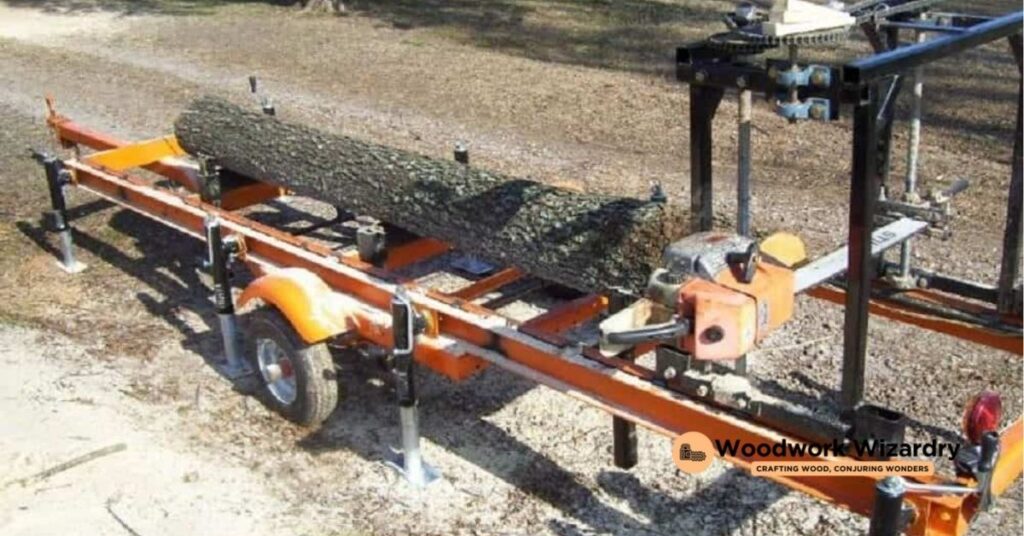
Exploring different portable mill types reveals alternatives catering to specific milling needs. Band saw mills, featuring a thin blade that wraps around wheels, provide efficient cuts with less waste than chainsaw mills. Swing blade mills, on the other hand, offer versatility by allowing the operator to cut both vertically and horizontally with a single blade. These mills excel in producing dimensional lumber rapidly. Lastly, portable circular sawmills, although less common, are capable of handling large logs and achieving high production rates. Each type features unique advantages, dependent on the project requirements and log sizes dealt with.
Conclusion
We’ve journeyed through the rewarding process of building our chainsaw mill from scratch. It’s been an adventure in not just creating a tool but enhancing our woodworking skills and safety knowledge. We’ve covered everything from the essential materials and tools to the detailed steps of construction and maintenance. Now it’s time to put our hard work to use. Whether we’re tackling a new project or refining our technique there’s always room for improvement. Remember the importance of regular maintenance and staying vigilant with safety practices. And if building one isn’t for you there are always alternatives to explore. Here’s to many successful projects ahead with our chainsaw mill at the heart of each creation. Happy woodworking!
Related Posts:
- Ultimate Guide: How to Cut Logs into Lumber with a Chainsaw
- DIY Guide: How to Make a Chainsaw Mill & Optimize Performance
- How to Build a Chainsaw Winch: DIY Guide & Innovations
- Ultimate Guide: How to Sharpen Wood Carving Tools Effectively
- Ultimate Guide: How to Use a Chainsaw Mill Efficiently & Safely

