Dealing with crayon marks on wood surfaces can be a frustrating experience for any homeowner or parent. Those vibrant wax streaks that once represented your child’s creativity now seem like permanent fixtures on your beautiful wooden furniture, floors, or doors.
We’ve gathered the most effective methods to remove crayon marks from wood without damaging the surface. Whether you’re dealing with fresh scribbles or marks that have been there for weeks, our tried-and-tested answers use items you likely already have at home. From household ingredients to specialized cleaners, we’ll show you exactly how to restore your wooden surfaces to their former glory.
Understanding Why Crayons Stick to Wood Surfaces
Crayons adhere to wood surfaces due to their waxy composition, which creates a bond that’s often difficult to remove. The main ingredient in crayons is paraffin wax, combined with pigments and stearic acid, forming a substance that melts slightly from the friction of coloring and embeds into wood’s porous surface. Wood’s natural grain and texture provide many tiny crevices where crayon wax can penetrate and solidify.
Unfinished wood poses a particular challenge as it readily absorbs the wax and colorants without any protective barrier. Finished wood surfaces (those with varnish, polyurethane, or paint) offer some resistance to crayon marks, though they’re not completely immune. The type of finish on your wood significantly impacts how deeply the crayon penetrates and so how difficult it is to remove.
Temperature also plays a crucial role in crayon adhesion. Warm environments cause the wax to soften and penetrate deeper into wood grain, while cooler temperatures might keep the marks more superficial. Pressure applied during coloring pushes wax particles further into wood pores, creating stronger bonds that resist simple cleaning methods.
Understanding these adhesion mechanisms helps select the most effective removal technique for your exact situation. Oil-based answers work well because they break down the waxy components, while heat methods take advantage of wax’s low melting point to help removal without damaging the wood underneath.
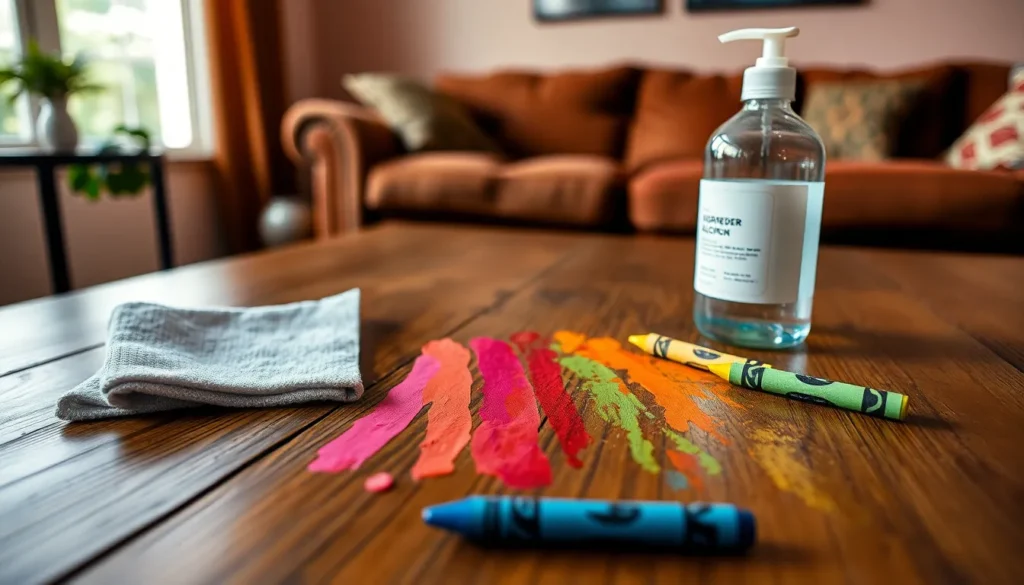
Materials You’ll Need to Remove Crayon Marks

Removing crayon marks from wood surfaces requires exact tools and products that break down the waxy residue without damaging the finish. We’ve compiled a comprehensive list of effective household items and commercial products that tackle even the most stubborn crayon stains.
Household Items That Work
Common items from your kitchen and bathroom cabinets can effectively remove crayon marks from wood. Warm water mixed with liquid dish soap creates a gentle cleaning solution that works on most finished wood surfaces. White vinegar serves as an excellent natural solvent for breaking down crayon wax when applied directly to the stain and scrubbed with paper towels. Rubbing alcohol (isopropyl) proves particularly effective on unfinished wood, lifting the stain without causing warping that water-based cleaners might. Soft cloths and paper towels are essential for application and wiping away dissolved crayon residue. Microfiber cloths work best as they’re non-abrasive and won’t scratch delicate wood finishes during the cleaning process.
Store-Bought Products to Consider
Commercial products offer powerful answers for stubborn crayon marks on wood surfaces. All-purpose cleaners like Cif/Jif can be sprayed directly onto crayon stains and wiped away with paper towels. Melamine sponges, commonly known as Magic Erasers, lift crayon marks through micro-abrasion but should always be tested first on an inconspicuous area. WD-40 breaks down waxy crayon residue effectively on finished wood surfaces – simply spray a small amount, let it sit briefly, then wipe with a clean damp cloth. Dedicated commercial wood cleaners formulated specifically for wooden surfaces provide effective cleaning while protecting the finish. These specialty products remove crayon marks while conditioning the wood and maintaining its natural beauty.
Heat Method: Using a Blow Dryer or Iron

The heat method effectively removes crayon marks from wood surfaces by melting the wax for easy wiping. This technique utilizes common household appliances to soften the crayon’s waxy components without damaging the wood underneath.
Step-by-Step Heat Removal Process
Blow dryers provide controlled heat for removing crayon marks from wood surfaces. Set your blow dryer to medium heat and hold it 6-8 inches away from the stained area for about 30 seconds. Once the wax begins to soften, immediately blot it with a clean microfiber cloth, wiping upward along the wood grain to prevent smearing. For stubborn marks, repeat the process in short bursts to avoid overheating the wood.
The iron method works exceptionally well for larger crayon areas on wood. Place a thin cotton cloth or paper towel over the crayon mark and set your iron to low heat with no steam. Gently press the iron on the cloth for 5-10 seconds, allowing the heat to transfer to the wax. The melted crayon transfers to the cloth as you lift it away. Replace the cloth with a clean section for each attempt until all wax is removed.
After using either heat method, clean any residual wax with a mixture of mild dish soap and warm water, or white vinegar for more persistent residue. Gently wipe the area with a damp cloth, then dry thoroughly to prevent water damage to the wood.
Precautions When Using Heat on Wood
Temperature control is crucial when applying heat to wooden surfaces. Excessive heat can damage finishes, warp the wood, or create permanent burn marks. Test your chosen heat method on an inconspicuous area first, and always start with the lowest effective heat setting.
Always maintain a protective barrier between the heat source and wood. With irons, use a thin cloth to prevent direct contact that could burn the wood or reduce the glossiness of finished surfaces. For blow dryers, maintain the recommended 6-8 inch distance and move the dryer constantly to distribute heat evenly.
Different wood finishes respond differently to heat treatments. Varnished or polyurethane-finished woods may become dull after heat application. Restore shine by applying furniture polish once the crayon is completely removed and the surface has cooled. Unfinished or lightly finished woods are more susceptible to heat damage, so use extra caution and brief heat exposure with these surfaces.
WD-40 can be combined with heat methods for particularly stubborn crayon marks. After warming the area, apply a small amount of WD-40 to a cloth and test on an inconspicuous spot before treating the stain. This combination helps break down both the wax and pigment components of crayons that have deeply embedded in wood grain.
Chemical Solutions for Crayon Removal

Chemical answers offer effective ways to remove crayon marks from wood surfaces without damaging the finish. Several household items contain properties that break down the waxy compounds in crayons, making removal simpler and more efficient.
For basic removal, mix dish soap with warm water and apply it to the affected area, wiping gently with a soft cloth. White vinegar works effectively when applied directly to crayon stains—simply dab some onto a paper towel and rub until the stain lifts. Rubbing alcohol proves particularly useful for unfinished or untreated wood surfaces; apply it to a cloth and wipe repeatedly until the crayon marks disappear.
Vinegar and Baking Soda Approach
The vinegar and baking soda method combines acidic properties with gentle abrasion to tackle stubborn crayon marks. White vinegar breaks down the waxy components while baking soda provides the mild scrubbing action needed to lift the stain from wood surfaces.
To use this technique, first apply white vinegar directly to the crayon-marked area. Next, sprinkle baking soda over the wet surface, creating a reactive paste that bubbles slightly. Gently rub the mixture with a soft cloth using circular motions to work the solution into the stain. Rinse the area with clean water afterward and thoroughly dry the wood surface with a clean towel to prevent water damage.
Mayonnaise: A Surprising Crayon Remover
Mayonnaise contains oils and emulsifiers that effectively break down crayon wax on wood surfaces. This kitchen staple works particularly well on painted or varnished wood where the protective coating prevents the oil from penetrating the wood grain.
To use mayonnaise as a crayon remover, spread a small amount directly onto the stain using a clean cloth. Let it sit for 5-10 minutes, allowing the oils to soften the waxy crayon residue. Gently rub the stain until it begins to fade, applying slight pressure to lift the color without scratching the wood. Wipe the surface clean with water and dry thoroughly. We don’t recommend this method for untreated or unfinished wood as the oil in mayonnaise might leave behind stains of its own.
Mechanical Methods to Remove Crayon Marks

Mechanical methods offer effective hands-on answers for removing crayon marks from wood surfaces without using chemicals. These approaches rely on physical action to lift or erase the waxy residue while minimizing damage to the wood beneath.
Using Erasers and Soft Cloths
Soft erasers provide a gentle yet effective way to remove light crayon marks from wood surfaces. Art gum erasers work particularly well as they lift the crayon without scratching finished wood. Simply rub the eraser over the crayon mark using light pressure in the direction of the wood grain until the marks begin to fade. Microfiber cloths offer another non-abrasive option for crayon removal, especially after applying a small amount of heat to soften the wax. Dampen the cloth slightly with warm water and gently rub in circular motions across the affected area. For best results, use white cloths to avoid transferring dye onto light-colored wood finishes.
Fine Sandpaper for Stubborn Marks
Fine-grit sandpaper (220-grit or higher) efficiently removes persistent crayon marks that resist other removal methods. This technique works best on unfinished or lightly finished wood surfaces where other approaches have failed. Sand gently in the direction of the wood grain using minimal pressure to avoid creating noticeable depressions in the surface. After sanding, wipe the area with a clean, damp cloth to remove any dust or crayon particles. Testing this method on an inconspicuous area first ensures you won’t damage the wood finish. For finished woods, sanding should be considered a last resort as it may remove part of the protective coating, requiring touch-up work afterward with an appropriate wood finish.
Preventing Damage to Wood Finishes

Testing your removal method on an inconspicuous area first protects your wood from potential damage. Apply a small amount of your chosen cleaner to a hidden spot and wait 5-10 minutes to see if any discoloration or damage occurs before proceeding with the full removal process.
Abrasive materials can permanently dull wood surfaces, even when they seem gentle. Melamine sponges (like Magic Erasers) should be used sparingly and with light pressure, as they function like extremely fine sandpaper that might strip away thin layers of finish with repeated use.
Excess moisture poses a important threat to wood’s integrity, potentially causing warping, swelling, or finish deterioration. After using any liquid-based solution, immediately dry the surface thoroughly with a clean, dry cloth to prevent water from seeping into the wood grain.
Oily residue from products like WD-40 can create new problems if not properly addressed. When using oil-based products for stubborn crayon marks, follow up by wiping the area with a cloth dampened with mild soapy water to remove any remaining oil, then dry completely to restore the wood’s natural appearance.
How to Restore Wood After Crayon Removal

After successfully removing crayon marks from your wood surfaces, it’s essential to restore the wood to maintain its beauty and integrity. Proper restoration prevents damage and brings back the natural luster of your wooden furniture or floors.
Clean and Dry the Area
The first step in wood restoration involves wiping the area with a damp cloth to remove any cleaning residue. Leftover soap, vinegar, or other answers can potentially damage wood over time if not properly removed. Thoroughly dry the surface with a clean, dry cloth to prevent moisture from seeping into the wood, which could lead to warping or discoloration.
Apply Wood Polish or Oil
Applying an appropriate wood polish or oil rejuvenates the surface after the cleaning process. Choose a product specifically formulated for your type of wood finish—whether it’s polyurethane, varnish, or natural oil. Quality wood polishes replenish essential oils that might have been stripped during the crayon removal process. Orange oil, lemon oil, or commercial wood conditioners work effectively on most finished wood surfaces, restoring shine and providing a protective layer.
Check for Residual Wax
Inspect the treated area carefully in good lighting to ensure all crayon wax has been completely removed. Run your fingertips lightly over the surface to feel for any waxy residue that might be invisible to the eye. If you detect any remaining wax, repeat the initial cleaning process using your preferred method until the surface feels smooth and clean.
Touch Up Damaged Finishes
Aggressive crayon removal techniques occasionally damage wood finishes, particularly when dealing with stubborn marks. Minor scratches can be filled using a matching wood touch-up marker. For more important damage to varnished or lacquered surfaces, apply a thin coat of matching finish using a fine artist’s brush. Allow proper drying time between applications if multiple coats are needed to achieve an even finish.
Prevent Future Crayon Marks
Creating a protective barrier helps minimize future damage from crayon marks. Apply a thin coat of furniture wax or polish every few months to create a protective seal that makes future cleanup easier. Consider using washable placemats or tablecloths in areas where children frequently use art supplies. Designating exact areas for coloring activities away from valuable wooden furniture also reduces the risk of crayon marks.
By following these restoration steps, your wood surfaces won’t just be crayon-free but will also maintain their natural beauty and longevity for years to come.
Conclusion
Getting crayon off wood doesn’t have to be a headache. With the right approach—whether using household items like vinegar and mayonnaise or tools like hair dryers and microfiber cloths—those colorful marks can become a thing of the past.
Remember to always test your chosen method on an inconspicuous area first and take proper care of your wood surfaces afterward. The key is finding the balance between effective removal and protecting your wood’s finish.
We hope these techniques help you restore your wooden surfaces to their former glory. With a little patience and the right materials at hand you’ll have your furniture looking pristine again in no time.
Frequently Asked Questions
Why do crayon marks stick so stubbornly to wood surfaces?
Crayon marks adhere to wood because of their waxy composition, primarily paraffin wax mixed with pigments and stearic acid. This combination embeds into wood’s porous surface, creating a strong bond. Unfinished wood absorbs wax more readily than sealed surfaces. The adhesion strength also depends on the temperature (warmer crayons transfer more wax) and pressure applied during coloring, making some marks particularly challenging to remove.
What household items can effectively remove crayon marks from wood?
Several household items can safely remove crayon marks from wood: warm soapy water for fresh marks, white vinegar applied directly to stains, rubbing alcohol (especially for unfinished wood), baking soda mixed with water to form a paste, mayonnaise for painted/varnished surfaces, and a hair dryer to melt the wax for wiping. Always use soft microfiber cloths to avoid scratching the wood surface.
Can heat methods damage my wood furniture when removing crayon marks?
Heat methods can damage wood if not used carefully. Always maintain a protective barrier (paper towel or cloth) between the heat source and wood surface. Keep blow dryers at least 3-4 inches away and moving constantly. With irons, use low heat settings and never apply directly to wood. Test in an inconspicuous area first. Heat just enough to soften the wax without scorching or warping the wood.
Is WD-40 safe to use on wooden surfaces for crayon removal?
WD-40 is generally safe for sealed wood surfaces and effectively breaks down crayon wax. Spray a small amount on a cloth rather than directly on the wood, then gently rub the stain. Always clean the area thoroughly with soapy water afterward to remove any oily residue. Test on an inconspicuous spot first, and avoid using on unfinished wood as it may cause staining.
How should I deal with crayon marks on unfinished wood?
Unfinished wood requires gentler approaches since it’s more absorptive. Rubbing alcohol on a soft cloth works well—apply with light pressure in the direction of the wood grain. For stubborn marks, fine-grit sandpaper (220-grit or higher) can be carefully used, always sanding with the grain. Avoid water-based solutions that might raise the grain, and never use mayonnaise as it can leave oil stains.
Will crayon removal methods affect the wood’s finish?
Some removal methods can affect wood finishes if used improperly. Abrasives like melamine sponges and sandpaper can dull finishes when used aggressively. Excessive moisture might warp wood or damage certain finishes. Harsh chemicals can strip protective coatings. Always test your chosen method on an inconspicuous area first, use gentle pressure, and follow up with appropriate wood conditioning after removal.
How can I restore the wood after removing crayon marks?
After successful crayon removal, clean the area with a slightly damp cloth to remove any residue and let it dry completely. Apply an appropriate wood polish, oil, or conditioner compatible with your wood’s finish to restore luster and protection. For minor finish damage, touch-up markers or wax sticks designed for wood can conceal scratches. If significant finish damage occurs, consider refinishing the affected area.
What preventive measures can stop future crayon marks on wood?
Prevent future crayon marks by designating specific coloring areas away from valuable wood furniture. Use tablecloths, placemats, or desk pads as protective barriers during art activities. Consider washable crayons for young children. Provide alternative coloring surfaces like easels or art desks. Store crayons out of reach when not in use. Regularly teaching children about appropriate drawing surfaces also helps minimize incidents.


