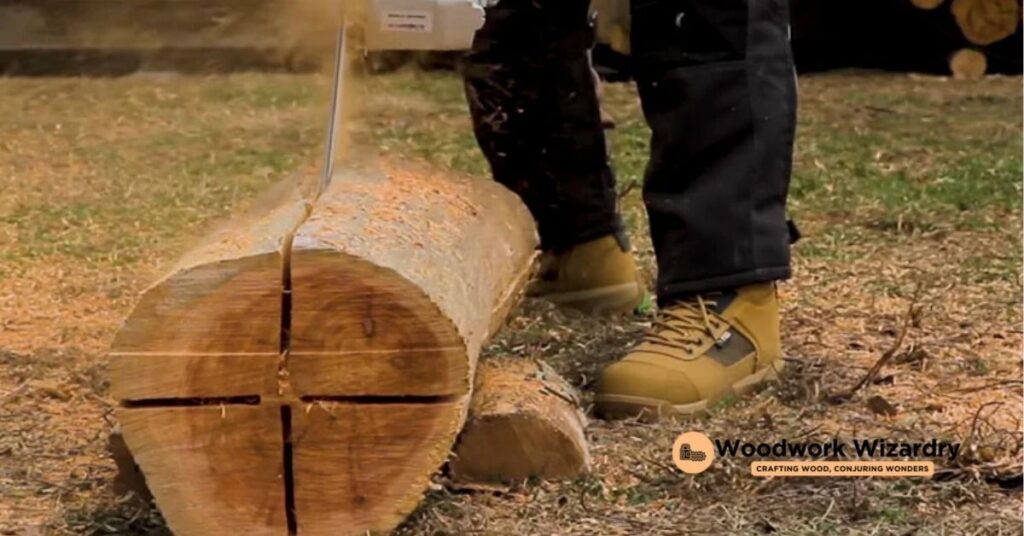
Turning logs into lumber with a chainsaw might sound like a task reserved for the pros, but we’re here to show you it’s within your reach. Whether you’re looking to tackle a DIY project, save some money, or simply enjoy the satisfaction of cutting your own lumber, we’ve got you covered. It’s a skill that not only adds value to raw materials but also connects us more deeply with the craft of woodworking.
We’ll guide you through the essentials, from selecting the right chainsaw to the finishing touches that’ll make your lumber look like it came straight from the mill. With a bit of practice and our straightforward advice, you’ll be slicing through logs with confidence and precision. Let’s dive into the world of chainsaw milling together, transforming those logs into beautiful, usable lumber.
Necessary Tools and Materials
Transitioning from logs to lumber is an exciting journey that begins with the right set of tools and materials. Below we detail the essentials to ensure safety, efficiency, and quality in your work.
Safety Gear
Prioritizing personal safety is crucial when using a chainsaw. Essential safety gear includes:
- Hearing Protection: Chainsaws can produce noise levels that damage hearing over time.
- Safety Glasses: Prevent eye injuries from flying debris.
- Chainsaw Chaps: Protect legs from potential chainsaw mishaps.
- Gloves: Shield hands from vibrations and cuts.
- Hard Hat: Offers head protection from falling branches, especially when working with logs in wooded areas.
- Steel-toed Boots: Safeguard feet against heavy falling objects.
Chainsaw Requirements
Selecting a chainsaw that meets the demands of milling logs into lumber involves considering several factors:
- Power: Opt for a chainsaw with at least 50cc of engine power to cut through hardwood logs.
- Guide Bar Length: Choose a guide bar long enough to span the diameter of the logs you plan to mill, typically ranging between 18 to 36 inches.
- Ripping Chain: This special chain design ensures smoother cuts along the grain of the wood.
Additional Tools Needed
Beyond the chainsaw and safety gear, a few more tools are indispensable for a successful milling operation:
- Chainsaw Mill Attachment: This apparatus attaches to the chainsaw, guiding the cut to produce evenly thick lumber.
- Wedges: Use these to prevent the saw from getting pinched in the cut, especially in larger logs.
- Cant Hook or Peavey: Assist in rolling and positioning logs for optimal cutting.
- Measuring Tape: Essential for marking out cuts to ensure the desired thickness of lumber.
- Sharpening Kit: Maintain a sharp chain for efficient and clean cutting.
- Level: Ensure your first and subsequent cuts are perfectly horizontal for uniform lumber thickness.
By assembling these tools and materials, we set the foundation for transforming logs into beautifully crafted lumber safely and effectively.
Preparing the Log
After gathering the necessary tools and understanding the basics of turning logs into lumber with a chainsaw, the next step involves preparing the log. This preparation is crucial for a smooth cutting process and to ensure the finished lumber meets your project’s requirements.
Inspecting the Log for Metal or Stones
First, thoroughly inspect the log for any metal, stones, or other foreign objects. These can damage your chainsaw blade and pose a safety hazard. Run your hands along the surface and look closely for nails, staples, or any signs of embedded debris. If you find any metal, a metal detector proves invaluable in detecting hidden objects within the log. Remove all detected metal and stones with pliers or a similar tool to prevent chainsaw damage and ensure a clean cut.
Positioning the Log Securely
Positioning the log securely is essential for safety and precision in cutting. Place the log on a stable, flat surface to prevent it from rolling during the cutting process. Using sawhorses can elevate the log, making it easier to cut without bending over, which reduces fatigue. Ensure the setup allows for easy maneuverability around the log. If necessary, secure the log with clamps or blocks to prevent any movement. Proper positioning guarantees accurate cuts and minimizes the risk of injury.
Setting Up Your Workspace
To continue with our process of converting logs into lumber, the next critical step involves setting up an optimal workspace. A well-prepared workspace not only ensures safety but also contributes to the efficiency and accuracy of your cuts.
Creating a Level and Stable Surface
Identify a clear, flat area to set up your workspace. The importance of a level surface cannot be overstated, as it directly impacts the stability of the log during the cutting process. If the ground is not naturally even, consider using wide plywood boards or metal plates to create a stable platform. Ensure that the chosen spot is free of obstacles, which allows for easy maneuverability around the log. Securing the log firmly in place is crucial to prevent any movement. Chains, clamps, or log dogs can be effective tools for this purpose, ensuring the log remains stationary throughout the cutting process.
Marking Your Cutting Lines
Accurate marking of your cutting lines ensures that the lumber meets your project’s specific dimensions. Use a straight edge or chalk line to mark out the intended width of the cut along the length of the log. For uniformity in the thickness of the lumber, consider using a template or jig that can be adjusted to the desired measurements. High-visibility marking tools, like chalk or a lumber crayon, provide clear and distinguishable lines, aiding precision in cutting. Remember, the accuracy of these marks dictates the final quality of the lumber, making it essential to take the time to do this step correctly.
The Cutting Techniques
Having prepared the workspace and the log, the next step involves mastering the cutting techniques that transform logs into lumber. Focus on these methods ensures precision and safety.
The Plunge Cut Method
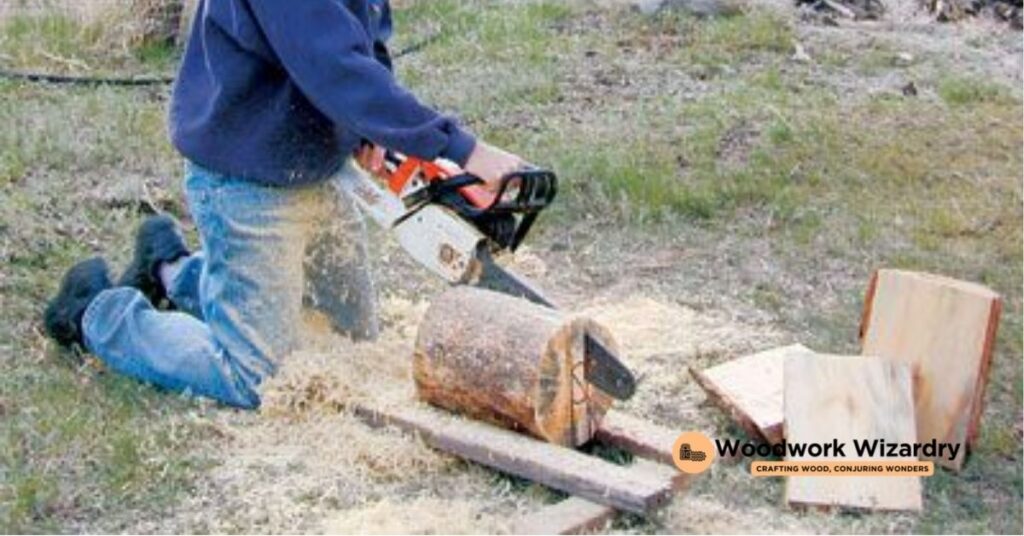
The plunge cut method starts with the chainsaw’s tip. Position the chainsaw’s nose at the start of your marked line, ensuring the saw is at full throttle for a clean entry. Control is crucial, and maintaining a firm grip aids in creating a smooth plunge without kickback. After penetrating the log, guide the saw along the marked line, using steady pressure and speed to maintain accuracy. This method is ideal for creating the initial cut in a log, especially important when dealing with large diameters that require control and precision.
The First Cut Method
Switching to the first cut method involves guiding the chainsaw along the top of the log. Align the saw with the marked line, ensuring the blade is parallel to the log’s surface. Start at one end, and push the saw forward gently along the line. Keep the saw steady and the pace even to ensure the cut remains straight and true. This method is particularly useful for making subsequent cuts after the initial plunge, assisting in cutting through the entire depth of the log with accuracy and efficiency.
Tips for Maintaining a Straight Line
Maintaining a straight line while cutting logs into lumber is essential for quality results. Two critical tips help achieve this:
- Use a Guide: Attaching a straight-edged guide along the cutting line ensures the saw remains on path. This can be a specialized chainsaw mill guide or a makeshift guide constructed from rigid materials like steel or aluminum.
- Regularly Check Alignment: Throughout the cutting process, pause periodically to check the saw’s alignment with the marked line. Minor adjustments during the cut can correct deviations before they become significant.
Together, these methods and tips ensure the transformation of logs into lumber is done with precision. Following these techniques minimizes waste and maximizes the quality of the final product, essential for successful DIY woodworking projects.
After the Cut
Having transformed logs into lumber with precision and care, the next steps focus on handling and storing the freshly cut pieces. Proper techniques in removing slabs and stacking lumber are crucial for maintaining the quality of the wood during the drying process.
Removing the Slabs
Once the cutting process concludes, the first task involves safely removing the slabs from the cutting area. Lift each slab carefully, keeping the back straight and using the legs to pick up heavier pieces to avoid strain. It’s essential to clear the area promptly, maintaining a clean and safe workspace. Transport the slabs to a designated staging area where they can be assessed, trimmed if necessary, and prepared for storage. Utilize tools like cant hooks or peaveys for larger slabs, ensuring secure grips and safe handling.
Stacking and Storing Freshly Cut Lumber
Stacking lumber properly ensures adequate air circulation, critical for the drying process, and prevents warping or molding. Follow these guidelines for effective stacking:
- Choose a level, dry area for the lumber stack, ideally sheltered from direct elements but allowing airflow.
- Lay stickers, which are small strips of wood, across each layer of lumber, spacing them evenly at 12 to 18 inches apart. This setup promotes uniform drying.
- Align the stickers vertically when adding new layers, improving the stability of the stack.
- Cover the top of the stack with a roofing felt or a similar water-resistant material, helping protect it from rain while still allowing moisture to escape.
- Leave gaps between the boards in each layer to facilitate airflow, speeding up the drying process without risking the lumber’s quality.
By following these procedures, we ensure that our hard work yields the best possible results, producing high-quality lumber ready for future woodworking projects.
Maintenance and Safety
After discussing the steps for turning logs into lumber, including workspace setup, log preparation, and cutting techniques, it’s crucial to touch upon the maintenance of your chainsaw and safety measures to ensure longevity and prevent accidents.
Chainsaw Maintenance for Longevity
Maintaining a chainsaw is essential for its longevity and efficient performance. Regular checks and upkeep reduce the risks of malfunctions and ensure it remains reliable for cutting lumber.
- Clean the Air Filter: A clean air filter ensures the engine runs smoothly. Check and clean the air filter regularly, particularly after extended use or when operating in dusty conditions.
- Sharpen the Chain: A sharp chain cuts efficiently and safely. Sharpen the chain whenever it starts to dull. Typically, after every few hours of use, a chain needs attention.
- Check Chain Tension: Proper chain tension improves cutting performance and reduces wear. Adjust the chain tension before use and during breaks in your work, as a hot chain may expand.
- Lubricate the Chain: Regular lubrication reduces friction and wear on the chain and bar. Ensure the chainsaw has enough oil and that the lubrication system works correctly.
- Inspect for Damage: Regularly inspect the chainsaw for any loose, damaged, or worn parts, especially the bar, chain, and sprockets. Replace parts as necessary to maintain optimal performance.
Safety Tips to Avoid Accidents
Using a chainsaw for cutting logs into lumber requires adherence to safety guidelines to prevent accidents.
- Wear Proper Protective Gear: Always wear protective gear, including gloves, hearing protection, safety glasses, and a hard hat. Chainsaw chaps or pants can provide additional protection for your legs.
- Maintain a Clear Workspace: Keep the workspace free of obstacles and debris. A clear area prevents tripping hazards and allows for easier movement around the logs.
- Use Correct Cutting Techniques: Employ the cutting techniques outlined earlier, focusing on keeping the chainsaw stable and body out of the kickback zone.
- Stay Alert and Focused: Always stay focused on the task. Fatigue and distractions can lead to mistakes. Take regular breaks to prevent tiredness.
- Handle the Chainsaw with Both Hands: For maximum control and precision, always use both hands to operate the chainsaw.
By following these maintenance and safety tips, you ensure both the longevity of your chainsaw and your safety during the log-to-lumber conversion process. This care and attention to detail support the production of high-quality lumber for your projects while minimizing risks and extending the life of your equipment.
Troubleshooting
After meticulously following each step from selecting and preparing logs to cutting them into lumber and ensuring chainsaw maintenance, one might still encounter some issues. Let’s tackle common problems and provide solutions for a smoother sawing process.
Addressing Uneven Cuts
Uneven cuts often result in lumber that is unsuitable for most woodworking projects. Three primary factors contribute to this problem: improper saw operation, uneven chain sharpening, and guide bar issues.
- Check guide bar alignment, ensuring it’s perfectly straight and not bent or worn. A straight guide bar promotes uniform cuts.
- Examine the chain’s sharpness on both sides. Both edges of the chain require equal sharpening to prevent the saw from veering off to one side.
- Maintain consistent pressure while cutting. Variations in pressure can lead to uneven cuts, so aim for uniformity throughout the process.
Practicing these adjustments enhances cutting precision, resulting in evenly sized lumber pieces.
Chainsaw Stalling Issues
A chainsaw that stalls during cutting disrupts the workflow and can lead to incomplete or uneven cuts. Several factors might cause this, including inadequate fuel mixture, dirty air filters, or issues with the chainsaw’s internal components.
- Ensure the correct fuel mixture. Follow the manufacturer’s recommendations for the fuel-to-oil ratio to prevent running issues.
- Clean or replace the air filter. A clean air filter ensures optimal air flow to the engine; a clogged filter can cause stalling.
- Inspect the spark plug and fuel lines for signs of wear or damage. Replace them if necessary to maintain efficient operation.
Addressing these areas often resolves stalling issues, allowing for continuous and effective use of the chainsaw in converting logs into lumber.
Alternative Methods
In exploring ways to cut logs into lumber, we sometimes require alternative approaches to complement or enhance the chainsaw method. These alternatives offer versatility for both small-scale and large-scale projects, ensuring that users can find a suitable method regardless of their specific needs or constraints.
Using a Chainsaw Mill Attachment
Utilizing a chainsaw mill attachment represents an effective transition from traditional chainsaw cutting to a more precise lumber-making process. This attachment, which mounts onto the chainsaw’s guide bar, converts the chainsaw into a portable milling machine. It allows for greater accuracy in cutting planks of a consistent thickness directly from logs. Operating with a chainsaw mill attachment involves securing the log in place, setting the desired plank thickness on the mill, and guiding the chainsaw along the mill’s rail. This method proves especially practical for cutting large logs that are difficult to transport, enabling users to mill lumber on-site with remarkable precision.
Sawmilling for Larger Projects
For projects demanding higher volumes of lumber or requiring exceptionally precise cuts, professional sawmilling emerges as a robust alternative. Sawmills, ranging from portable to stationary models, are designed for efficient conversion of logs into lumber on a larger scale. Opting for sawmilling services or investing in sawmill equipment becomes essential when the project scope exceeds the practical capacity of chainsaw-based methods. Sawmills not only enhance productivity but also ensure uniformity and dimensional accuracy across all lumber produced. This method is highly suitable for extensive construction projects, commercial lumber production, or when working with a significant quantity of logs. By leveraging sawmilling, users achieve expedited processing times and improved lumber quality, making it a go-to solution for larger-scale lumber needs.
Conclusion
We’ve walked through the essentials of transforming logs into lumber right in our backyard. From setting up our workspace and preparing the log to mastering the cut with our chainsaw, we’ve covered the ground to ensure we get the best out of our efforts. We’ve also tackled those pesky problems that might throw a wrench in our work and explored alternatives for those of us looking to step up our lumber game. Whether we stick with our trusty chainsaw or decide to venture into the realm of sawmilling, we’re now equipped with the knowledge to make lumber that meets our needs. Here’s to the satisfaction of building with lumber we’ve made ourselves—there’s nothing quite like it.
Related Posts:
- Ultimate Guide: How to Cut Logs into Lumber with a Chainsaw
- DIY Guide: How to Make a Chainsaw Mill & Optimize Performance
- How to Build a Chainsaw Winch: DIY Guide & Innovations
- Ultimate Guide: How to Sharpen Wood Carving Tools Effectively
- Ultimate Guide: How to Use a Chainsaw Mill Efficiently & Safely


