If you’ve ever found your chainsaw sputtering to life or struggling to keep its roar, chances are the carburetor’s calling for a clean-up. It’s the heart of your chainsaw, mixing air and fuel to power up those cutting tasks. We know it sounds daunting, but trust us, it’s a task you can tackle with a bit of guidance.
We’re here to walk you through the steps of cleaning your chainsaw carburetor, ensuring it runs smoothly and efficiently. Whether you’re a seasoned pro or a first-timer, we’ve got the tips and tricks to make this process as painless as possible. So, let’s roll up our sleeves and breathe new life into your chainsaw.
Safety Precautions
Ensuring safety is paramount when undertaking the cleaning of a chainsaw carburetor. We want to make sure that before diving into the details, everyone is well-prepared and protected.
Gather Protective Gear
To start, assembling the right protective gear is critical. This includes safety goggles to shield your eyes from any debris, durable gloves to protect your hands from sharp edges and chemicals, and a long-sleeved shirt to prevent skin contact with harmful substances. Always have these items on hand before beginning the carburetor cleaning process to minimize any risks of injury.
Understand Your Chainsaw’s Model
Next, it’s essential to familiarize yourself with your chainsaw’s specific model. Different chainsaws may have varying carburetor designs and components, making the cleaning process unique for each. Consult the user manual or manufacturer’s website for guidance on safely disassembling and accessing the carburetor. This step ensures you do not inadvertently damage your equipment or compromise its functionality during cleaning.
Materials and Tools Required
Moving forward from emphasizing safety and preparation, let’s gather all necessary materials and tools to ensure a successful cleaning of the chainsaw carburetor. These items play a pivotal role in removing dirt and restoring performance.
Cleaning Solvents
Choosing the right cleaning solvents ensures the removal of built-up residue and grime without damaging carburetor components. Commercial carburetor or engine cleaner stands out for its effectiveness in breaking down tough deposits. Opt for solvents designed specifically for carburetors to avoid corrosion or damage to plastic and rubber parts. Always follow the manufacturer’s instructions for use to ensure safety and effectiveness.
Compressed Air
Compressed Air is indispensable for blowing out dust and particles from hard-to-reach areas of the carburetor. A can of compressed air or an air compressor with a blower attachment works best. It ensures thorough cleaning without introducing moisture, which can lead to rust or deterioration of metal parts. Direct the airflow through each passageway and port to dislodge any remaining debris after solvent cleaning.
Carburetor Adjustment Tools
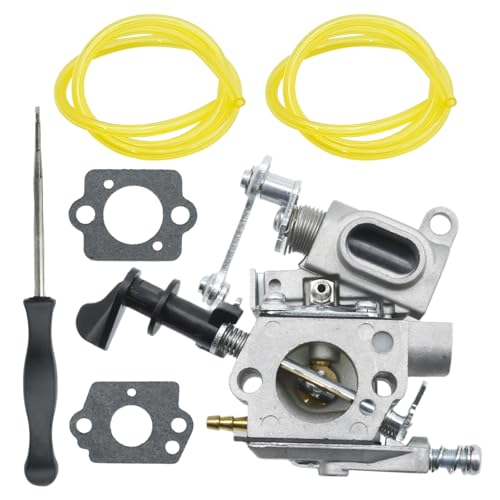
To fine-tune the carburetor post-cleaning, Carburetor Adjustment Tools are essential. Specific chainsaw models may require unique tools for adjustment. These might include a flathead screwdriver, a D-shaped tool, or a Pacman-shaped tool, depending on the carburetor’s design. Procuring the correct adjustment tools guarantees precise settings, optimizing the chainsaw’s performance and efficiency. Always consult the chainsaw’s manual to identify the right tools for your model.
Preparing the Chainsaw
With the right materials and tools in hand, it’s time to prepare the chainsaw for cleaning. Ensuring safety and proper disassembly are crucial steps to effective carburetor cleaning.
Ensuring the Chainsaw is Powered Off
Before touching any part of the chainsaw, make sure it is completely powered off. If the chainsaw is gas-powered, disconnect the spark plug to prevent accidental starting. For electric models, unplug the chainsaw from its power source or remove its battery. This step ensures a safe working environment and eliminates the risk of accidental starts while cleaning.
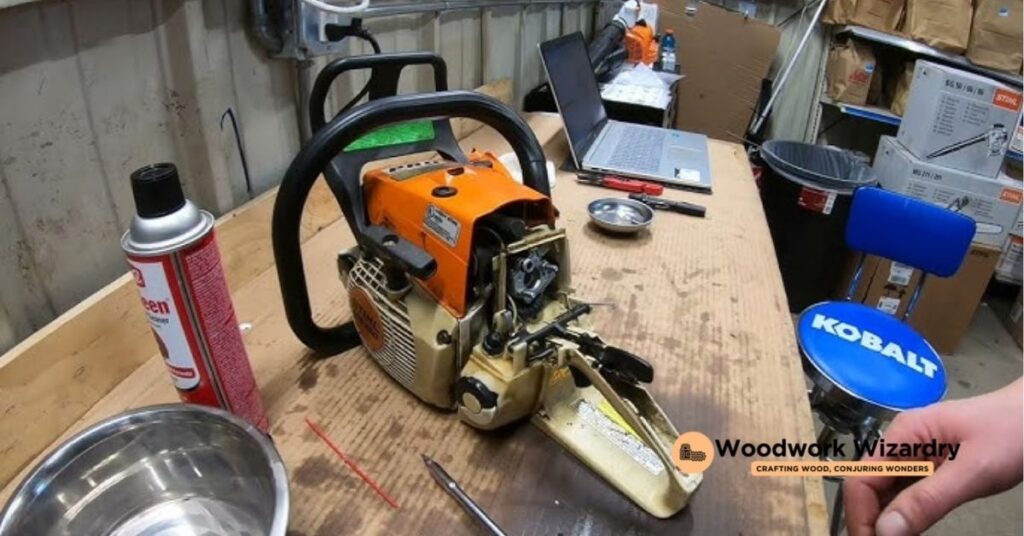
Removing the Chainsaw Cover
Locate the screws or clips holding the chainsaw’s cover in place. Using the appropriate screwdriver, loosen and remove these fasteners. Lift off the cover gently. This exposes the internal components, including the air filter and carburetor, making them more accessible for thorough cleaning. Remember where each screw and fastener belongs to ensure easy reassembly after cleaning.
Detaching the Air Filter
After removing the chainsaw’s cover, the air filter becomes visible. On most chainsaw models, the air filter will either clip on or screw into place. Carefully remove any clips or unscrew the filter. Take the air filter out, taking note of its condition. If it’s heavily soiled, it might also need cleaning or replacing. This ensures that no debris obstructs the air flow to the carburetor during operation.
Removing the Chainsaw Carburetor
Continuing from our discussion on preparing the chainsaw for cleaning, the next step involves the careful removal of the chainsaw carburetor. This phase is critical for ensuring that we can clean every nook and cranny of the carburetor without causing any damage to the chainsaw itself.
Disconnecting the Fuel Lines
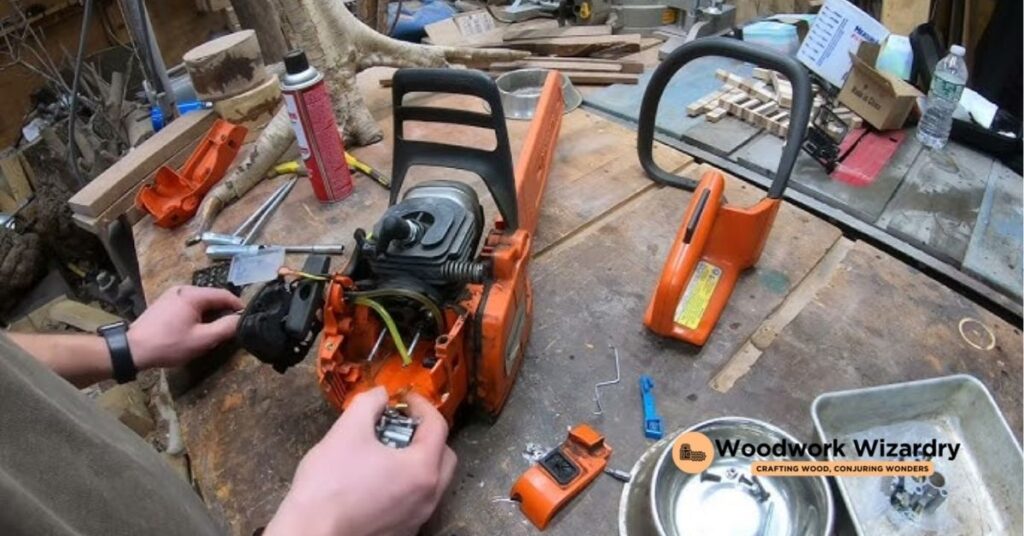
Initiate this process by locating the fuel lines connected to the carburetor. These tubes transport fuel from the chainsaw’s tank to the carburetor and are crucial for the chainsaw’s operation. Wearing gloves for protection, gently pinch the clips securing the fuel lines and slide them away from the connection points. Carefully pull the fuel lines off the carburetor nipples. Take care to note which fuel line connects to which point on the carburetor to ensure correct reassembly. If the chainsaw has been used recently, make sure to catch any fuel that may leak out during this process using a rag or towel to prevent any fire hazards.
Unscrewing the Carburetor
With the fuel lines disconnected, proceed to unscrew the carburetor from the chainsaw. Locate the mounting screws or bolts that hold the carburetor in place. Typically, chainsaws have two to four screws securing the carburetor to the engine. Using a screwdriver or a socket wrench that fits the screw heads perfectly, turn the screws counterclockwise to loosen them. Keep the screws in a safe place to avoid losing any small parts. Once all screws are removed, gently lift the carburetor away from the chainsaw’s body. Ensure to detach any remaining links or throttle connections by gently unhooking them, being cautious not to damage any sensitive parts.
This step-by-step guide allows for a smooth and efficient removal of your chainsaw’s carburetor, setting the stage for a thorough cleaning process.
Cleaning the Carburetor
Having removed the carburetor successfully, it’s now time for a thorough cleaning. This crucial step ensures that your chainsaw runs smoothly and efficiently.
Disassembling the Carburetor
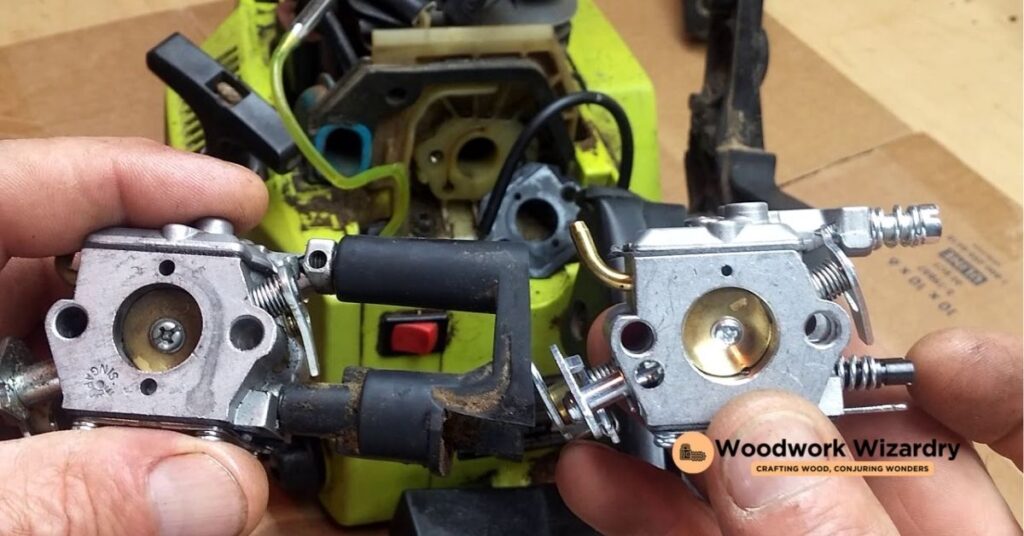
Disassemble the carburetor carefully, recording each step to aid in reassembly. Begin by removing the screws that hold the carburetor’s outer casing. Next, extract the float bowl, being mindful of any gaskets or O-rings to prevent damage. Keep all parts organized to simplify the reassembly process.
- Remove Screws: Locate and unscrew all visible screws on the carburetor’s surface.
- Extract Float Bowl: Gently pull the float bowl away from the main body.
- Preserve Gaskets: Handle gaskets and O-rings with care to avoid tearing.
Cleaning the Components with Solvent
Once disassembled, clean each component with a carburetor-specific solvent. Submerge metal parts in the solvent for several minutes to break down the build-up. Use a soft brush to scrub away stubborn debris. Avoid soaking rubber parts to prevent damage.
- Submerge Metal Parts: Place metal components into the cleaning solvent.
- Scrub with a Brush: Use a soft brush to remove any remaining deposits.
- Handle Rubber Parts Separately: Clean rubber pieces with a damp cloth instead of soaking.
Drying the Components
After cleaning, it’s essential to dry each component thoroughly. Compressed air is effective for removing moisture from small crevices. Lay out all parts on a clean cloth and allow them to air-dry completely before reassembly. This step prevents potential issues caused by moisture.
- Use Compressed Air: Blow air through each component to remove trapped moisture.
- Air-Dry Components: Place all parts on a cloth, ensuring they’re thoroughly dry.
Reassembling the Carburetor
Reassemble the carburetor by reversing the disassembly process. Begin by replacing the float bowl and ensuring all gaskets and O-rings are properly seated. Reattach the carburetor to the chainsaw, connecting fuel lines and securing it with screws. Double-check all connections for a snug fit to avoid leaks.
- Replace Float Bowl and Gaskets: Ensure a tight seal by correctly positioning gaskets.
- Reattach to Chainsaw: Connect the carburetor and tighten all screws.
- Double-Check Connections: Verify that all parts are securely reassembled.
Reinstalling the Carburetor
Now that the carburetor is clean and resembles a finely-tuned piece of machinery again, it’s time to put it back where it belongs inside the chainsaw. Reinstallation is just as critical as the disassembly and cleaning phases, ensuring everything functions seamlessly for optimal performance.
Connecting the Fuel Lines
Begin by carefully reconnecting the fuel lines to the carburetor. It’s essential to ensure that each line fits snugly onto its respective port. If the chainsaw has two fuel lines, one serves as the fuel intake and the other as the return line; connect them correctly to avoid fuel flow issues. A firm push until each line feels secure does the job, but double-check for a tight seal to prevent leaks, which could lead to starting problems or unsafe operation.
Attaching the Air Filter and Cover
Next, reattach the air filter to the carburetor. The air filter ensures that the engine receives clean air, free from dust and debris that could harm internal components. Insert the air filter carefully back into its housing, ensuring it fits correctly without forcing it. Lastly, secure the cover over the air filter and carburetor assembly. Align the cover properly and tighten the screws or fasteners. This step not only protects the carburetor and air filter from external contaminants but also holds everything together, allowing the chainsaw to operate efficiently and safely.
Adjusting the Carburetor Settings
Following a thorough cleaning, adjusting the carburetor settings ensures the chainsaw operates efficiently. Let’s dive into fine-tuning the carburetor for optimal performance.
Tips for Adjusting Idle Speed
- Locate the Idle Speed Screw: This screw controls the engine’s idle speed. You’ll find it on the carburetor, often labeled with an “I” or “T.”
- Warm Up the Engine: Before any adjustments, start the chainsaw and let it run for a few minutes. A warm engine gives more accurate adjustments.
- Turn the Screw Clockwise: To increase idle speed, turn the screw clockwise. Adjust this until the chain starts to move, then back it off slowly until the chain stops.
- Listen for a Smooth Idle: The goal is a smooth, even idle sound. If the chainsaw stalls or the idle is uneven, further adjustments are necessary.
- Repeat Adjustments as Needed: Achieving the perfect idle speed may require multiple adjustments. Patience ensures a well-tuned chainsaw for reliable operation.
Testing the Chainsaw’s Performance
After adjusting the carburetor settings, testing the chainsaw’s performance is essential to ensure it runs smoothly under various conditions.
- Perform a Stationary Test: Start the chainsaw and let it idle. Listen for a steady hum without sputtering, signifying a correctly adjusted idle.
- Test Under Load: Cut through a few logs of different sizes. The chainsaw should maintain power and efficiency regardless of the load.
- Adjust as Necessary: If the chainsaw falters or struggles, minor adjustments to the idle speed screw may be needed. A smooth operation indicates the carburetor is correctly set.
- Monitor for Consistency: During use, keep an ear out for changes in performance, indicating the carburetor may need readjustment.
By following these steps, we ensure the chainsaw operates at peak efficiency, providing reliable performance and extending the life of the engine. With the carburetor cleaned and properly adjusted, the chainsaw is ready for whatever task lies ahead.
Troubleshooting Common Issues
After cleaning and adjusting your chainsaw’s carburetor, you may still encounter issues that affect its performance. Let’s dive into troubleshooting common problems to keep your chainsaw running smoothly.
Solving Starting Problems
Check the spark plug and air filter first if your chainsaw refuses to start. A dirty spark plug or a clogged air filter can prevent the engine from starting. Remove the spark plug, clean it with a wire brush, and check for any signs of wear or damage. Replace it if necessary. Similarly, inspect the air filter and clean or replace it if it’s clogged.
Ensure the fuel mixture is correct, as old or improperly mixed fuel can also cause starting problems. Chainsaws typically require a specific gas-to-oil ratio (often 50:1). Empty the fuel tank and refill it with fresh, correctly mixed fuel.
Addressing Irregular Idling
Adjust the idle speed screw if your chainsaw starts but does not idle properly or stalls when idling. Locate the idle speed screw on the carburetor. Turn it clockwise to increase the idle speed or counterclockwise to decrease it. Adjust this screw until the chainsaw idles smoothly without the chain moving.
If adjusting the idle speed does not solve the issue, inspect the fuel lines for leaks or damage. Cracked or worn-out fuel lines can disrupt the fuel flow to the carburetor, causing irregular idling. Replace the fuel lines if you find any signs of deterioration.
By addressing these common issues, we ensure our chainsaw remains in top condition, ready for efficient operation.
Conclusion
We’ve walked through the essential steps to keep your chainsaw’s carburetor clean and functioning at its best. Remember, taking the time to properly maintain your chainsaw not only ensures it runs smoothly but also extends its life. Whether you’re troubleshooting after a thorough cleaning or just keeping up with regular maintenance, the effort you put in pays off in performance. So grab your tools and give your chainsaw the TLC it deserves. Here’s to many more years of reliable cutting and a well-maintained machine that’s ready whenever you are. Happy sawing!
Related Posts:
- Can You Put a Longer Bar on Your Chainsaw? Compatibility & Installation Guide
- Step-by-Step Guide: How to Adjust Chainsaw Carburetor for Optimal Performance
- Ultimate Guide: How to Clean Your Chainsaw Carburetor for Peak Performance
- Safe Hedge Trimming: How to Cut Hedge with Chainsaw & Avoid Mistakes
- Ultimate Guide: How to Measure Chainsaw Bar Chain for Optimal Use
- How to Start a Poulan Chainsaw: A Step-by-Step Guide
- Understanding Chain Pitch: Essential for Smooth Machinery Operation
- Beginner’s Guide to Chip Carving: Tools, Techniques, and Tips

