Discovering a stripped screw hole in your wooden furniture or project can be frustrating, but don’t worry—it’s a common problem with several effective answers. Whether you’re dealing with a loose hinge on a cabinet door or a wobbly chair leg, we’ve got you covered with proven repair techniques that will restore strength to those worn-out holes.
In this comprehensive guide, we’ll walk you through multiple methods to fix stripped screw holes in wood, from simple toothpick tricks to wood filler applications and dowel inserts. These repairs don’t require expensive tools or professional woodworking skills—just a few basic supplies and our step-by-step instructions. Let’s transform those problematic holes into secure fastening points that will hold screws firmly for years to come.
Understanding Stripped Screw Holes in Wood
Stripped screw holes occur when the wood fibers around a screw become damaged, preventing the screw from gripping properly. These frustrating issues happen when screws are overtightened, removed and reinserted multiple times, or when the wood itself ages and weakens. The telltale signs include screws that spin freely without catching, wiggle even when tightened, or pull out with minimal force.
Several factors contribute to this common woodworking problem. Hardware that’s too large for the pre-drilled hole can splinter the surrounding wood. Repeatedly removing and reinserting screws gradually wears away the wood fibers. Moisture damage also weakens wood’s structural integrity, making it more susceptible to stripping when screws are inserted.
Wood type significantly impacts how prone screw holes are to stripping. Softwoods like pine or cedar strip more easily than hardwoods such as oak or maple. The grain direction matters too – screws inserted perpendicular to the grain have less holding power than those aligned with it. Understanding these fundamentals helps determine the most appropriate repair method for your exact situation.
The location and purpose of the damaged hole determines which repair approach makes the most sense. Load-bearing connections require stronger answers than decorative elements. For example, a stripped hole on a cabinet hinge needs a more substantial fix than one on a lightweight picture frame. Recognizing the severity of your exact issue is crucial before selecting the appropriate repair technique.
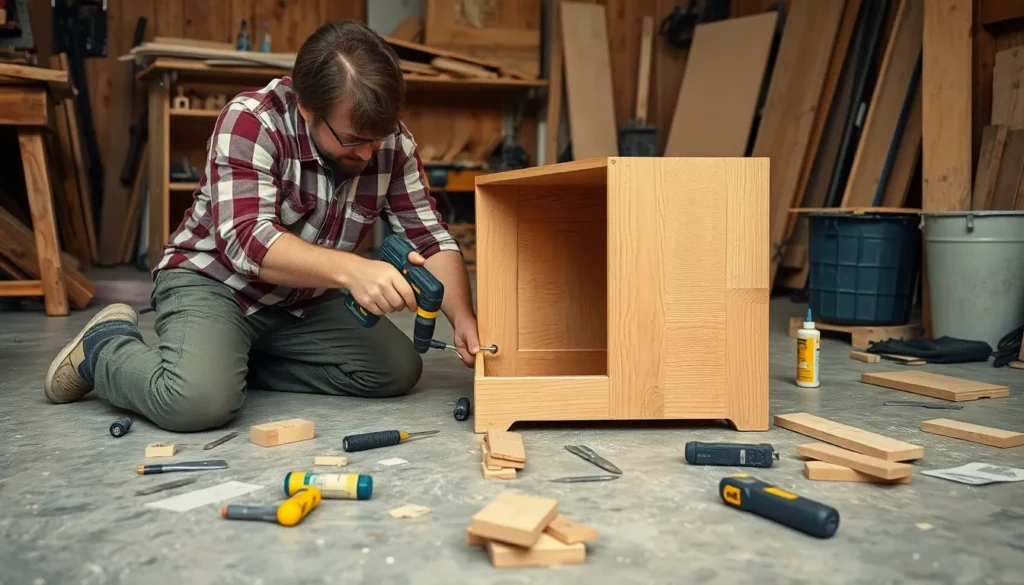
Tools and Materials You’ll Need

Repairing a stripped screw hole requires exact tools and materials to achieve a strong, lasting fix. These items are readily available and typically inexpensive, making DIY wood repairs accessible for most homeowners.
Essential Tools
A successful screw hole repair depends on having the right tools on hand. You’ll need a hammer for tapping in fillers, a drill for creating pilot holes, a utility knife for trimming excess material, and sandpaper for smoothing the repaired area. These basic tools ensure clean, professional-looking results while restoring functionality to the damaged wood.
Materials for Different Repair Methods
The materials you’ll need vary based on your chosen repair method. For the toothpick or matchstick method, gather wooden toothpicks or matchsticks (with heads removed) and wood glue—you’ll insert 2-3 of these into the hole with glue for added strength. The wood strips technique requires thin strips cut from scrap wood matching your original piece, which you’ll dip in glue before hammering into the hole. For more permanent repairs, the doweling method uses hardwood dowels inserted into an enlarged hole with glue, creating a solid base for new screws. Each technique requires wood glue to enhance bond strength, though it’s optional for toothpicks in low-stress applications. Remember that softwoods benefit from simple repairs like the toothpick method, while load-bearing connections often need the sturdier doweling approach.
Evaluating the Damage

Accurately assessing the condition of a stripped screw hole is essential for selecting the most effective repair method. The severity of damage determines which technique will restore proper functionality to your wooden furniture or project.
Minor vs. Severe Stripping
Minor stripping occurs when the threads in the wood are partially worn but some wood material remains intact for gripping. This type of damage is especially common in softwoods like pine or cedar, or when screws have been only recently loosened. You’ll notice the screw still catches somewhat but feels loose or spins more easily than it should.
Severe stripping involves complete loss of the wood threads, creating an oversized hole with no remaining material to grip the screw. This extensive damage typically results from repeated use of the same hole, overtightening, or when working with hardwoods that have split around the screw. In severely stripped holes, screws spin freely without resistance and pull out with minimal effort. The surrounding wood often appears damaged or splintered, making it impossible for the original screw to hold securely without proper repairs.
Quick Fix Methods for Lightly Stripped Holes

Quick fixes offer simple answers for lightly stripped screw holes in wood without requiring specialized tools or extensive woodworking experience. These methods work best for minor damage where the hole hasn’t completely lost its ability to grip.
Using Toothpicks and Wood Glue
The toothpick method creates a solid new base for screws to grip by filling the stripped hole with wood material. Start by gathering several wooden toothpicks and wood glue. Insert multiple toothpicks into the damaged hole, packing them tightly to fill the space. Add a few drops of wood glue either before or after placing the toothpicks for enhanced strength. Tap the toothpicks gently with a hammer to ensure they’re firmly seated in the hole. Once the toothpicks are flush with the wood surface, snap off any protruding ends. Sand the area smooth with fine-grit sandpaper. After the glue dries completely (typically 1-2 hours), reinsert the original screw into the repaired hole for a secure fit.
The Matchstick Method
Wooden matchsticks provide an excellent alternative to toothpicks, especially for slightly larger stripped holes. Remove the match heads first, leaving only the wooden sticks. Apply a small amount of wood glue inside the damaged hole. Insert multiple matchsticks into the hole until it’s completely filled. Press them firmly into place, ensuring they reach the bottom of the hole. Tap the matchsticks with a hammer if needed to seat them properly. Snap off the excess wood flush with the surface. Sand the area until smooth and level with the surrounding wood. This method creates new wood fibers for the screw to grip, effectively restoring the hole’s functionality without requiring specialized materials.
Advanced Repair Techniques for Severely Stripped Holes

When standard fixes aren’t enough for badly damaged screw holes, more robust answers become necessary. These advanced techniques provide superior strength and longevity for heavily damaged wood that can’t be repaired with simple methods.
Wood Filler Method
High-density wood filler offers an effective solution for moderately damaged holes. We recommend thoroughly cleaning the stripped hole before applying the filler, pressing it firmly into the void until completely packed. Allow the filler to cure according to the manufacturer’s specified timeframe (typically 2-6 hours). Once cured, drill a pilot hole slightly smaller than your screw diameter through the filler to prevent cracking when reinserting the hardware. This method works particularly well for areas under moderate stress where structural integrity isn’t the primary concern.
Dowel Plug Technique
The dowel plug technique creates a solid wood-to-wood connection that’s significantly stronger than fillers. First, drill out the damaged hole to a uniform diameter matching your hardwood dowel (typically 1/4″ to 3/8″). Coat the dowel with wood glue, ensuring complete coverage, and insert it firmly into the freshly drilled hole. After trimming any excess dowel flush with the surface, let it cure for 12-24 hours before drilling a new pilot hole for your screw. This method provides excellent reinforcement for high-stress joints like chair legs, table supports, or cabinet hinges where durability matters most.
Wood Epoxy Answers
Two-part wood epoxy delivers maximum strength for severely damaged areas with large voids. Mix the epoxy components according to package instructions and fill the hole completely, shaping it slightly before it hardens. After full curing (4-24 hours depending on the product), drill your pilot hole through the hardened epoxy. Products like JB Weld create an exceptionally strong bond that adheres to both the surrounding wood and the screw threads. Epoxy outperforms standard wood fillers in load-bearing applications, making it ideal for repairing structural components that must withstand important weight or regular movement.
| Method | Strength | Best For | Cure Time |
|---|---|---|---|
| Wood Filler | Moderate | Small holes, low stress | 2–6 hours |
| Dowel Plug | High | High-stress joints | 12–24 hours |
| Epoxy | Very High | Large voids, heavy loads | 4–24 hours |
For quick fixes in less visible areas, try inserting glued toothpicks or matchsticks into the hole, snapping off any excess, and driving the screw. Hidden areas might benefit from using longer screws (switching from 1″ to 2″) to reach fresh wood beyond the damaged section. Pre-treating screw threads with wax reduces friction during installation and helps prevent future stripping.
Installing Hardware After Repairs

Once you’ve completed the repair of your stripped screw hole, proper installation of hardware is crucial to prevent future damage. Following exact techniques ensures your repaired area remains sturdy and functional for years to come.
Proper Drilling Techniques
Drilling straight is essential when reinstalling hardware into a repaired screw hole. Always position your drill perpendicular to the wood surface to prevent veering off course, which can damage your fresh repair. Selecting the right drill bit makes a important difference in creating a solid anchor point – choose a bit that’s slightly smaller than your screw diameter to create proper threading. Pre-drilling pilot holes before inserting screws reduces pressure on the repaired area and minimizes the risk of re-stripping the hole.
Choosing the Right Screws
The material of your screws matters just as much as the repair itself. For outdoor applications, stainless steel screws resist corrosion and provide lasting durability compared to standard options. Screw length and type should match your exact project requirements – wood screws with coarse threads work better in softwoods while fine-threaded screws are more appropriate for hardwoods. Consider using a larger screw if the hole was significantly damaged, but ensure it still fits the hardware you’re installing without creating new problems. Applying a small amount of wax to screw threads reduces friction during installation, making the process smoother and decreasing the chance of stripping freshly repaired holes.
Preventing Future Stripped Screw Holes

Properly drilled pilot holes significantly reduce the risk of stripping. These starter holes should be slightly smaller than the screw’s core diameter, creating the perfect pathway for installation without damaging surrounding wood fibers.
Selecting the correct screw size makes all the difference in maintaining wood integrity. Screws that match both the load requirements and wood type provide optimal holding power without unnecessary stress on the material. Over-tightening is a common mistake that weakens wood fibers, so stop when the screw head sits flush with the surface.
Metal threaded inserts offer superior reinforcement for heavy-duty applications. These specialized hardware pieces create strong, reusable connection points that withstand repeated assembly and disassembly without degrading the wood structure.
Wood glue serves as an excellent reinforcement when applied to screws before insertion. This simple addition enhances grip strength by filling microscopic gaps between the screw threads and wood, reducing movement that leads to stripping over time. For maximum effectiveness, allow the glue to partially set before final tightening.
Conclusion
Repairing stripped screw holes in wood doesn’t require professional expertise or expensive tools. With the techniques we’ve shared you can restore functionality to your wooden furniture and projects using simple materials like toothpicks wood filler or dowels.
Remember that the severity of the damage should guide your repair approach. For minor stripping a quick toothpick fix might suffice while severely damaged holes call for dowels or epoxy answers.
By following proper installation techniques like pre-drilling and choosing appropriate screws you’ll prevent future stripping issues. These repair methods not only extend the life of your wooden items but also save you money on replacements.
Now you’re equipped to tackle any stripped screw hole with confidence and restore strength to your wooden pieces for years to come.
Frequently Asked Questions
What causes stripped screw holes in wood?
Stripped screw holes occur when wood fibers around the screw become damaged. This typically happens due to overtightening screws, repeatedly removing and reinserting screws, or aging wood that has lost its structural integrity. You might notice a stripped hole when screws spin freely without gripping or pull out easily when minimal force is applied.
Can I fix stripped screw holes without special tools?
Yes, you can fix stripped screw holes with basic household items. For lightly stripped holes, the toothpick method works well—simply insert wooden toothpicks with wood glue into the hole, let dry, trim excess, and reinsert the screw. Other simple fixes include using wooden matchsticks or longer screws. Most repairs require only basic tools like a screwdriver, utility knife, and possibly a drill.
Which repair method is best for heavily damaged screw holes?
For severely stripped or enlarged holes, the dowel plug technique offers the strongest repair. Drill out the damaged hole to a clean, consistent diameter, coat a hardwood dowel with wood glue, tap it into the hole, allow it to dry, then trim flush and drill a new pilot hole. Two-part wood epoxy also provides excellent strength for badly damaged areas in high-stress locations.
How do softwoods and hardwoods differ when it comes to screw holes?
Softwoods (pine, cedar, fir) are more prone to stripping because their fibers compress and wear away more easily. Hardwoods (oak, maple, walnut) typically hold screws better due to their denser structure and tighter grain pattern. Repair techniques work for both types, but you may need more substantial reinforcement when working with softwood furniture or components.
Does the location of the stripped hole matter when choosing a repair method?
Absolutely. Load-bearing connections (like chair legs or bed frames) require more robust repair solutions such as dowel plugs or epoxy fills. Decorative or low-stress areas (like cabinet door hinges) can often be fixed with simpler methods like toothpicks or wood filler. Always consider the purpose and stress level of the connection when selecting your repair approach.
How can I prevent screw holes from stripping in the future?
Prevent stripped holes by drilling proper pilot holes slightly smaller than the screw’s core diameter. Avoid overtightening screws—stop when the screw head is flush with the surface. For heavy-duty applications, consider using metal threaded inserts. Applying wax to screw threads reduces friction during installation, and using the correct screw size for your project maintains wood integrity.
What supplies do I need to fix a stripped screw hole?
The basic supplies include wood glue, toothpicks or matchsticks for simple repairs, wood filler or wood dowels for more severe damage, and epoxy for critical repairs. Tool-wise, you’ll need a screwdriver, utility knife, sandpaper, and potentially a drill with appropriate bits. Most repairs can be completed with items you likely already have around your home.
Can I use longer screws instead of repairing the hole?
Using longer screws can be a quick fix for lightly stripped holes as they can reach undamaged wood beyond the stripped area. However, this is generally a temporary solution and may not work for load-bearing connections. It’s also important to ensure the longer screw won’t protrude through the other side of the material or damage adjacent components.


