Keeping your wood burning stove clean isn’t just about aesthetics—it’s essential for safety and efficiency. A well-maintained stove burns fuel more effectively, produces more heat, and significantly reduces the risk of chimney fires that could threaten your home.
We’ve helped countless homeowners transform their grimy, underperforming stoves into clean, efficient heating powerhouses. In this comprehensive guide, we’ll walk you through our proven step-by-step process for cleaning every part of your wood burning stove, from the firebox to the glass door. You’ll discover which tools work best, learn professional techniques, and find out how often you should perform maintenance to keep your stove in prime condition.
Why Regular Cleaning of Your Wood Burning Stove Is Important
Regular cleaning of your wood burning stove extends its lifespan significantly and optimizes its performance. A clean stove burns fuel more efficiently, generating more heat from less wood and saving you money on fuel costs. Creosote buildup—a highly flammable, tar-like substance that accumulates in the stove and chimney—presents a serious fire hazard when left unchecked.
Soot deposits on the glass door and interior surfaces reduce heat output by up to 25%, making your stove work harder to warm your space. Ash accumulation restricts airflow to the fire, causing incomplete combustion and increased smoke production. Proper maintenance also prevents unpleasant odors from permeating your home during idle periods.
Environmental benefits of a clean stove include reduced particle emissions and lower carbon monoxide production. Most manufacturers specify that regular cleaning is necessary to maintain the warranty on your appliance. Signs your stove needs cleaning include:
- Difficulty starting or maintaining fires
- Excessive smoke escaping into the room
- Visible thick black soot on the glass
- Reduced heat output even though burning quality wood
- Strange burning smells coming from the stove
A thorough cleaning twice per season provides optimal performance for most wood stoves. High-use stoves operating daily throughout winter months may require monthly maintenance checks and more frequent cleaning.
Tools and Materials You’ll Need for Cleaning

Proper cleaning of your wood burning stove requires exact tools and materials to ensure efficiency and safety. Gathering these items before you start makes the cleaning process much smoother:
- Ash pan and shovel: Essential for removing accumulated ash and debris from the firebox without creating a mess.
- Vacuum cleaner with HEPA filter: Helps extract fine dust particles from the stove interior and air baffles, preventing ash from spreading throughout your home.
- Steel wool or wire brush: Perfect for tackling stubborn stains and built-up residue on cast iron surfaces.
- Soft cloths: Use these for general wiping and polishing of stove surfaces after cleaning.
- Kosher salt and water solution: Creates an effective, natural cleaning mixture specifically for exterior cast iron surfaces.
- Rubber gloves: Protect your hands from potentially harsh cleaning answers and dirty residue.
- Plastic sheeting: Lay this around your work area to catch falling debris, making cleanup easier and protecting your flooring.
Having these tools readily available ensures you’re prepared to thoroughly clean every component of your wood burning stove. The right equipment not only makes the job easier but also helps achieve better results for optimal stove performance.
Preparing Your Stove for Cleaning

Proper preparation is crucial before cleaning your wood burning stove to ensure safety and effectiveness. Taking the right precautions protects both you and your home during the cleaning process.
Ensuring the Stove Is Cool and Safe to Clean
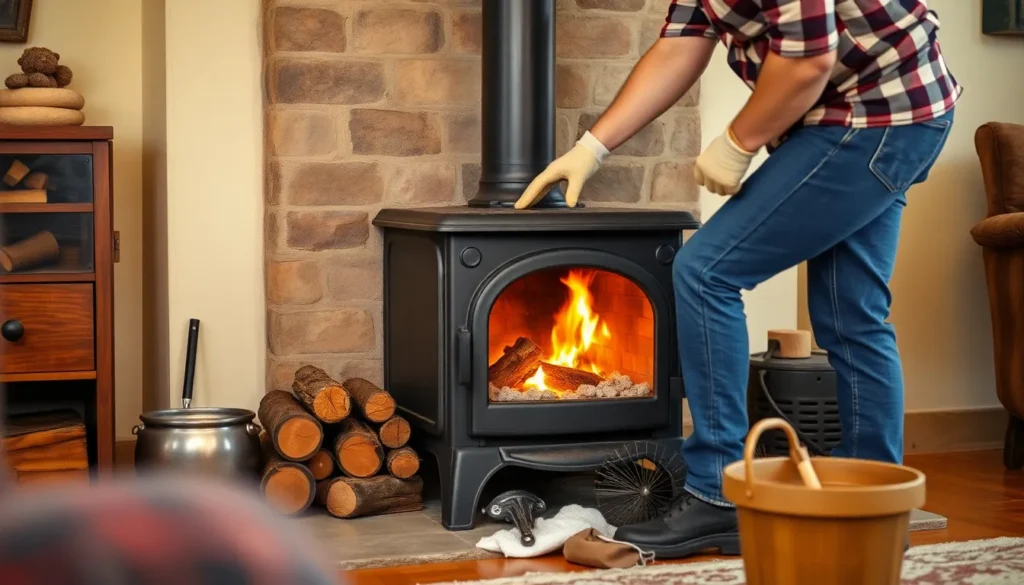
Safety comes first when preparing to clean your wood burning stove. Wait at least 2 hours after the last use to ensure the stove has completely cooled down. Touch the exterior of the stove to verify it’s cool before proceeding with any cleaning activities. Always wear protective gloves during the cleaning process to protect your hands from potential irritants. Avoid inhaling dust particles that may be released during cleaning, as these can cause respiratory issues. Setting up proper ventilation in the room creates a safer environment for tackling this maintenance task.
Removing Ashes and Debris
Effective ash removal prevents dust from spreading throughout your home. Use a dedicated ash vacuum or ash pan to carefully extract loose ashes from the firebox. Cover the floor beneath your stove with plastic sheeting to catch any falling debris and make cleanup easier. For stubborn residue that won’t budge with standard cleaning, create a solution using 2 cups of kosher salt mixed with half a gallon of lukewarm water. Apply this mixture to tough spots and scrub gently with a cloth or steel wool. The salt acts as a natural abrasive that breaks down built-up carbon without damaging the stove’s surfaces. After scrubbing, wipe all surfaces clean with a damp cloth to remove any remaining solution. This preparation stage sets the foundation for a thorough and effective deep cleaning of your wood burning stove.
Deep Cleaning the Firebox and Interior

The firebox and interior components of your wood burning stove require regular deep cleaning to maintain optimal performance. This critical maintenance task removes ash, soot, and creosote that can impede airflow and create fire hazards.
Cooling the Stove Completely
Before beginning any cleaning procedures, ensure your stove has completely cooled. Wait at least 2 hours after the last fire to prevent burns and safely handle all components. During this cooling period, gather your cleaning supplies and prepare your work area with plastic sheeting to catch debris.
Removing Ash and Debris
Start by removing accumulated ash using a shovel and shop vacuum. Focus first on clearing the air baffle holes, as these can easily become clogged and restrict proper airflow. A clogged baffle system reduces heating efficiency and increases smoke production. Carefully remove the ash drawer if your stove has one, emptying it into a metal container for disposal.
Cleaning Baffles and Heat Plates
The baffles (heat-retaining plates) require special attention during your deep clean. Gently lower them according to your stove’s manual specifications and vacuum any debris that has collected on top. These plates often trap important amounts of ash and soot that aren’t visible during regular operation but can impact performance.
Inspecting Firebricks
Examine all firebricks inside your stove for cracks, chips, or other damage. Compromised firebricks reduce heating efficiency and can lead to further deterioration of your stove’s interior. Replace any damaged sections promptly to maintain proper insulation and heat reflection within the firebox.
Cleaning the Glass Door
The glass door provides visual enjoyment of your fire but quickly accumulates sooty residue. Use a dedicated stove glass scraper or non-abrasive tool to remove loose deposits without scratching the surface. For stubborn stains, dampen a cloth with water, dip it into cooled ash from your stove, and gently scrub in circular motions. This natural cleaning method effectively removes tough buildup without harsh chemicals that might damage specialized stove glass. Finish by wiping the glass with a clean, dry cloth to prevent streaking.
Removing Creosote Buildup
Creosote, a tar-like residue that forms when wood doesn’t burn completely, poses a serious fire hazard when allowed to accumulate. Inspect your chimney and flue annually, looking for black or brown sticky deposits on the interior surfaces. Use a properly sized chimney brush to scrape away creosote from flue liners, ensuring smoke can exit freely while reducing fire risk. For safety reasons, always collect creosote in a metal container for disposal, as this highly flammable substance can ignite even after removal. Professional chimney sweeps recommend scheduling an inspection before each heating season to assess creosote levels, particularly for stoves used frequently.
Cleaning the Flue and Chimney

A clean flue and chimney are essential for safe and efficient wood stove operation. Regular maintenance prevents dangerous creosote buildup and ensures proper smoke ventilation throughout the heating season.
Frequency of Cleaning
Chimney cleaning frequency depends directly on your stove usage patterns. After burning through 1-2 cords of wood, it’s time for a thorough cleaning – typically once per heating season for average users. Heavy users burning wood daily should inspect their flues more frequently, approximately every 2-3 months. Burning seasoned hardwoods produces less creosote than softwoods or wet wood, potentially extending the time between cleanings. Visual inspections revealing creosote layers exceeding ⅛ inch thickness indicate immediate cleaning is necessary regardless of time elapsed since the previous maintenance.
Essential Tools for DIY Cleaning
DIY chimney cleaning requires exact equipment designed for the task. Chimney rods with appropriate brush attachments matching your flue’s exact dimensions ensure effective creosote removal without damaging the chimney liner. A drop cloth protects your living space from falling debris and makes cleanup significantly easier. Safety equipment including goggles, dust masks, and sturdy gloves shields you from harmful soot and debris during the cleaning process. A powerful flashlight helps inspect hard-to-see areas inside the flue, ensuring no spots are missed during the cleaning process.
Step-by-Step Cleaning Process
The chimney cleaning process begins with proper preparation of your work area. Seal the stove opening with plastic sheeting to prevent soot from entering your living space. Standing on the roof, remove the chimney cap and insert the brush attached to extension rods into the flue. Push and pull the brush in a scrubbing motion from top to bottom, adding extension rods as needed to reach the entire length of the chimney. Black debris falling indicates successful removal of creosote deposits. After thoroughly brushing all surfaces, reattach the chimney cap securely. Complete the process by vacuuming any debris that collected at the bottom of the flue where it connects to the stove.
Signs of Serious Chimney Problems
Several warning signs indicate potential chimney issues requiring immediate attention. Visible cracks in the chimney structure compromise safety and efficiency. Unusual odors, particularly strong smoky smells when the stove isn’t in use, suggest creosote buildup or blockages. Poor drafting causes smoke to back up into your home instead of exiting through the chimney. White staining (efflorescence) on exterior chimney surfaces indicates moisture penetration and potential structural damage. Animals nesting in the chimney create dangerous blockages that prevent proper ventilation.
When to Call a Professional Chimney Sweep
Professional chimney sweeps should handle complex situations beyond typical DIY maintenance. Excessive creosote buildup exceeding ⅛ inch thickness requires specialized removal techniques and equipment. Structural problems including cracks, damaged flue liners, or deteriorating mortar demand expert assessment and repair. Multi-story or complex chimney systems with multiple bends prove difficult to clean thoroughly without professional tools. Homes with inaccessible roofs or steep pitches present safety hazards for inexperienced homeowners. Annual professional inspections complement DIY maintenance by identifying potential issues before they become serious problems, ensuring your wood stove remains safe and efficient throughout its lifespan.
Maintaining Your Wood Burning Stove Year-Round

Proper maintenance of your wood burning stove throughout the year ensures optimal performance, efficiency, and safety. Regular cleaning and inspection prevent dangerous buildups and extend the lifespan of your heating system.
Seasonal Maintenance Tips
Seasonal inspection of your wood burning stove components prevents hazardous conditions and maintains peak efficiency. Regular checks of the chimney and flue help identify damage or creosote buildup before they become serious problems. Replace worn parts immediately to avoid safety risks and performance issues.
Annual chimney sweeping is essential for maintaining proper airflow and preventing dangerous accumulations that could lead to chimney fires. Schedule this crucial maintenance task before each burning season begins to ensure your system is ready for safe operation.
Before winter arrives, conduct thorough pre-season maintenance of all stove components. Inspect the door gaskets, firebricks, baffle plates, and other internal parts for signs of wear. This comprehensive check ensures your stove operates efficiently when temperatures drop and you need reliable heat.
Year-Round Cleaning
- Empty Ashes:
- Remove accumulated ashes with an ash pan and brush or specialized vacuum, working carefully to minimize dust dispersion
- Ensure the stove has completely cooled before attempting ash removal to prevent burns or accidental fires
- Maintain a thin layer (about 1 inch) of ash at the bottom of the firebox during the burning season to help insulate and improve combustion
- Clean the Glass:
- Apply a wood stove-exact glass cleaner for effective removal of soot and creosote without damaging the glass surface
- Create a natural cleaning solution using damp ash from the stove, applying it in circular motions to cut through stubborn residue
- Avoid abrasive materials like metal scrapers or standard household cleaners that can scratch or damage the specialized glass
- Clean Exterior Surfaces:
- Apply cast iron polish to maintain the finish of iron stoves, creating a protective barrier against moisture and preventing rust formation
- Create a cleaning solution using kosher salt and lukewarm water for tackling tough stains and buildup on exterior surfaces
- Wipe down painted surfaces with a damp cloth regularly to prevent dust accumulation and maintain the stove’s appearance
- Clean Interior Surfaces:
- Remove buildup from interior walls and components using a soft brush to prevent damage to firebricks or other sensitive parts
- Check for and clear any obstructions in air inlets, ensuring proper combustion airflow throughout the system
- Inspect for and address any warping or damage to internal components that might affect the stove’s performance or safety
Additional Tips
Always verify the stove has completely cooled before beginning any cleaning procedure to prevent injuries. Consistent maintenance improves heating efficiency, reduces fuel consumption, and significantly extends your wood burning stove’s operational life.
Common Cleaning Mistakes to Avoid

Ignoring Dust Control
Stirring up ash clouds creates a important health hazard in your home. Many homeowners make the mistake of vigorously sweeping ash, which disperses harmful particles throughout the room. Instead, use gentle vacuuming with a HEPA-filtered vacuum designed for ash removal. This approach contains the fine particles that can otherwise irritate lungs and settle on surrounding surfaces.
Using Harsh Chemical Cleaners
Abrasive commercial cleaners often damage the integrity of wood stove surfaces. These harsh chemicals degrade cast iron components and can permanently etch glass doors. A mild saltwater solution (2 cups kosher salt per ½ gallon water) provides effective cleaning power without the harmful effects. Apply this natural cleaner with a soft cloth for regular maintenance, reserving steel wool only for stubborn deposits on appropriate surfaces.
Leaving Moisture Behind
Incomplete drying after cleaning accelerates rust formation on metal components. Even small amounts of residual moisture can initiate corrosion that compromises your stove’s structural integrity over time. After applying any cleaning solution, always follow up with a thorough wipe-down using a dry, clean cloth to remove all moisture. This extra step protects your investment and extends the life of your wood burning stove.
Neglecting Regular Ash Removal
Letting ash accumulate beyond 1-2 inches severely impacts your stove’s efficiency. Excessive ash buildup restricts critical airflow needed for complete combustion, leading to increased creosote formation in your chimney. Remove ash after every few burns to maintain optimal performance. This simple maintenance task not only improves heat output but also reduces the risk of dangerous chimney fires.
Burning Unseasoned Wood
Using green or unseasoned wood creates excessive ash and accelerates creosote buildup. Properly seasoned firewood (dried for at least 6-12 months) burns cleaner and leaves fewer residues to clean. The moisture content of your firewood significantly affects how often you’ll need to clean your stove. Choosing quality, well-seasoned wood eventually reduces maintenance requirements while improving heating efficiency.
Conclusion
Maintaining your wood burning stove isn’t just about cleanliness – it’s about safety efficiency and longevity. By following our cleaning guide you’ll enjoy more heat from less wood while significantly reducing fire hazards.
Remember that regular maintenance saves you money on fuel costs and repairs while keeping your warranty valid. Twice-seasonal deep cleaning complemented by annual professional inspections creates the perfect maintenance schedule for most homeowners.
Your efforts will reward you with consistent warmth reduced emissions and a stove that performs at its best for years to come. The small investment of time in proper cleaning and maintenance pays tremendous dividends in both comfort and peace of mind throughout the heating season.
Frequently Asked Questions
How often should I clean my wood burning stove?
Most wood stoves should be thoroughly cleaned at least twice per heating season. However, if you use your stove heavily, more frequent cleaning may be necessary. Regular ash removal should be performed after every few burns. Annual professional chimney inspections are also recommended to complement your regular maintenance routine.
Why is cleaning my wood stove important?
Cleaning your wood stove improves safety by preventing chimney fires from creosote buildup, increases efficiency (dirty stoves can lose up to 25% heat output), extends the lifespan of your stove, saves money on fuel costs, reduces harmful emissions, and maintains your warranty. Regular cleaning ensures optimal performance and prevents unpleasant odors in your home.
What tools do I need to clean my wood burning stove?
Essential tools include an ash pan, vacuum cleaner with HEPA filter, steel wool, soft cloths, kosher salt and water solution, rubber gloves, and plastic sheeting to protect surrounding areas. For chimney cleaning, you’ll need chimney brushes, extension rods, a ladder, drop cloths, and safety equipment like goggles and a dust mask.
How do I know if my wood stove needs cleaning?
Signs that indicate your stove needs cleaning include difficulty starting or maintaining fires, excessive smoke production, visible soot accumulation on the glass door, decreased heat output compared to normal operation, and strange odors coming from the stove. These symptoms suggest reduced efficiency from buildup.
Can I use chemical cleaners on my wood stove?
Avoid harsh chemical cleaners as they can damage stove components and create toxic fumes when the stove is next used. Instead, use natural cleaning solutions like a kosher salt and water mixture for the glass and mild soap for exterior surfaces. Always ensure the stove is completely dry before using it again.
What is creosote and why is it dangerous?
Creosote is a highly flammable, tar-like substance that builds up inside chimneys and flues from wood combustion. It’s extremely dangerous because it can ignite, causing chimney fires that may spread to your home. Regular cleaning prevents hazardous creosote accumulation and maintains safe operation of your wood burning stove.
How do I properly remove ashes from my wood stove?
Wait until the stove is completely cool. Leave about 1-inch of ash in the firebox as insulation for future fires. Use an ash pan or small metal shovel to gently remove excess ash. Transfer to a metal container with a tight-fitting lid. Never use a regular vacuum as hot embers can remain hidden for days.
When should I call a professional chimney sweep?
Call a professional if you notice glazed creosote (shiny, tar-like substance), damaged chimney components, animal nests, excessive soot buildup, or if you haven’t had your chimney inspected in over a year. Professional cleaning is recommended annually, especially before the heating season begins, to ensure safety and optimal performance.
What maintenance should I perform in the off-season?
During the off-season, thoroughly clean the stove interior and exterior, inspect door gaskets for wear, check firebricks for cracks, clean the glass, inspect the chimney cap for damage, and ensure the chimney is properly covered to prevent debris and wildlife entry. This preparation ensures your stove is ready when cold weather returns.
How can I reduce the amount of cleaning my wood stove needs?
Burn only properly seasoned wood with less than 20% moisture content. Maintain proper airflow during fires. Remove ashes regularly. Don’t let fires smolder at low temperatures, which produces more creosote. Consider installing a catalytic combustor to burn gases more completely. These practices will significantly reduce maintenance requirements.


