Wondering how long to season wood properly? It’s a question we hear often from DIY enthusiasts and professional woodworkers alike. Properly seasoned wood can make all the difference between a successful project and a disappointing outcome, affecting everything from burn efficiency in fireplaces to stability in furniture pieces.
We’ve spent years researching and testing various wood seasoning methods to bring you the definitive guide on timing. Whether you’re preparing lumber for construction, firewood for winter, or specialty woods for crafting, the seasoning process isn’t something you’ll want to rush. In this comprehensive guide, we’ll walk through the optimal seasoning periods for different wood types and share proven techniques to speed up the process without compromising quality.
Understanding Wood Seasoning: What It Is and Why It Matters
Wood seasoning refers to the process of drying freshly cut wood to reduce its moisture content. This essential procedure transforms raw, “green” wood into material that’s stable and suitable for various applications. Proper seasoning allows wood to reach equilibrium moisture content (EMC), typically between 12-15% for most applications, down from the 30-200% moisture content found in freshly cut timber.
The Science Behind Wood Seasoning
The seasoning process involves the gradual evaporation of moisture from wood fibers. Fresh-cut lumber contains two types of moisture: free water (in cell cavities) and bound water (within cell walls). During seasoning, free water evaporates first until the wood reaches fiber saturation point (typically 25-30% moisture content). After this point, bound water begins to leave the cell walls, causing the most important dimensional changes and potential for defects.
Temperature, humidity, and air circulation directly impact the seasoning rate. Higher temperatures accelerate moisture evaporation, while air circulation helps carry moisture away from the wood’s surface. Relative humidity determines the final equilibrium moisture content the wood can achieve in a given environment.
Benefits of Properly Seasoned Wood
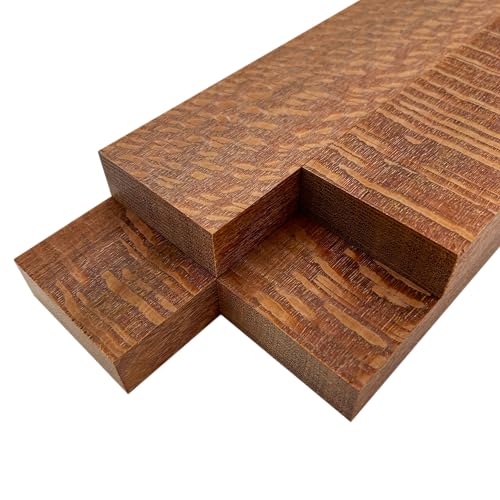
Properly seasoned wood offers many advantages across different applications. For woodworking projects, seasoned lumber reduces the risk of warping, cracking, and dimensional changes after construction. Furniture built with well-seasoned wood maintains its structural integrity and appearance for decades.
In firewood applications, seasoned wood burns more efficiently with higher heat output. Green wood wastes energy evaporating moisture rather than producing heat, creating excessive smoke and creosote buildup in chimneys. Tests show that seasoned firewood produces approximately 20-30% more BTUs compared to unseasoned wood of the same species.
Construction projects benefit from seasoned lumber’s increased strength and improved nail-holding capacity. Building with properly dried wood minimizes problems like nail pops, squeaky floors, and drywall cracks that often occur when green lumber continues drying after installation.
Consequences of Using Unseasoned Wood
Using insufficiently seasoned wood leads to multiple problems across various applications. In woodworking, unseasoned lumber causes joint failures, warping, and surface checking as the wood continues to dry and shrink. Projects made with green wood frequently develop splits and cracks that compromise both aesthetics and structural integrity.
For heating purposes, burning green wood creates excessive creosote buildup, increasing chimney fire risks by up to 70% according to fire safety studies. The reduced heat output and difficulty in starting and maintaining fires make green wood impractical for efficient home heating.
Construction with unseasoned lumber results in shrinkage-related issues including gaps between framing members, uneven floors, and misaligned doors and windows. These problems often emerge months after construction, leading to costly repairs that could have been avoided with properly seasoned materials.


Factors That Affect Wood Seasoning Time

Wood seasoning duration varies significantly based on several key factors. Understanding these variables helps predict how long your exact wood will take to reach optimal dryness for use in projects or as firewood.
Wood Species and Density
Different wood species season at vastly different rates due to their inherent density. Hardwoods like oak and maple contain tightly packed fibers that resist moisture movement, requiring 12 to 24 months of seasoning time. These dense woods hold more moisture initially and release it more slowly throughout the drying process. Softwoods such as pine and fir season much faster, typically reaching appropriate moisture levels in just 3 to 12 months thanks to their less dense cellular structure that allows moisture to escape more readily.
Size and Thickness of Wood
The dimensions of your wood pieces dramatically impact seasoning time. Wood dries at approximately one inch per year, meaning thicker cuts require proportionally longer seasoning periods. Splitting logs into smaller segments creates more surface area for moisture evaporation, significantly accelerating the seasoning process. Quarter-split logs, for example, dry much faster than whole rounds because moisture can escape from multiple exposed surfaces rather than just the end grain.
Climate and Environmental Conditions
Environmental factors play a crucial role in determining seasoning timeframes. Temperature and humidity levels directly affect moisture evaporation rates, with wood drying most efficiently in environments featuring low humidity and higher temperatures. The ideal moisture content for burning is achieved when the relative humidity hovers around 75%. Seasonal timing also matters significantly – spring and summer provide optimal conditions for seasoning due to warmer temperatures and typically lower humidity levels. Proper stacking techniques that maximize airflow between pieces and protective covering that shields wood from rain while allowing air circulation can further optimize the seasoning process.


Standard Timelines for Seasoning Different Types of Wood

Wood seasoning times vary dramatically based on wood type, thickness, and environmental conditions. Understanding these differences helps ensure your wood reaches optimal dryness for its intended use.
Hardwoods vs. Softwoods
Hardwoods generally require significantly longer seasoning periods than softwoods due to their dense structure and higher initial moisture content. Oak, maple, hickory, and other hardwoods typically need 18 months to 2+ years to properly season. These dense woods release moisture much more slowly, requiring patience to achieve the ideal 20-25% moisture content. Softwoods like pine, fir, and cedar season more quickly, often ready in just 6-18 months. Their less dense cellular structure allows moisture to escape more rapidly, making them a practical choice when you’re working with tighter timeframes.
Firewood Seasoning Timeline
The firewood seasoning process follows a predictable pattern that varies by wood type. Here’s a breakdown of what to expect:
| Wood Type | Seasoning Time |
|---|---|
| Hardwoods | 18 months to 2+ years |
| Softwoods | 6-18 months |
Split size dramatically affects seasoning speed, with smaller pieces drying much faster than larger logs. Environmental factors play a crucial role too – wood seasoned during late spring or summer with good air circulation dries more efficiently than wood seasoned in cooler, damper conditions. Most freshly cut wood starts with 30-45% moisture content and must drop to 20-25% for efficient, clean burning. Monitoring moisture levels with a wood moisture meter provides the most accurate way to determine when your firewood has properly seasoned.


Methods to Speed Up the Seasoning Process

Accelerating wood seasoning doesn’t mean compromising quality. Several proven techniques can significantly reduce drying time while ensuring your wood reaches optimal moisture content for your projects.
Proper Stacking Techniques
Effective stacking is crucial for faster wood seasoning. Elevate your wood at least 12 inches (300mm) above ground on a raised platform to prevent moisture absorption from soil. Insert 1-inch spacers or “stickers” between layers both vertically and horizontally to create consistent air exposure throughout the stack. Cover only the top of your woodpile with a tarp or temporary roof while leaving the sides completely open—this protects from rainfall while maintaining essential airflow. Splitting logs into smaller pieces before stacking increases the surface area exposed to air, dramatically accelerating moisture evaporation compared to whole logs.
Creating Optimal Air Flow
Air circulation forms the foundation of efficient wood seasoning. Orient your woodpile parallel to prevailing winds to maximize natural ventilation through the stack. Maintain 2-4 inch gaps between individual logs and avoid tight bundling that restricts airflow. Position your woodpile in a well-ventilated shed or sheltered outdoor area with good wind exposure to enhance drying without direct weather damage. Seasoning during late spring and summer takes advantage of naturally warmer temperatures that increase evaporation rates. For significantly faster results, consider artificial methods like kiln drying, which can reduce seasoning time from months to just 5-6 days under controlled heat and humidity conditions.


How to Tell When Wood Is Properly Seasoned

Determining if wood has properly seasoned requires observation and testing. Properly seasoned wood exhibits exact characteristics that indicate its readiness for use in construction or as firewood.
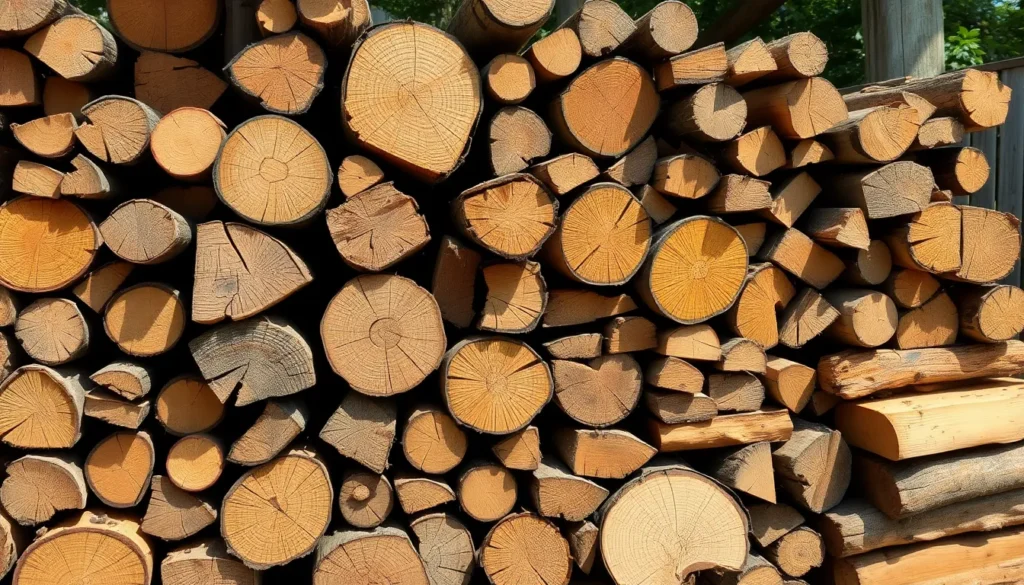
Visual Indicators
Visual inspection offers reliable clues about wood’s seasoning status. The color of well-seasoned wood fades from fresh green or yellow tones to a distinct gray hue as moisture evaporates. Radial cracks develop at the ends of logs, indicating internal moisture has escaped and the wood has shrunk during the drying process. Bark on seasoned logs becomes noticeably loose or starts peeling away from the wood itself. Weight reduction provides another obvious indicator—seasoned wood feels significantly lighter compared to freshly cut green wood due to moisture loss. These visual changes collectively confirm the wood has reached an appropriate dryness level for optimal use.
Testing for Moisture Content
Objective testing methods confirm when wood has reached ideal moisture levels. A moisture meter offers the most accurate assessment, with optimal readings between 15-20% indicating properly seasoned wood ready for use. The sound test provides a simple alternative—striking two pieces of seasoned wood together produces a distinctive hollow “clink” rather than the dull thud of wet wood. Performing a kindling test reveals wood’s readiness for burning; properly seasoned wood ignites easily with minimal smoke production compared to unseasoned wood that hisses, steams, and generates excessive smoke. For best results, we’ve found stacking wood off the ground with airflow gaps between logs accelerates the seasoning process while covering only the top (not the sides) with metal roofing or breathable covers protects from precipitation without trapping moisture.


Common Mistakes When Seasoning Wood

Seasoning wood properly requires attention to detail and patience. Many DIY enthusiasts and even experienced woodworkers make several critical errors that compromise the quality of their seasoned wood. Understanding these pitfalls helps ensure optimal results for your firewood or woodworking projects.
Rushing the Drying Process
One of the most frequent mistakes is not allowing sufficient drying time. Burning hardwoods before they’ve seasoned for at least 6 months or softwoods before 3 months creates inefficient fires with excessive smoke and reduced heat output. Properly seasoned wood reaches an optimal moisture content of 15-20%, which isn’t achievable when rushing the process. Patience pays dividends in better burning efficiency and reduced creosote buildup in chimneys.
Improper Stacking Techniques
Poor stacking significantly impedes the seasoning process. Tightly packed woodpiles restrict airflow between logs, trapping moisture and extending drying times. Leaving stacks completely uncovered exposes wood to rain and snow, while fully covering them prevents moisture from escaping. The ideal approach involves covering just the top of the stack, allowing side ventilation while protecting from precipitation.
Placing Wood Directly on the Ground
Stacking firewood directly on soil creates multiple problems for the seasoning process. Ground contact introduces moisture from below, promotes fungal growth, and attracts insects that can damage the wood. This common error not only slows drying but can lead to rot and deterioration of the bottom layer. Using pallets, concrete blocks, or dedicated firewood racks creates essential ground clearance that improves air circulation.
Ignoring Climate Factors
Many wood enthusiasts fail to account for regional climate conditions when estimating seasoning times. Humid environments significantly extend drying periods compared to arid regions. Wood seasoned in the Pacific Northwest might take twice as long to reach proper moisture content compared to the same species in Arizona or New Mexico. Adjusting your seasoning timeline based on local humidity levels ensures properly dried wood.
Cutting Wood at the Wrong Time
Timing matters when harvesting trees for firewood. Late summer or fall cutting often doesn’t allow adequate drying time before winter use. This mistake results in burning partially seasoned wood that produces less heat and more smoke. Spring and early summer cutting provides sufficient time for proper seasoning before the burning season arrives.
Neglecting to Split Logs
Leaving logs whole dramatically increases seasoning time. Unsplit logs dry primarily from the ends, while split pieces expose more surface area for moisture evaporation. Large, round logs can take years longer to season than their split counterparts. Splitting wood immediately after cutting accelerates the drying process and improves overall seasoning efficiency.
Failing to Measure Moisture Content
Guessing when wood is properly seasoned leads to inconsistent results. Without using a moisture meter to verify readiness, you’re likely burning wood that’s either too wet or unnecessarily over-dried. Properly seasoned firewood should register 20% moisture content or less on a quality meter. This inexpensive tool eliminates guesswork and ensures your wood burns efficiently.


Storing Seasoned Wood Properly

Proper storage maintains the quality of your seasoned wood and protects your investment of time and effort. Seasoned wood requires exact storage conditions to prevent reabsorption of moisture that would negate your careful seasoning process.
Keep it Covered
A waterproof tarp creates an essential barrier against rain and snow while preserving your wood’s low moisture content. Cover only the top portion of your woodpile rather than wrapping the entire stack, which allows necessary airflow to continue circulating. Heavy-duty tarps withstand UV exposure and prevent water from seeping through to your carefully seasoned logs. Secure your covering with weights or tie-downs to prevent wind from displacing it during storms.
Raise Off Ground
Elevating your woodpile 4-6 inches off the ground creates important benefits for long-term storage. Use pallets, concrete blocks, or purpose-built wood racks as a foundation for your stack. Elevation prevents ground moisture from being absorbed into the bottom layer of wood and reduces the risk of insect infestations. The space beneath the pile also enhances air circulation, helping maintain the wood’s seasoned state throughout the storage period.
Optimize Location
The ideal storage location dramatically impacts how well your seasoned wood maintains its quality. Position your woodpile in an area that receives ample sunlight for at least part of the day, accelerating any remaining moisture evaporation. A south-facing location provides maximum sun exposure in northern climates. Choose spots with natural wind protection on one side but good ventilation on others. Accessible locations near your home balance convenience with proper storage conditions, making it easier to maintain your supply throughout the seasons.


How Long to Season Wood by Type
Conclusion
Seasoning wood isn’t just a step in woodworking—it’s an essential process that determines the quality of your final project. We’ve seen how proper drying leads to stable furniture reduced warping and more efficient firewood.
Remember that patience yields the best results. Hardwoods need 18+ months while softwoods can be ready in 6-12 months. By implementing our recommended stacking techniques and monitoring moisture levels you’ll achieve optimal results.
The effort you invest in properly seasoning your wood will pay dividends in performance durability and satisfaction. Whether you’re crafting heirloom furniture or preparing for winter heating season properly seasoned wood makes all the difference.
Frequently Asked Questions
How long does it take to properly season wood?
Seasoning time varies by wood type and other factors. Hardwoods like oak and hickory typically require 18-24 months, while softwoods like pine and cedar can be ready in 6-18 months. The wood’s thickness, environmental conditions, and storage method also affect drying time. For optimal results, hardwoods should reach 20-25% moisture content and softwoods around 15-20%.
Why is wood seasoning important?
Properly seasoned wood is crucial for both woodworking and firewood applications. It reduces the risk of warping, cracking, and dimensional changes in furniture and construction projects. For firewood, seasoned wood burns more efficiently, produces more heat, creates less smoke, and minimizes creosote buildup in chimneys, which reduces fire hazards.
How can I tell if wood is properly seasoned?
Look for visual cues like color changes (from bright to dull), visible cracks on the end grain, loose bark, and significantly reduced weight. You can also test by striking two pieces together—seasoned wood produces a clear, ringing sound rather than a dull thud. The most accurate method is using a moisture meter, with readings below 20% indicating well-seasoned firewood.
Can I speed up the wood seasoning process?
Yes, several methods can accelerate seasoning without compromising quality. Split logs into smaller pieces to increase surface area for faster drying. Use proper stacking techniques with spacers between rows for maximum air exposure. Position your woodpile in sunny, windy locations and consider kiln drying for rapid results. Always monitor moisture content regardless of the method used.
What happens if I use unseasoned wood?
Using unseasoned wood can lead to numerous problems. In woodworking, it may cause warping, splitting, and joint failures as the wood continues to dry and shrink. As firewood, it burns inefficiently with excessive smoke, produces less heat, and creates dangerous creosote buildup in chimneys. Unseasoned wood is also heavier and more difficult to ignite.
How should I store wood during the seasoning process?
Store wood elevated off the ground on pallets or runners to prevent moisture absorption. Stack logs with spacing between rows to maximize air circulation. Cover only the top of the pile with a waterproof tarp, leaving the sides exposed for ventilation. Position the stack in a sunny location with good airflow, ideally oriented to catch prevailing winds for optimal drying.
Does wood thickness affect seasoning time?
Yes, thickness significantly impacts seasoning duration. Thicker pieces have less surface area relative to their volume, slowing moisture evaporation. While a 2-inch thick board might season in months, a 6-inch log could take years to reach the same moisture content. Split larger logs to reduce effective thickness and accelerate drying time considerably.
Do different seasons affect the wood seasoning process?
Absolutely. Warm, dry summer conditions accelerate moisture evaporation, while cold, humid winter conditions slow the process. Spring is ideal for cutting wood, as it allows maximum drying during summer months. Wood cut in winter dries more slowly initially but benefits from spring and summer drying. Consider your local climate patterns when planning your seasoning timeline.


