Tackling lacquer removal can be intimidating, but we’ve got you covered with proven methods that make this challenging task manageable. Whether you’re restoring an antique piece or preparing furniture for a fresh finish, understanding how to properly strip lacquer is essential for your project’s success.
We’ll walk you through effective techniques using both chemical strippers and natural alternatives that break down stubborn lacquer finishes without damaging the precious wood underneath. From denatured alcohol to commercial removers, you’ll discover which option works best for your exact wood type and project scope. With our step-by-step guidance, you’ll transform that dated, yellow-tinged finish into a fresh canvas ready for your creative vision.
What Is Lacquer and Why Is It Difficult to Remove
Lacquer is a high-gloss, durable wood finish created from synthetic polymers or tree resins that forms a hard, protective shell on furniture and wood surfaces. This finish contains nitrocellulose, acrylic compounds, or polyurethane components that create an exceptionally strong bond with the wood substrate. Traditional lacquer originated in Asia centuries ago using the sap from lacquer trees, while modern formulations incorporate synthetic resins and solvents for enhanced durability.
Removing lacquer presents important challenges due to its inherent chemical properties. The finish cures through a process called polymerization, creating cross-linked molecular chains that resist conventional solvents. Unlike softer finishes such as shellac or oil, lacquer penetrates wood grain deeply and forms a nearly impermeable barrier that standard household cleaners can’t break down. Many lacquer formulations contain UV inhibitors and additional hardeners that further strengthen this resistance.
The difficulty in removal varies based on several factors:
- Age of the finish – Older lacquer becomes increasingly brittle and resistant as it oxidizes
- Number of coats – Multiple layers require stronger solvents and longer application times
- Additives present – Catalyzed lacquers contain acid hardeners making them exceptionally difficult to dissolve
- Wood type – Porous woods like oak or mahogany absorb more finish into their grain structure
Lacquer’s water and chemical resistance—qualities that make it desirable as a protective finish—create the very challenges faced during removal attempts. The finish’s molecular structure forms tight bonds that common solvents can’t easily penetrate, often requiring specialized chemical strippers designed specifically for tough synthetic finishes. This resistance explains why many DIY attempts using household products fail to make important progress against well-applied lacquer coatings.


Tools and Materials You’ll Need for Lacquer Removal

Gathering the right tools and materials before starting your lacquer removal project ensures efficient and safe completion. Having these items on hand prevents interruptions and helps achieve professional results.
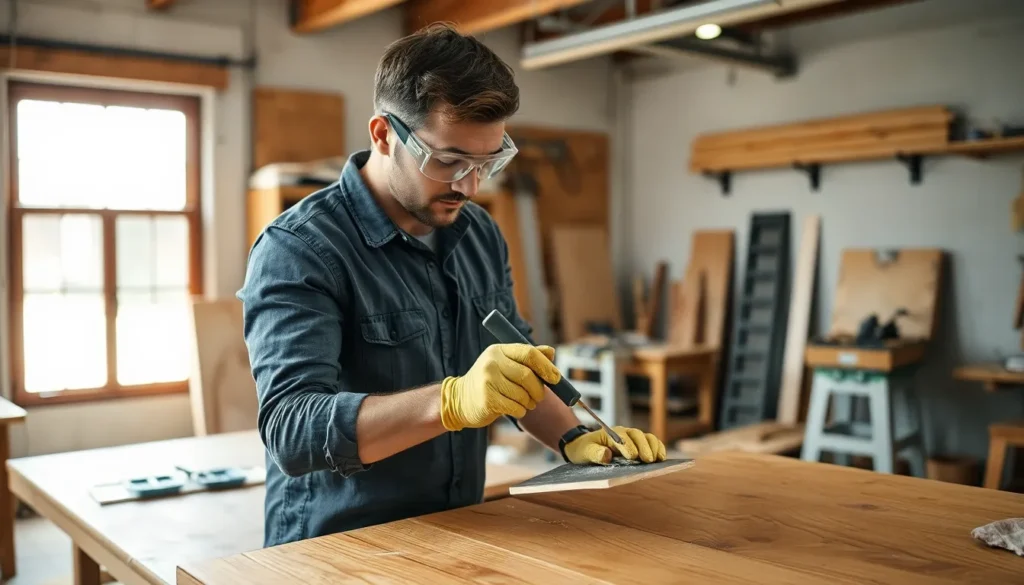
Safety Equipment Essentials
Safety equipment protects you from harmful chemicals and dust during the lacquer removal process. A NIOSH-approved respirator with organic vapor cartridges filters out dangerous fumes that lacquer thinners and strippers emit. Nitrile or neoprene gloves provide necessary hand protection, preventing chemicals from contacting your skin and causing irritation or burns. Splash-resistant safety goggles shield your eyes from accidental splashes or airborne particles. Proper ventilation serves as your first line of defense against toxic fumes—always work outdoors or in spaces with excellent air circulation to prevent fume buildup. These protective measures aren’t optional extras but critical components of any lacquer removal project.
Best Solvents and Strippers for Lacquer
Effective solvents break down lacquer finishes without damaging the underlying wood. Lacquer thinner works exceptionally well on fresh or thin layers of finish—simply apply it with a clean rag and scrape away the softened finish after 5-10 minutes of contact time. A 50/50 mixture of lacquer thinner and denatured alcohol creates a balanced solution that removes lacquer while often preserving the underlying stain, making it perfect for partial refinishing projects. Low-VOC strippers based on citrus or soy compounds offer an eco-friendly alternative with fewer harsh fumes, though they may require longer working times.
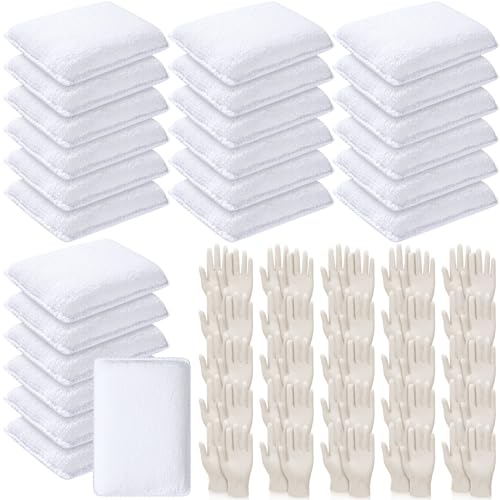
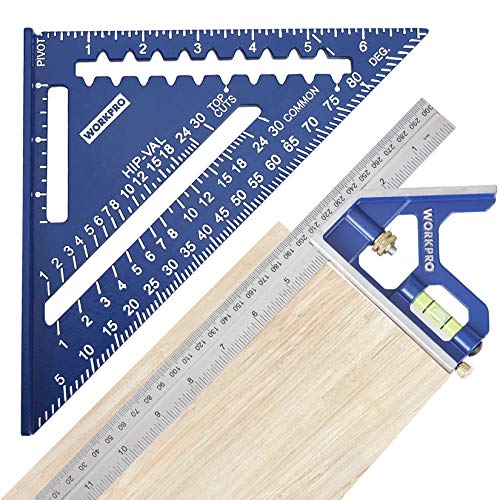
For mechanical removal, plastic putty knives and scrapers provide effective tools that won’t gouge or damage wood surfaces. Sandpaper in 120-220 grit ranges helps remove residual finish after chemical softening. Small nylon or natural bristle brushes reach into detailed carvings and crevices where scrapers can’t access. Lint-free rags or tack cloths complete your toolkit, essential for wiping away residue and neutralizing any remaining solvents before refinishing begins.


Chemical Stripping Method: Step-by-Step Process

Chemical stripping offers an effective way to remove lacquer from wood surfaces when mechanical methods aren’t suitable. This technique uses solvents to break down the finish chemically, making it easier to scrape away without excessive sanding or damage to the underlying wood.
- Safety First: Put on protective gear including chemical-resistant gloves, safety goggles, and a respirator before beginning. Work in a well-ventilated area, preferably outdoors or near open windows.
- Test a Small Area: Apply a small amount of solvent to an inconspicuous spot to ensure it won’t damage the wood or any stain beneath the lacquer.
- Apply the Solvent: Use lacquer thinner or a 50/50 mixture of lacquer thinner and wood alcohol. Apply liberally with a clean rag or brush, making sure to work the solution into cracks and detailed areas.
- Wait for Softening: Allow the solvent to sit for 5-10 minutes until the lacquer begins to bubble, wrinkle, or soften.
- Scrape Gently: Using a plastic putty knife or scraper, remove the loosened finish by working in the direction of the wood grain to avoid scratching.
- Remove Dust: Wipe the surface with a tack cloth to eliminate all dust and residue from the scraping process.
Application Techniques
Effective solvent application ensures thorough lacquer removal without damaging the wood underneath. Apply the chemical stripper evenly using smooth, overlapping strokes to prevent missed spots or uneven removal. Working in small sections approximately 2-3 square feet at a time gives you better control and prevents the solvent from drying before you can scrape it off.
For detailed areas and carvings, use an old toothbrush or small artist’s brush to work the solvent into tight spaces. On vertical surfaces, choose a gel-based stripper that clings to the surface rather than running off. Multiple applications may be necessary for stubborn or thick lacquer finishes—don’t rush the process or try to remove all layers at once.
Removal and Cleanup
Once the lacquer has softened completely, lift it away from the wood with gentle, controlled movements of your plastic scraper. Steel wool (0000 grade) can help remove residue from detailed areas and carvings that scrapers can’t reach effectively. After the bulk of the finish is removed, neutralize any remaining chemical residue by wiping with the appropriate solvent recommended by the stripper manufacturer.
For final cleanup, lightly sand the wood surface with 220-grit sandpaper, always following the wood grain. This step removes any lingering finish particles and prepares the surface for a new finish. Vacuum all dust thoroughly, then wipe with a tack cloth to ensure the surface is completely clean. Allow the wood to dry completely for 24-48 hours before applying any new finishes, as trapped solvents can interfere with proper adhesion.
For stronger finishes, acetone or denatured alcohol can be used as alternatives, though these require extra caution due to their potency. Remember that any remnants of lacquer must be completely removed before applying new finishes, especially polyurethane, which isn’t compatible with lacquer without a proper barrier coat.


Sanding Method: When and How to Use It

Sanding effectively removes lacquer finishes by physically abrading the surface until the coating is gone. This method works particularly well for thin lacquer applications or as a follow-up to chemical stripping when residue remains.
Hand Sanding vs. Power Sanding
Hand sanding offers precise control when removing lacquer from wood surfaces. We recommend starting with medium-grit sandpaper (120-150 grit) for initial lacquer removal, then progressing to finer grits (180-220) for smoothing. Manual sanding excels on delicate pieces, small areas, or when working around hardware and edges that require careful attention.
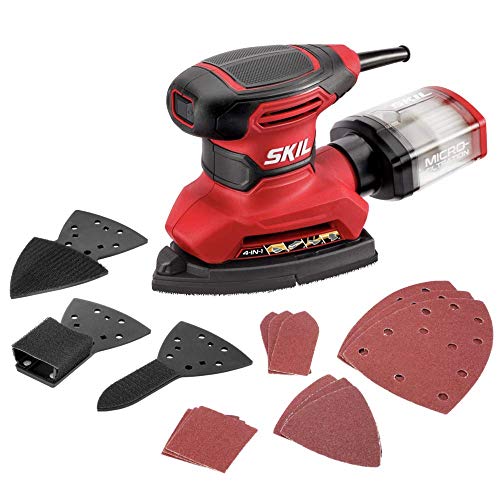
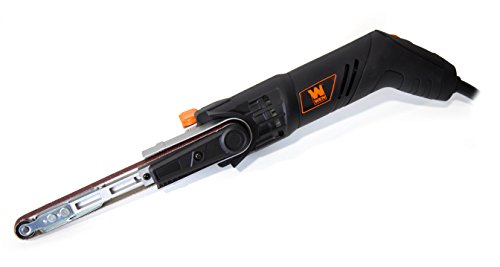
Power sanding dramatically reduces the time and effort needed for large surface areas. Orbital sanders provide even removal with less risk of creating uneven spots, while belt sanders offer aggressive removal but require experienced handling to prevent gouging. For power sanding, it’s essential to move continuously across the surface and avoid lingering in one spot, which can create depressions in the wood.
Dealing with Detailed or Carved Areas
Carved wood details require specialized approaches to effectively remove lacquer without damaging the intricate patterns. Flexible sanding pads conform to curved or irregular surfaces, making them ideal for moldings, turned spindles, or decorative elements. Steel wool (0000 grade) works remarkably well for reaching into crevices and tight spots where sandpaper can’t effectively reach.
For extremely detailed carvings, consider using sanding sticks or wrapped sandpaper around small tools like wooden dowels to access tight spaces. Dental picks wrapped with fine sandpaper help remove lacquer from deep recesses. When sanding detailed areas, consistent light pressure prevents flattening the carved details that give the piece its character.


Heat Gun Method: A Gentler Alternative

Heat guns offer a chemical-free approach to lacquer removal that’s gentler on wood finishes when used correctly. This method works by warming the lacquer finish until it softens enough to be scraped away without harsh chemicals. Operating at lower temperatures than traditional stripping methods, heat guns can help preserve underlying stains when handled with proper technique.
How Heat Guns Work on Lacquer
Heat guns soften brittle lacquer finishes by applying controlled, directed warmth to the surface. The process transforms hard lacquer into a malleable state that’s easily removed with a scraper. This technique works particularly well on flat surfaces and can be more precise than chemical methods when targeting exact areas for finish removal.
Proper Technique and Safety Precautions
Always maintain the heat gun in constant motion to prevent scorching the wood beneath. Hold the tool 3-4 inches away from the surface and use the lowest effective temperature setting. Protective gear including heat-resistant gloves and safety glasses is essential during this process. Ensure you’re working in a well-ventilated area as heated lacquer may release fumes.
Step-by-Step Application
- Test first on an inconspicuous area to determine optimal temperature and technique
- Heat small sections (about 4-6 inches square) at a time
- Watch for bubbling or softening of the lacquer
- Scrape immediately with a plastic or metal scraper while the finish remains soft
- Clean residue with mineral spirits after scraping
Limitations and Considerations
Heat guns aren’t ideal for all situations. This method requires careful monitoring as excessive heat can scorch wood or drive stains deeper into the grain. Intricate carvings and detailed areas present challenges for heat application. For vintage or valuable pieces where stain preservation is critical, test thoroughly before applying heat to larger areas.
When to Choose Heat Over Chemicals
Choose the heat gun method when working in poorly ventilated spaces where chemical fumes pose health risks. This approach is also preferable when you’re sensitive to chemical strippers or want to minimize environmental impact. Heat works effectively on pieces with multiple layers of built-up finish that might require repeated chemical applications.


Natural and Eco-Friendly Removal Options

Mechanical Removal Techniques
Mechanical removal offers the most environmentally friendly approach to lacquer removal without introducing chemicals. Scraping with a cabinet scraper or dull putty knife effectively lifts lacquer from wood surfaces while maintaining eco-conscious practices. Light hand-sanding using 120-150 grit sandpaper removes surface lacquer with minimal environmental impact. Intricate areas and detailed woodwork respond well to sanding sponges or steel wool, which conform to complex shapes and reach difficult spots. These methods require more physical effort but eliminate the need for chemical solvents entirely.
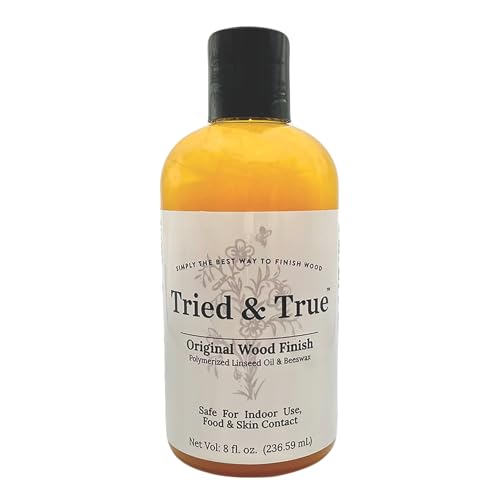
Low-VOC Solvents
Denatured alcohol serves as a less toxic alternative to traditional lacquer thinners for some lacquer finishes. Testing this solvent on an inconspicuous area first determines compatibility, as not all lacquers respond to alcohol. Bio-based strippers containing citrus or soy ingredients provide another eco-friendly option when labeled as “low-VOC” (volatile organic compounds). Effectiveness varies between products and lacquer types, making a patch test essential before full application. For stubborn finishes that resist gentler methods, a 50/50 mix of lacquer thinner and wood alcohol offers a compromise that’s less harmful than pure chemical strippers while still preserving underlying wood stains.
Safety Precautions for Eco-Friendly Removal
Working outdoors or in spaces with excellent ventilation reduces exposure to any fumes produced during the removal process. Protective equipment remains essential even with natural methods—gloves protect skin from splinters and residues, while respirators prevent inhalation of wood dust during sanding. Avoiding methylene chloride-based products significantly reduces health risks, as these chemicals pose serious health hazards even though their effectiveness. Personal protection complements eco-friendly methods to create a safer overall experience for both the user and the environment.


Refinishing After Lacquer Removal

After successfully removing lacquer from your wood surface, proper refinishing is crucial to achieve a beautiful, long-lasting result. The wood is now ready for transformation into something fresh and new with the right preparation and finishing techniques.
Preparing the Bare Wood
Bare wood requires thorough preparation before applying any new finish. Sand the wood surface using progressively finer grits of sandpaper, starting with medium (120-150) and working up to fine (220) for a smooth result. Remove all dust and debris with a tack cloth to ensure no particles interfere with your new finish. Inspect the wood for any remaining lacquer spots, which appear as shiny patches when viewed from different angles. Apply a wood conditioner to softwoods like pine or cedar to prevent blotching and ensure even absorption of stains or finishes.
Applying New Finishes
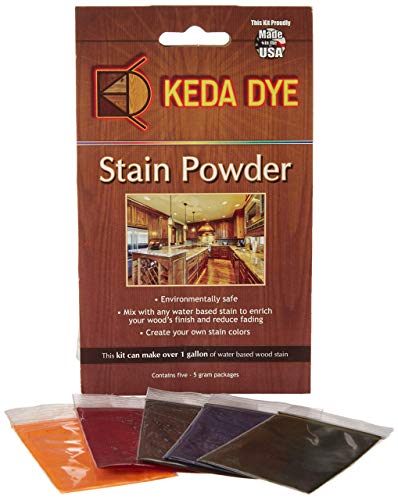
Selecting the right finish depends on your wood type and desired appearance. Test your chosen finish on an inconspicuous area to confirm compatibility with any existing stain or dye that remains in the wood. Apply a barrier coat if transitioning from lacquer to a different finish type like polyurethane, which creates a separation between potentially incompatible materials. Use long, even strokes in the direction of the wood grain for the smoothest application, allowing proper drying time between coats as specified by the manufacturer. Consider oil-based finishes for deeper penetration and richer color, or water-based options for quicker drying and lower odor. Apply multiple thin coats rather than one thick coat to minimize bubbles and ensure better adhesion to your freshly prepared wood surface.


Common Mistakes to Avoid When Removing Lacquer

Skipping the Test Area
Testing a small, inconspicuous area before applying your chosen removal method is essential. Many DIYers rush into the full project without verification, leading to potential wood damage or finish deterioration. Apply your selected stripper or method to a hidden spot first to gauge its effectiveness and ensure it won’t harm the underlying wood.
Neglecting Safety Precautions
Proper protection isn’t optional when working with lacquer removal chemicals. Inadequate safety measures frequently result in respiratory issues, skin irritation, or chemical burns. Always wear chemical-resistant gloves, a respirator (not just a dust mask), and protective eyewear when handling methylene chloride strippers or lacquer thinners.
Working in Poor Environmental Conditions
Temperature significantly impacts chemical stripper effectiveness. Products typically work best in warmer environments between 65-75°F, while cold conditions can reduce their efficiency. Attempting to strip lacquer in a cold garage or outdoor space during winter months often leads to frustration and incomplete removal. Similarly, working in areas with poor ventilation creates dangerous accumulations of toxic fumes.
Over-Stripping the Wood
Removing more than necessary is a common error when using aggressive stripping methods. Over-zealous sanding or excessive chemical application can damage the wood beneath, expose underlying stains prematurely, or reveal wood defects. The 50/50 mixture of lacquer thinner and wood alcohol provides a gentler approach when you’re trying to preserve stain while removing just the lacquer layer.
Insufficient Removal Before Refinishing
Incomplete lacquer removal creates serious problems for new finishes. Even small traces of old lacquer can prevent proper adhesion of new products, resulting in bubbling, peeling, or uneven coloration. After using chemical strippers like methylene chloride, thoroughly clean the surface with appropriate neutralizers before applying any new finish.


Conclusion
Removing lacquer from wood doesn’t have to be intimidating with the right approach. Whether you choose chemical strippers, sanding, heat guns, or eco-friendly alternatives, success depends on matching the method to your exact project needs. Remember that patience is key—rushing through the process can damage your valuable wood pieces.
Always prioritize safety with proper ventilation and protective equipment regardless of your chosen method. Take time to thoroughly clean the surface before applying new finishes for professional-quality results.
With the techniques we’ve shared, you’re now equipped to tackle lacquer removal with confidence. Your restoration projects can transform tired furniture into beautiful pieces that showcase the natural beauty of wood and your craftsmanship.
Frequently Asked Questions
What is lacquer and why is it difficult to remove?
Lacquer is a high-gloss, durable wood finish made from synthetic polymers or tree resins that creates a hard protective shell on furniture. It’s difficult to remove because it polymerizes (chemically bonds) and penetrates deeply into wood grain. Its resistance to water and chemicals—the very qualities that make it an excellent protective finish—also make it challenging to strip, often requiring specialized chemical strippers or significant mechanical effort.
What safety equipment do I need for lacquer removal?
Essential safety equipment includes chemical-resistant gloves, safety goggles, a respirator mask (rated for chemical vapors), protective clothing covering arms and legs, and adequate ventilation. When using chemical strippers, ensure you have proper ventilation with open windows or fans. For sanding methods, use a dust mask or respirator rated for fine particles. Never compromise on safety equipment as chemical strippers and dust can pose serious health risks.
What’s the best chemical stripper for removing lacquer?
The most effective chemical for lacquer removal is typically lacquer thinner or commercial strippers containing methylene chloride for stubborn finishes. For a gentler approach, denatured alcohol works well on shellac-based lacquers. Eco-friendly citrus-based strippers are less powerful but safer for indoor use. Always choose based on your specific lacquer type and project requirements, and test on an inconspicuous area first.
How do I apply chemical stripper properly?
Apply chemical stripper in a thick, even layer using a natural-bristle brush or paint brush. Work in small, manageable sections rather than covering the entire piece at once. Allow the stripper to work according to manufacturer’s instructions (typically 15-30 minutes) until the lacquer bubbles or wrinkles. Never rush the process or scrape too early, as this may remove only part of the finish.
Can I sand lacquer off instead of using chemicals?
Yes, sanding is an effective method for removing lacquer, especially for thin finishes or when chemicals aren’t suitable. Start with medium-grit sandpaper (80-100) and progress to finer grits. Hand sanding offers precision for detailed areas, while power sanders work efficiently on larger surfaces. Be careful not to sand too aggressively, which can damage the wood underneath. This method is more labor-intensive but avoids chemical exposure.
Is a heat gun safe for removing lacquer?
Heat guns can safely remove lacquer when used properly. Maintain constant motion to prevent scorching the wood, keep the gun 2-3 inches from the surface, and work at temperatures between 400-600°F. Always wear heat-resistant gloves and eye protection. This method works well in poorly ventilated spaces where chemical fumes would be problematic, but isn’t suitable for all wood types, particularly thin veneers that may warp.
Are there eco-friendly alternatives for removing lacquer?
Several eco-friendly options exist for lacquer removal. Mechanical methods include careful scraping with cabinet scrapers or light hand-sanding. Low-VOC solvents like denatured alcohol and citrus-based strippers offer safer chemical alternatives. Soy-based and bio-derived strippers work more slowly but with fewer harmful emissions. Always test eco-friendly products first, as they may require longer working times and multiple applications to be effective.
How do I prepare wood for refinishing after removing lacquer?
Once lacquer is removed, sand the bare wood with progressively finer grits (start with 120-150, finish with 180-220). Clean thoroughly with a tack cloth to remove dust. Inspect in different lighting angles for any remaining lacquer spots, which will appear as shiny areas. Neutralize any chemical residue according to stripper instructions. Allow the wood to completely dry before applying any new finish. Proper preparation ensures your new finish will adhere correctly.
What are common mistakes to avoid when removing lacquer?
Common mistakes include skipping the test area, neglecting safety equipment, working in poor ventilation or extreme temperatures, rushing the process, and insufficient cleaning before refinishing. Also avoid over-stripping, which can damage the wood surface, and using incompatible products without testing. Finally, never mix different chemical strippers, as this can cause dangerous reactions and potentially damage the furniture beyond repair.
How long does the lacquer removal process typically take?
The time required varies significantly based on the method used, furniture size, and finish thickness. Chemical stripping typically takes 1-3 hours for application and removal, plus drying time. Sanding can take 2-4 hours for average pieces. Multiple applications may be needed for thick or aged finishes. Allow 24-48 hours for complete drying before refinishing. For intricate pieces with carvings or details, expect the process to take considerably longer.


