Wondering how to protect your freshly painted wood surfaces? You’re not alone. We’ve helped countless homeowners preserve their beautiful painted furniture, decks, and woodwork with the right sealing techniques.
Sealing painted wood isn’t just about extending the life of your paint job—it’s about safeguarding your investment and keeping those surfaces looking pristine for years to come. Whether you’re dealing with indoor furniture or outdoor structures exposed to the elements, a proper sealant creates a protective barrier against moisture, UV damage, and everyday wear and tear.
In this guide, we’ll walk you through everything you need to know about sealing painted wood surfaces effectively. From choosing the right products to mastering application techniques, we’ve got the expert tips that’ll help your painted woodwork stand the test of time.
Why Sealing Painted Wood Is Essential
Sealing painted wood creates a protective barrier that shields your paint job from damage caused by moisture, UV rays, and everyday wear. Without proper sealing, painted surfaces deteriorate quickly, leading to peeling, cracking, and fading that diminishes the appearance of your woodwork. Moisture absorption represents one of the biggest threats to painted wood, as it causes wood to expand and contract, breaking the bond between paint and surface.
UV radiation from sunlight breaks down paint pigments over time, resulting in color fading and a dull appearance on unsealed surfaces. Dust, dirt, and grime easily penetrate unsealed paint, making cleaning difficult and causing permanent staining. Properly sealed paint surfaces are significantly easier to maintain, requiring only simple cleaning with mild soap and water rather than extensive repainting.
Sealants extend the lifespan of your paint job by up to 5-7 years in many cases, representing substantial cost savings compared to frequent repainting. High-traffic areas like wooden floors, tables, and doors particularly benefit from sealing, as the extra protection prevents premature wear from constant use. Outdoor wooden elements face even harsher conditions, making sealing absolutely critical for items like painted decks, fences, and garden furniture exposed to the elements year-round.
Many modern sealants enhance the paint’s appearance by adding depth, richness, and either a glossy, satin, or matte finish according to your preference. Professional-grade sealants contain fungicides and mildewcides that prevent mold and mildew growth, especially important in humid environments or bathrooms where moisture levels are consistently high.
Preparing Your Painted Wood Surface for Sealing

Proper preparation is crucial for ensuring your sealant adheres correctly to your painted wood surface. These preparation steps create an optimal foundation for long-lasting protection that maintains the beauty of your paint job.
Cleaning the Surface
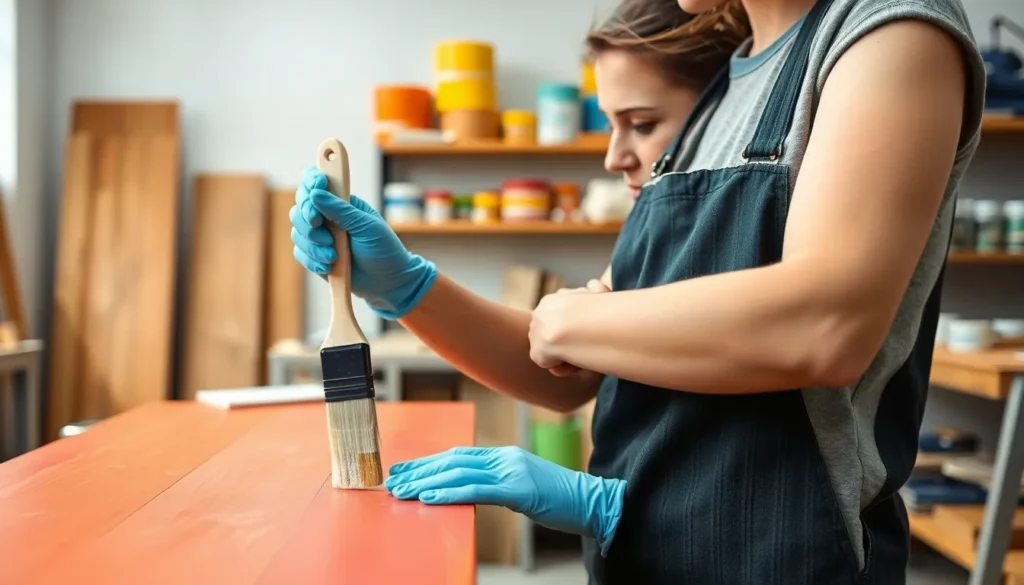
Thorough cleaning removes contaminants that can prevent proper sealant adhesion. Start by wiping down the entire painted surface with a mild detergent mixed with warm water, using a soft cloth or sponge to avoid scratching the paint. Stubborn grime might require slightly more pressure, but avoid harsh scrubbing that could damage the paint layer. For surfaces with existing wax or previous sealers, apply an appropriate solvent or commercial remover designed for your exact finish type. Mineral spirits work effectively for most oil-based finishes, while denatured alcohol helps remove shellac-based products. After cleaning, allow the surface to dry completely for at least 24 hours, as trapped moisture can compromise the sealant’s effectiveness.
Sanding for Better Adhesion
Light sanding creates a slightly textured surface that helps the sealant bond properly to the painted wood. Choose fine-grit sandpaper (220-320 grit) and sand in the direction of the wood grain using gentle, even pressure. Focus on creating a slight roughness rather than removing the paint—you’re aiming to dull the surface sheen just enough to promote adhesion. Electric sanders can be used for larger surfaces but require careful control to prevent damaging the paint layer. After sanding, remove all dust particles by wiping the surface with a tack cloth or slightly damp microfiber cloth. Compressed air cans also work effectively for getting dust out of corners and crevices. Complete dust removal prevents particles from becoming trapped under the sealant, which would create an uneven finish with visible imperfections.
Best Sealants for Painted Wood

Choosing the right sealant for painted wood ensures long-lasting protection and enhances the finish of your project. Various products offer different benefits depending on your exact needs, paint type, and whether the item will be used indoors or outdoors.
Polyurethane Sealers
Polyurethane sealers provide exceptional durability for painted wood surfaces and come in two primary formulations. Water-based polyurethane works perfectly with latex and acrylic paints, drying clear with minimal odor in approximately 2 hours. Varathane Water-based Topcoat ranks as the top choice for latex-painted furniture due to its clarity and quick-drying properties. Oil-based polyurethane creates a more robust finish for surfaces painted with oil-based paints, developing an amber-tinted finish that adds warmth to the wood. These formulations require mineral spirits for cleanup and have longer drying times, often exceeding 24 hours per coat.
Polycrylic Sealants
Polycrylic sealants offer excellent compatibility with flat latex paints while producing fewer toxic emissions than other options. These products feature low toxicity levels, making them safer for indoor applications where ventilation might be limited. Polycrylics don’t provide the same level of durability as polyurethane sealers but still deliver adequate protection for most indoor pieces. Applying polycrylic over oil-based paints isn’t recommended as adhesion problems frequently occur, potentially compromising the protective finish and appearance of your painted wood projects.
Varnish Options
Varnish provides traditional wood protection with specialized formulations for different environments and needs. Exterior varnish contains UV inhibitors and weather-resistant properties, making it ideal for outdoor painted wood projects exposed to sunlight and elements. Water-based varnishes maintain clarity over time without yellowing, similar to their polyurethane counterparts. Oil-based varnish alternatives add warmth and richness to the painted surface while offering substantial protection. Application requires proper preparation including cleaning wood with TSP, light sanding, and dust removal to ensure optimal adhesion. Thin coats applied with high-quality brushes prevent bubbles and drips, creating a smooth, professional finish that enhances your painted wood’s appearance and longevity.
Step-by-Step Guide to Sealing Painted Wood

Sealing painted wood requires attention to detail and proper technique to achieve lasting protection. Follow these essential steps to ensure your painted surfaces remain beautiful and durable for years to come.
Step 1: Prepare the Surface
Surface preparation creates the foundation for a successful sealing project. Confirm that your painted surface is completely dry before beginning the sealing process. Sand any rough areas lightly with fine-grit sandpaper to create a smooth base for the sealant. Clean the entire surface with a tack cloth to remove all dust particles that could create bumps or imperfections in your final finish.
Step 2: Choose and Apply Sealant
Selecting the appropriate sealant dramatically impacts the longevity of your painted wood. Pick from quality options like polyurethane, polycrylic, or clear acrylic sealer based on your project’s needs. Interior projects work well with standard sealants, while exterior applications require UV-resistant or waterproof formulations for maximum protection. Apply your chosen sealant using a soft brush or sponge in thin, even strokes that follow the wood grain direction. Spray sealers offer an alternative application method—hold the can 8-12 inches from the surface and use sweeping motions for consistent coverage.
Step 3: Allow First Coat to Dry
Patience during drying time ensures optimal adhesion between coats. Let the first coat dry completely according to the manufacturer’s instructions, typically 1-2 hours before proceeding. Rushing this step can compromise the integrity of your finish and lead to clouding or peeling.
Step 4: Apply Additional Coats
Multiple coats provide superior protection for your painted wood surfaces. Apply 2-3 coats for optimal results, allowing each layer to dry thoroughly before adding the next. This layering technique creates a more durable barrier against moisture, UV damage, and everyday wear.
Application Techniques
Brush-on application techniques preserve the natural beauty of wood grain while providing excellent control. Choose a high-quality soft-bristle brush and apply sealant in long, even strokes following the direction of the wood grain. Spray-on methods deliver fast, even coverage for larger projects or intricate surfaces. Apply spray sealants using smooth, sweeping motions while maintaining consistent distance from the surface to prevent pooling or uneven application. Both techniques require attention to detail—avoid overworking the sealant, which can create bubbles or streaks in the finish.
Drying Time and Multiple Coats
Proper drying between coats creates a professional-quality finish that lasts. Follow product instructions for exact drying times, which typically range from 1-2 hours depending on the sealant type and environmental conditions. Temperature and humidity significantly impact drying—warm, dry conditions accelerate the process while cool, damp environments extend necessary drying time. Apply multiple coats (2-3 minimum) for enhanced protection against wear, moisture, and UV damage. Each additional layer increases the durability and longevity of your sealed painted wood, making the extra time investment worthwhile for high-use or outdoor items.
Sealing Outdoor vs. Indoor Painted Wood

Painted wood surfaces face dramatically different threats depending on their location. Indoor and outdoor environments present unique challenges that require exact sealing approaches to ensure maximum durability and appearance retention.
Weather-Resistant Sealants for Exterior Projects
Exterior painted wood requires robust protection against UV rays, moisture, and temperature fluctuations. UV-resistant, waterproof sealants like Outdoor Defense Oil (a penetrating formula) or water-based polyurethane create essential barriers against cracking, fading, and water damage. Preparation plays a critical role—exterior surfaces must be completely dry, sanded smooth with 220-grit sandpaper, and thoroughly cleaned with Tri-Sodium Phosphate (TSP) to remove all debris before sealing. Application follows the “Apply, Absorb, Repeat, Remove” method: continue adding sealant until the wood stops absorbing it, then wipe away excess to prevent unsightly pooling. Exterior sealants typically need annual reapplication to maintain optimal protection against harsh environmental conditions.
Light-Duty Sealants for Interior Pieces
Indoor painted furniture benefits from gentler, clarity-focused formulations such as polycrylic (like Minwax’s water-based formula) or acrylic varnish. These products offer excellent scratch resistance without the yellowing effect that can diminish appearance over time. Surface preparation requires light sanding with 220-grit paper followed by thorough cleaning with a tack cloth to remove dust particles. Application tools matter significantly—foam brushes or rollers work best for flat surfaces like tabletops, while traditional brushes handle detailed areas more effectively, minimizing streaks and brush marks. Indoor pieces typically need 2-3 thin coats with light sanding between layers for a professional finish. Indoor sealants generally last longer between applications, requiring resealing only when visible wear appears.
The fundamental differences between outdoor and indoor sealing approaches center on durability requirements and maintenance schedules. Outdoor formulations prioritize waterproofing and UV stability to combat constant environmental exposure, while indoor options focus on clarity and easy maintenance in controlled environments. Ventilation considerations vary too—oil-based outdoor sealants demand proper airflow during application, whereas water-based indoor formulations emit fewer fumes, making them more pleasant to work with in enclosed spaces.
Common Mistakes to Avoid When Sealing Painted Wood

Even experienced DIYers can make errors when sealing painted wood. Recognizing these common pitfalls helps ensure your sealing project achieves professional results and lasting protection.
Rushing the Preparation Process
Inadequate surface preparation leads to poor adhesion and premature failure of your sealant. Many homeowners skip thorough cleaning or proper sanding before applying sealer. A dirty surface prevents the sealer from bonding correctly, while improper sanding creates an uneven base. Always clean with appropriate cleaners like TSP for heavily soiled surfaces, and sand with progressively finer grits (#220 followed by #320) to create the ideal foundation for your sealant.
Applying Thick Coats
Thick application doesn’t mean better protection. Heavy coats of polyurethane or other sealants often result in drips, bubbles, and extended drying times. The sealant might appear milky or cloudy when applied too thickly. Multiple thin coats (2-3 layers) provide superior protection and a smoother finish than one thick layer. Allow each coat to dry completely—about 2 hours for water-based products and 24 hours for oil-based sealants—before applying the next.
Using Incorrect Application Tools
The choice of applicator significantly impacts your results. Using rollers on intricate details or carved surfaces produces uneven coverage and trapped bubbles. Brushes work better for detailed areas, while foam applicators or high-quality synthetic brushes provide smooth application on flat surfaces. Match your tool to your project—fine-bristled brushes for detailed work and wider brushes or foam applicators for larger, flat areas.
Neglecting Environmental Conditions
Temperature and humidity dramatically affect sealant performance. Applying polyurethane in high humidity environments (above 80%) or extreme temperatures (below 60°F or above 90°F) compromises drying time and finish quality. Poor ventilation with oil-based sealants creates health hazards and extends drying periods. Always check product instructions for optimal application conditions and ensure proper air circulation during application and drying.
Skipping the Fine Sanding Between Coats
Many DIYers overlook light sanding between coats of sealer. This crucial step removes dust nibs and creates a slightly textured surface for the next coat to adhere to. After each coat dries completely, lightly sand with #320 grit sandpaper and wipe with a tack cloth before applying the next layer. This technique produces a remarkably smooth, professional finish that feels silky to the touch.
Disturbing the Drying Process
Impatience ruins more finishing projects than almost any other factor. Moving or using sealed items before they’re fully cured can result in permanent marks, dents, or adhesion failures. Water-based polyurethanes might feel dry after a few hours but typically require 24 hours before light use and up to 3 weeks for complete curing. Oil-based products need even longer—at least 24 hours between coats and up to 30 days for full hardening. Allow proper curing time based on the manufacturer’s instructions before putting sealed items into service.
Maintaining Your Sealed Painted Wood Surfaces

Regular maintenance extends the life of your sealed painted wood and keeps it looking fresh. Proper care involves simple routines that prevent deterioration and maintain the protective barrier.
Regular Cleaning Practices
Gentle cleaning preserves the integrity of sealed painted surfaces. Use mild soap and water to remove dust and grime without damaging the protective seal. Avoid harsh chemicals or abrasive cleaners that can scratch or degrade the sealer over time. A soft cloth dampened with the soap solution works perfectly for routine cleaning tasks.
When to Reapply Sealant
Sealants require periodic reapplication to maintain their protective qualities. Check for signs of wear such as dullness, scratches, or areas where the sealant appears thin. Most sealed painted wood surfaces need refreshing every few years, though high-traffic items or outdoor pieces may require more frequent attention. Water-based sealers typically need reapplication sooner than their oil-based counterparts.
Touch-Up Techniques
Minor damage doesn’t always necessitate a complete refinishing. For small scratches or worn spots, lightly sand the affected area with 220-grit sandpaper. Clean thoroughly with a tack cloth before applying a thin layer of matching sealant to the damaged section. Blend the edges of your touch-up with the surrounding finish for a seamless repair that extends the life of your painted wood surface.
Conclusion
Sealing painted wood isn’t just an optional final step—it’s essential for protecting your investment and ensuring your painted surfaces remain beautiful for years to come. With the right preparation techniques, appropriate sealant selection, and proper application methods, you’ll create a durable protective barrier against moisture, UV damage, and everyday wear.
Remember that indoor and outdoor projects require different approaches, and patience is key throughout the entire process. By avoiding common mistakes and following our maintenance recommendations, you’ll extend the life of your painted wood surfaces by 5-7 years or more.
Don’t rush the process—those extra hours spent on proper preparation and application will save you days of rework later. Your sealed painted wood surfaces will reward you with easier cleaning, enhanced appearance, and important long-term cost savings.
Frequently Asked Questions
Why is sealing painted wood important?
Sealing painted wood creates a protective barrier against moisture, UV rays, and everyday wear. This prevents peeling, cracking, and fading while making surfaces easier to clean. Properly sealed painted wood can extend the paint job’s lifespan by 5-7 years, saving money on frequent repainting. It’s especially critical for high-traffic areas and outdoor items exposed to harsh conditions.
How long should paint dry before applying a sealer?
Allow painted wood to dry completely for at least 24-48 hours before applying sealer. This timeframe may extend to 7 days for oil-based paints. Proper drying ensures the paint has fully cured and prevents trapping moisture between layers, which could lead to adhesion problems. Always check the paint manufacturer’s recommendations for specific drying times.
What’s the best sealer for outdoor painted wood?
For outdoor painted wood, use sealants specifically formulated with UV inhibitors and weather resistance. Marine-grade polyurethane, exterior varnish, or Outdoor Defense Oil work best. Water-based polyurethane offers good protection while maintaining color clarity. Choose products labeled for exterior use to ensure they can withstand temperature fluctuations, moisture, and sun exposure.
Can I use polyurethane over all types of paint?
No, polyurethane isn’t compatible with all paints. Water-based polyurethane works well over latex paints, while oil-based polyurethane is better for oil-based paints. Using oil-based polyurethane over latex can cause yellowing. Always ensure paint is fully cured before applying polyurethane. For chalk or milk paint, test in an inconspicuous area first or consider specialized sealers.
How many coats of sealer should I apply?
Apply 2-3 thin coats of sealer for optimal protection. Multiple thin layers create a stronger, more durable finish than one thick coat. Allow proper drying time between applications (typically 2-4 hours) and lightly sand with fine-grit sandpaper (320-400 grit) between coats. The final coat can be left unsanded for a smooth finish.
Do I need to sand between coats of sealer?
Yes, light sanding between coats of sealer is recommended. Use fine-grit sandpaper (320-400 grit) and sand lightly to remove dust nibs and create a slightly textured surface for better adhesion. After sanding, wipe the surface with a tack cloth to remove dust particles. This step creates a smoother, more professional finish and stronger bond between coats.
How do I fix bubbles in my sealer?
To fix bubbles in sealer, wait until it’s completely dry, then lightly sand the affected area with 320-400 grit sandpaper. Clean dust with a tack cloth before applying another thin coat. Prevent bubbles by not shaking the sealer (stir gently), using quality brushes, applying thin coats, and working in moderate temperatures (65-75°F) with low humidity.
How often should I reseal painted wood furniture?
Indoor painted wood furniture typically needs resealing every 3-5 years, depending on use. Outdoor pieces may require yearly resealing due to weather exposure. Look for signs like dullness, water no longer beading, or minor scratches indicating the sealant is wearing thin. High-traffic items like tables and chairs need more frequent maintenance than decorative pieces.
Can I change sealers if I’ve previously sealed painted wood?
Yes, you can change sealers, but proper preparation is essential. Lightly sand the existing sealer to create a textured surface for adhesion. Clean thoroughly to remove sanding dust and residue. Test the new sealer in an inconspicuous area to ensure compatibility. Some combinations may cause adhesion problems or discoloration, so research compatibility between your existing and new sealer.
How can I tell if painted wood needs sealing?
Painted wood needs sealing if the surface feels tacky, absorbs water rather than repelling it, or shows early signs of wear like scuffs and scratches. For outdoor items, fading color or water stains indicate inadequate protection. Try the water drop test—if water soaks in rather than beading up, it’s time to seal. New paint projects always benefit from sealing for longevity.


