Wondering if acrylic paint will work on wood? You’re in the right place! Acrylic paint is actually one of the best choices for wooden surfaces, offering vibrant colors, excellent adhesion, and long-lasting results that can transform any wooden project into a masterpiece.
We’ve tested countless paint types on various wooden surfaces and can confidently say that acrylics deliver outstanding performance. Whether you’re refreshing furniture, creating art, or working on a DIY project, acrylic paint provides the versatility and durability you need. The best part? It’s easy to use even for beginners, dries quickly, and can be sealed for extra protection.
In this guide, we’ll explore everything you need to know about using acrylic paint on wood, from proper preparation techniques to application tips that ensure a professional-looking finish.
Understanding Acrylic Paint and Its Compatibility With Wood
Acrylic paint forms an excellent bond with wooden surfaces due to its polymer-based composition. This versatile medium contains pigments suspended in an acrylic polymer emulsion, creating a flexible yet durable finish once dry. The chemical structure of acrylic paint allows it to penetrate wood fibers while maintaining its color vibrancy and resistance to environmental factors.
Wood accepts acrylic paint readily because of its porous nature which provides an ideal surface for paint adhesion. Different wood types—such as pine, oak, or cedar—vary in their porosity and grain patterns, affecting how the paint adheres and appears. Softwoods like pine absorb more paint and may require additional coats, while hardwoods like oak offer more resistance but provide a smoother finish.
The water-based formula of acrylic paint makes it particularly suitable for wooden projects. Unlike oil-based alternatives, acrylics don’t yellow over time and maintain their brilliant colors for years. They’re also less prone to cracking as the wood expands and contracts with temperature and humidity changes, thanks to their flexibility once cured.
Acrylic paint’s quick-drying property gives it a distinct advantage for wood painting projects. Most acrylics dry to the touch within 20-30 minutes and cure completely in 24 hours, allowing for faster project completion. This rapid drying time also reduces the risk of dust particles settling on wet surfaces, resulting in a cleaner finish.
The compatibility between acrylic paint and wood extends beyond basic adhesion—it creates a breathable barrier that protects the wood while allowing it to maintain its natural characteristics. For outdoor wooden pieces, acrylic paint provides UV protection and weather resistance, extending the lifespan of the wood substantially when properly sealed.
Why Acrylic Paint Works Well on Wooden Surfaces

Acrylic paint creates an exceptional bond with wooden surfaces due to its unique chemical composition. This versatile medium dries quickly, typically within 20 minutes depending on application thickness and paint brand. Its water-based formula delivers vibrant colors without toxic fumes, making it a safe choice for indoor wood painting projects.
Key Properties That Make Acrylic Paint Ideal for Wood
Acrylics offer remarkable ease of application when working with wood surfaces. While they can be applied directly to wood, using a primer first significantly improves both adhesion and the smoothness of the final finish. The durability factor cannot be overlooked – properly prepared wood surfaces painted with acrylics demonstrate excellent longevity and resistance to wear. Artists and DIY enthusiasts appreciate the flexibility of acrylic paints, which maintain their integrity even as wood expands and contracts with environmental changes.
Comparing Acrylic to Other Wood Paint Options
Acrylic paints outperform oil-based alternatives in several key aspects. They dry substantially faster and produce minimal odor compared to their oil-based counterparts, making them more convenient for indoor projects. When compared to latex paints (which share water-based properties), acrylics deliver more vibrant color saturation and better adhesion on wooden surfaces with proper preparation. Unlike wood stains that merely alter color while preserving grain visibility, acrylic paint provides complete coverage and enables complex design possibilities. Crafters working on detailed wooden projects often prefer acrylics for their precision and control during application.
Preparing Your Wood Surface for Acrylic Paint

Proper preparation of your wood surface is essential for achieving a flawless finish with acrylic paint. The quality of your preparation directly impacts how well the paint adheres and how long it lasts on the wooden surface.
Cleaning and Sanding Techniques
Thorough cleaning removes all contaminants that might prevent proper paint adhesion. Start by wiping down the entire wood surface with a clean, damp cloth to remove dust and dirt. For greasy or heavily soiled surfaces, use a mild detergent solution and rinse completely afterward. Allow the wood to dry completely before moving to the next step.
Sanding creates the ideal texture for paint adhesion by slightly roughening the surface. Use fine-grit sandpaper (180-220 grit) for most projects, working in the direction of the wood grain to avoid scratches. Electric sanders speed up the process for larger projects, but hand sanding offers better control for detailed work. After sanding, remove all dust with a tack cloth or vacuum with a brush attachment, as dust particles can create bumps in your finished paint job.
Applying the Right Primer for Best Results
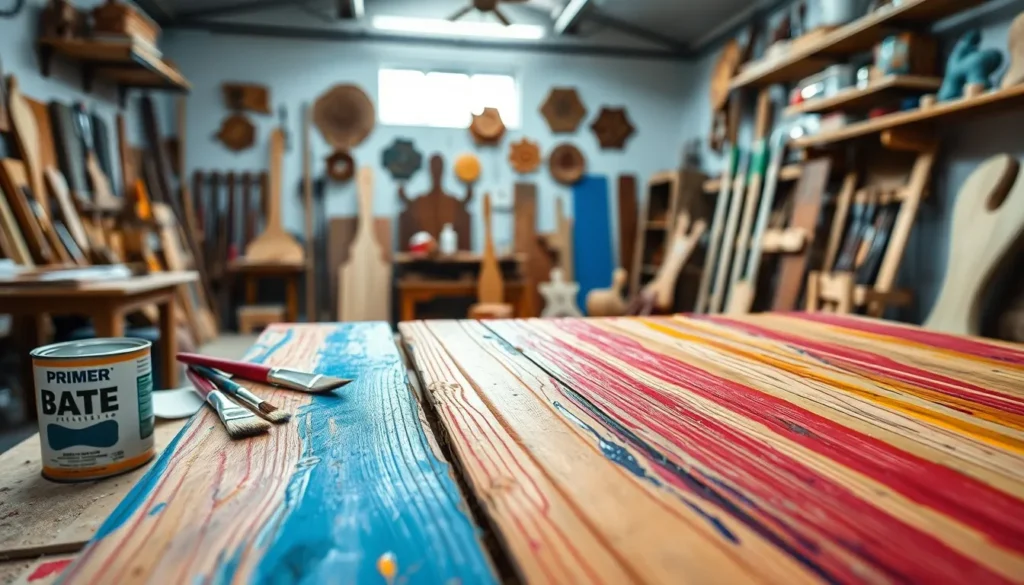
Primer creates the foundation for a successful paint application on wood. Choose a primer specifically designed for wood and compatible with acrylic paint, such as acrylic-based primers or universal primers. These formulations seal the wood’s porous surface and prevent tannins from bleeding through your paint layer.
Apply primer using a high-quality synthetic brush or foam roller in thin, even coats. Multiple thin coats provide better results than one thick coat that may drip or take longer to dry. Allow each coat to dry completely according to the manufacturer’s instructions, typically 1-3 hours depending on the product and environmental conditions. Once dry, lightly sand the primed surface with fine-grit sandpaper (220 grit) to remove any brush marks or imperfections, creating the smoothest possible base for your acrylic paint application.
Step-by-Step Guide to Painting Wood With Acrylics

Applying acrylic paint to wood involves a systematic approach to achieve professional results. Follow these proven steps to transform your wooden surfaces with vibrant, long-lasting color.
Choosing the Right Brushes and Tools
Synthetic bristle brushes provide the best application experience for acrylic paint on wood. Flat or angled brushes create smooth, even coverage and help reach corners and edges with precision. Foam rollers work exceptionally well for large, flat wooden surfaces, delivering streak-free results in less time than traditional brushes.
Non-porous palettes prevent premature drying of your acrylic paints during mixing sessions. A selection of quality brushes in various sizes allows for both broad coverage and detailed work. High-quality acrylic paints like Liquitex offer superior pigmentation and durability for wooden projects.
For perfect application, we’ve found these essential tools improve results:
- Sandpaper (120-220 grit) for surface preparation
- Wood-exact primer to seal the surface
- Clean mixing containers for paint thinning
- Drop cloths to protect surrounding areas
- Fine brushes for detail work and edges
Application Techniques for Different Wood Types
Softwoods like pine and cedar require thorough priming to prevent uneven absorption of acrylic paint. Their porous nature can cause paint to soak in unevenly, so applying a dedicated wood primer creates a consistent base for your color layers.
Hardwoods such as oak and maple benefit from extra sanding attention before painting. Their dense grain patterns may show through acrylic paint without sufficient preparation and multiple thin layers. Sand with progressively finer grits to achieve the smoothest possible surface.
Manufactured woods like plywood and MDF need special consideration for their edges. Seal all edges thoroughly to prevent moisture from the acrylic paint causing swelling or warping. These materials accept paint readily but require complete edge treatment for professional results.
The painting process follows four key steps:
- Clean and sand the surface using 120-220 grit sandpaper to remove imperfections and create texture for better paint adhesion.
- Apply wood primer in a thin, even layer to seal the surface, enhance paint adhesion, and prevent tannin bleeding.
- Paint with quality acrylics using wide, flat brushes for base coats. Apply multiple thin layers (allowing 20 minutes drying time between each) rather than one thick coat.
- Add a protective sealant such as varnish or polyurethane to enhance durability and achieve your desired finish (matte, satin, or glossy).
Tips for Achieving Professional-Looking Results

Professional-looking acrylic paint finishes on wood require attention to detail during preparation and application. We’ve compiled essential techniques to help you create stunning painted wooden projects that stand out.
Preparation Techniques
Proper preparation creates the foundation for exceptional results. Applying a wood primer or sealant before painting prevents warping and ensures better paint adhesion. Gesso works particularly well for improving surface texture, creating an ideal base for detailed work.
For optimal results, clean the wood thoroughly and allow it to dry completely before applying any primer. Sand the surface between primer coats to create an ultra-smooth foundation for your paint application.
Application Methods
The right application methods make a important difference in your finished project. Use wide, flat brushes for even coverage on larger areas and switch to smaller brushes for intricate details and precision work.
Multiple thin layers of paint achieve more vibrant colors and better textures than single thick coats. Let each layer dry completely before applying the next to prevent muddy colors and ensure proper adhesion between coats.
Layering Techniques for Depth and Texture
Layering techniques transform ordinary wooden surfaces into visually ever-changing pieces. Glazing involves applying thin, transparent layers over opaque base layers, creating depth and luminosity that can’t be achieved with single applications.
The impasto technique uses thick layers of acrylic paint to build texture and dimension on wooden surfaces. This approach works beautifully for creating textural elements or mimicking carved details.
For subtle color variations, try the wash technique by mixing acrylic paint with water. This creates a translucent effect that allows the wood grain to partially show through while adding color, perfect for achieving a weathered or antique appearance.
Common Mistakes to Avoid
Under-preparation leads to disappointing results when painting wood. Failing to seal or prime wooden surfaces causes uneven paint absorption and potential warping as moisture from the paint penetrates the wood.
Overloading the surface with too much paint at once creates problems like cracking and extended drying times. Thick layers also tend to hide detail and texture rather than enhance them.
Incomplete drying between layers results in poor adhesion and smudging. Patience during the painting process ensures each layer bonds properly with the previous one, creating a durable and professional-looking finish.
Sealing and Protecting Your Acrylic-Painted Wood Projects

Properly sealing your acrylic paint on wood creates a barrier against moisture, UV damage, and physical wear. The right protective finish not only enhances the longevity of your artwork but also brings out the vibrancy of your acrylic colors and prevents them from fading over time.
Best Topcoat Options for Different Wood Applications
Different wood projects require exact topcoat answers based on their intended use and environment. Indoor decorative pieces benefit from water-based polyurethane, which provides a clear, non-yellowing finish that preserves the true colors of your acrylic paint. Furniture and high-traffic items need more robust protection from polycrylic or exterior-grade varnishes that offer resistance against scratches, spills, and daily handling. Outdoor wood projects demand UV-resistant sealants that prevent sun damage and water infiltration, with exterior polyurethane or marine-grade varnish being excellent choices. Create projects and smaller decorative objects can be effectively protected with acrylic spray sealants or shellac, which dry quickly and provide adequate protection for items that won’t face heavy use.
Application Techniques for Durable Finishes
Applying protective finishes correctly dramatically impacts their effectiveness and appearance. Start by ensuring your acrylic paint has completely dried—typically 24 hours for thin layers. Synthetic brushes work best for liquid sealants, creating smooth, streak-free applications across wooden surfaces. Apply thin, even coats rather than heavy layers to prevent dripping, cloudiness, or extended drying times. Multiple thin coats (2-3 layers) provide superior protection compared to a single thick application, especially for frequently handled items. Light sanding with fine-grit sandpaper (320-400 grit) between coats removes imperfections and improves adhesion of subsequent layers. Spray sealants should be applied in a well-ventilated area with steady, sweeping motions at the recommended distance to avoid puddles or uneven coverage.
Maintaining Sealed Acrylic Paint on Wood
Proper maintenance extends the life of your sealed acrylic wood projects significantly. Clean sealed surfaces regularly with a soft, slightly damp cloth to remove dust without scratching the protective finish. Avoid harsh chemicals, abrasive cleaners, or alcohol-based products that can deteriorate the sealant layer and potentially damage the acrylic paint underneath. Indoor pieces benefit from placement away from direct sunlight, which can cause fading even though UV protection. Outdoor items require inspection twice yearly for signs of sealant breakdown—such as cloudiness, cracking, or water absorption—indicating it’s time for a maintenance coat. Apply a fresh topcoat every 1-2 years for outdoor pieces or high-use items to maintain optimal protection against environmental factors and physical wear.
Inspiring Wood Projects Using Acrylic Paint

Home Décor Transformations
Acrylic paint transforms ordinary wooden home décor items into stunning focal pieces. Wooden trays become sophisticated serving pieces with geometric patterns or bold solid colors. Shelves gain personality with painted borders or decorative motifs that complement your interior design. Furniture pieces like side tables or chairs can be completely refreshed with acrylic paint, allowing you to create custom pieces that match your color scheme. These transformations don’t require professional skills—just some quality acrylic paint and a bit of creativity.
Art on Wood Panels
Wood panels offer an excellent alternative to traditional canvas for acrylic painting. Artists appreciate the solid, sturdy surface that resists warping and provides a durable base for creative expression. Primed wood panels create gallery-ready pieces with a distinctive natural edge that enhances many artistic styles. The texture of the wood grain can be incorporated into the artwork or completely covered, depending on your artistic vision. Many contemporary artists choose wood panels for their longevity and the unique aesthetic quality they bring to finished pieces.
Create Projects for All Skill Levels
Wooden crafts present endless possibilities for acrylic paint applications. Holiday ornaments can be personalized with acrylic paint to create cherished keepsakes or thoughtful gifts. Wooden toys gain charm and character through painted details, making them one-of-a-kind creations. Decorative signs with inspiring quotes or custom designs become meaningful home additions that reflect your personal style. The quick-drying nature of acrylic paint makes these create projects particularly satisfying, as you’ll see results in approximately 20 minutes per layer without lengthy wait times between coats.
Seasonal and Holiday Decorations
Seasonal décor items made from wood and acrylic paint add festive touches to your home throughout the year. Painted wooden pumpkins and autumn leaves create warm fall displays that can be reused year after year. Winter-themed wooden cutouts treated with acrylics and sealed properly withstand storage and repeated use. Spring and summer decorations featuring bright floral designs or beachy themes bring seasonal freshness to your space. These decorations benefit from proper sealing, which protects the acrylic paint from scratches and UV damage, maintaining their vibrant appearance across multiple seasons.
Conclusion
Acrylic paint is undeniably an excellent choice for wood projects offering versatility durability and stunning visual impact. We’ve seen how its unique polymer-based formula creates a strong bond with wooden surfaces while protecting them from environmental damage.
With proper preparation application and sealing techniques your painted wooden creations can maintain their beauty for years to come. Whether you’re refreshing furniture creating artistic wood panels or crafting seasonal decorations acrylics provide the perfect balance of ease-of-use and professional results.
Remember that success lies in the details—proper sanding quality primers thin application layers and appropriate sealants will elevate your work. Now it’s time to gather your supplies let your creativity flow and transform those wooden surfaces into vibrant expressions of your imagination.
Frequently Asked Questions
Is acrylic paint good for wood projects?
Yes, acrylic paint is excellent for wood projects. Its water-based formula creates a strong bond with wooden surfaces, offering vibrant colors that resist yellowing and cracking. Acrylic paint dries quickly (typically within 20 minutes), is low-odor, and when properly sealed, provides durability and weather resistance for both indoor and outdoor wooden items.
Do I need to prime wood before using acrylic paint?
Yes, priming is essential. A wood-specific primer creates an ideal surface for paint adhesion, seals the wood, and prevents tannins from bleeding through. Apply 1-2 thin coats of primer, allowing proper drying time between applications. Light sanding between primer coats creates the smoothest possible base for your acrylic paint application.
How should I prepare wood for acrylic painting?
Preparation is crucial for a professional finish. Clean the wood thoroughly to remove dirt and oils. Sand the surface with fine-grit sandpaper (180-220 grit) to create texture for better adhesion. Remove all dust with a tack cloth or slightly damp rag. Ensure the wood is completely dry before applying primer and paint.
What’s the best way to apply acrylic paint to wood?
Use synthetic bristle brushes for smooth application and foam rollers for larger surfaces. Apply multiple thin layers rather than one thick coat, allowing each layer to dry completely (usually 20-30 minutes). Paint with the wood grain whenever possible. For the most vibrant color, use a white primer underneath and build up layers gradually.
How does acrylic paint compare to wood stain?
Acrylic paint provides complete coverage with vibrant colors and allows for detailed designs, while wood stain penetrates the surface to enhance the natural grain. Paint sits on top of the wood creating a protective layer, whereas stain becomes part of the wood. Acrylic paint offers more creative possibilities and color options than stain.
Does acrylic-painted wood need to be sealed?
Yes, sealing is highly recommended. A protective topcoat enhances durability, prevents chipping, and protects the paint from moisture and UV damage. For indoor items, water-based polyurethane works well. Furniture benefits from polycrylic, while outdoor projects require exterior-grade varnishes. Apply 2-3 thin coats of sealant for optimal protection.
How long does acrylic paint take to dry on wood?
Acrylic paint typically dries to the touch within 20-30 minutes on wood surfaces. However, allow 1-2 hours between coats for proper curing. The complete curing process takes 24-72 hours depending on humidity, temperature, and paint thickness. Avoid handling the painted item heavily for at least 24 hours after the final coat.
How do I maintain acrylic-painted wood items?
Clean painted surfaces regularly with a soft, slightly damp cloth. Avoid harsh chemicals or abrasive cleaners that can damage the finish. For outdoor items, inspect annually for signs of wear and reapply sealant as needed. Indoor items may need a fresh coat of sealant every few years to maintain their appearance and protection.


