Wondering how to stick felt to wood perfectly? We’ve got you covered with proven techniques that deliver lasting results. Whether you’re creating furniture pads, lining jewelry boxes, or crafting decorative items, the right adhesive method makes all the difference.
We’ll show you simple yet effective ways to attach felt to wood surfaces without the frustration of peeling edges or unsightly bumps. From selecting the appropriate adhesive to preparing your materials properly, our step-by-step approach ensures professional-quality results every time. Don’t waste money on methods that fail after just a few weeks of use.
Why Use Felt on Wood Projects
Felt provides crucial protection for wood surfaces against scratches and damage when used as furniture pads. Many woodworkers incorporate felt into their projects to reduce noise from moving objects, creating a quieter environment in homes and offices. Decorative applications of felt add texture and visual interest to wooden crafts, picture frames, and wall art.
Crafters often choose felt for lining wooden boxes and drawers because it creates a soft cushioning effect for delicate items. Felt’s moisture-absorbing properties help protect wood from condensation in certain applications like coasters and tableware holders. Educational toys and games benefit from felt additions on wooden pieces to enhance tactile experiences for children.
Interior designers frequently recommend felt accents on wooden furnishings to add color without permanent alterations. Felt’s versatility allows it to be cut into precise shapes to fit various wooden surfaces perfectly. DIY enthusiasts appreciate felt’s affordability compared to other protective materials, making it accessible for projects of all sizes.
Materials Needed for Attaching Felt to Wood
 2")
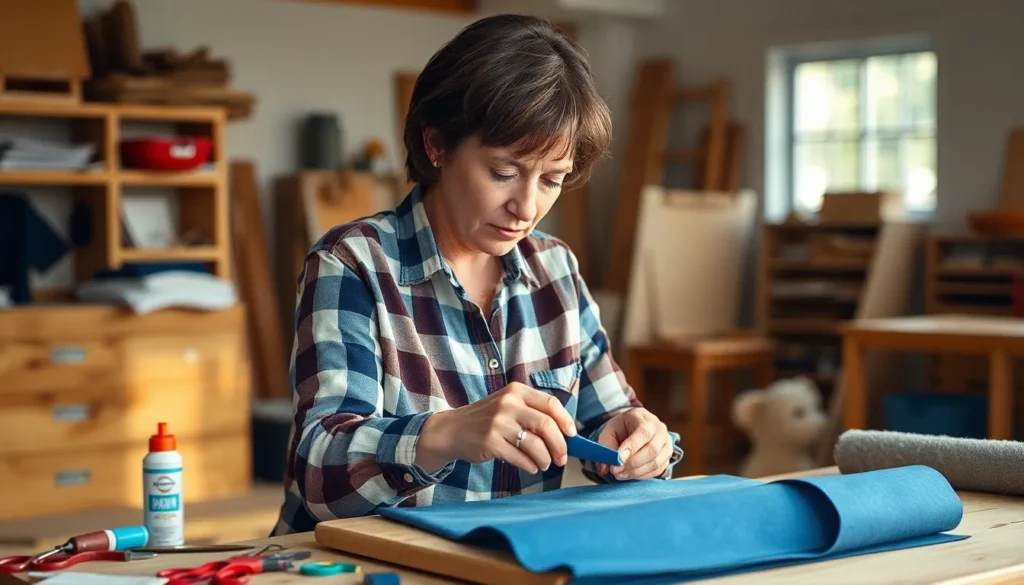
Attaching felt to wood requires exact materials to ensure a secure bond that lasts. We’ve compiled a comprehensive list of essential supplies and tools you’ll need before starting your project.
Types of Adhesives for Felt
Selecting the right adhesive is crucial for a successful felt application. Spray adhesive like 3M Super 77 provides even coverage and quick bonding, making it perfect for larger projects. PVA glue (such as Elmer’s) offers a non-toxic, water-based option that dries completely clear without leaving visible residue. Contact cement creates instant, durable bonds that work exceptionally well for covering extensive wood surfaces. Traditional hide glue requires heating to 140-150°F before application but offers the advantage of being reversible if adjustments are needed later.
Essential Tools for the Job
Several tools complement your adhesive choice to achieve professional results. A plastic putty knife or smoothing tool helps eliminate air bubbles and ensures the felt lays perfectly flat against the wood surface. Brushes or rollers help even application of spreadable adhesives like PVA or hide glue. Utility knives and scissors allow precise trimming of excess felt after attachment. Protective sheeting prevents unwanted adhesive drips or overspray from damaging surrounding surfaces. Proper ventilation equipment (masks, open windows) becomes necessary when working with spray adhesives in enclosed spaces. Those using hide glue benefit from having a crock-pot to maintain consistent temperature during application.
Preparing Your Wood Surface
 4")
Proper surface preparation is the foundation for successfully attaching felt to wood. A well-prepared wood surface ensures stronger adhesion and a professional-looking finished project.
Cleaning and Sanding Tips
Clean wood surfaces thoroughly before applying any adhesive or felt. Remove all dust, dirt, and grease using a lint-free cloth and mild detergent solution for heavily soiled areas. Stubborn residues like oil or wax require mineral spirits applied with a clean rag. Always allow the wood to dry completely after cleaning, as moisture trapped between the felt and wood can prevent proper adhesion.
Sanding creates an ideal surface texture for adhesives to bond effectively. Use fine-grit sandpaper (180-220 grit) to smooth rough spots and create a slightly textured surface that adhesives can grip. Sand in the direction of the wood grain to avoid leaving visible scratch marks. After sanding, wipe the surface with a tack cloth to remove all dust particles that might interfere with the bonding process.
Surface Treatment Considerations
Painted or varnished surfaces require special attention before felt application. Check that any paint or varnish has fully cured according to the manufacturer’s instructions, which typically takes 24-72 hours. Lightly sand glossy finishes with fine-grit sandpaper to create a slightly roughened surface that provides better grip for adhesives.
Lacquered or polyurethane-finished wood presents unique challenges for felt adhesion. Inspect these surfaces carefully for any flaking or peeling areas, as these unstable sections will compromise the bond between felt and wood. Remove damaged finish completely from the application area, and consider applying a thin primer designed for slick surfaces if the finish is particularly glossy. Testing adhesive on a small, inconspicuous area helps determine whether additional surface preparation is needed for these treated woods.
Different Methods to Attach Felt to Wood
 6")
Attaching felt to wood requires selecting the right adhesive method for your exact project. Each technique offers unique advantages depending on the size, purpose, and permanence needed for your felt application.
Using Spray Adhesive
Spray adhesive creates a strong, even bond ideal for large, flat wooden surfaces. Begin by shaking the can vigorously (10-12 times) before holding it 8-10 inches away from the wood surface to ensure even distribution. Products like 3M Super 77 work excellently for projects such as table toppers or boards. Apply the adhesive in a well-ventilated area to avoid inhaling fumes, then immediately press your felt onto the surface. This immediate application helps create the strongest possible bond between materials.
Applying Fabric Glue
Water-based adhesives provide reliable attachment for felt-to-wood projects. PVA glue, such as Elmer’s, works effectively when applied in a thin, even layer using a brush or roller to prevent clumping. Contact cement offers another excellent option for permanent bonding—apply it to both the wood and felt surfaces, allow it to dry until tacky, then press the materials together. Weldwood contact cement delivers particularly strong results for projects requiring durability and longevity.
Working with Self-Adhesive Felt
Self-adhesive felt simplifies the attachment process by eliminating separate glue application. These pre-cut sheets come with adhesive backing already applied—simply peel off the protective layer and press the felt directly onto your wood surface. This method works perfectly for small projects or quick fixes. Clean and smooth wood surfaces ensure optimal adhesion, so take time to prepare your wood properly before applying self-adhesive felt.
For all these methods, proper preparation enhances results. Sand wood lightly to create texture for better adhesion and remove all dust before applying adhesives. A plastic putty knife helps smooth the felt and eliminate air bubbles after application. Allow adequate drying time according to the manufacturer’s guidelines for your exact adhesive. Always work in well-ventilated spaces, particularly when using spray adhesives or contact cement to protect your health during the project.
Step-by-Step Guide to Attaching Felt
 8")
Attaching felt to wood requires precision and the right technique to ensure a professional finish. We’ve created this comprehensive guide to walk you through each crucial step of the process, from accurate measurements to final adjustments.
Measuring and Cutting the Felt
Proper measurement is the foundation of any successful felt application project. Measure the wood surface carefully using a measuring tape, then cut your wool felt approximately 1/8-inch larger than the target area to allow for adjustments during application. Clean, precise cuts are essential for professional results, so use a sharp utility knife rather than scissors to ensure clean edges and prevent fraying. This extra preparation step makes a important difference in the final appearance of your project.
Application Techniques for Best Results
Choosing the right adhesive dramatically affects the longevity and appearance of your felt application. Spray adhesive offers even coverage and quick bonding, making it ideal for larger surface areas. PVA glue (such as Elmer’s) works perfectly for smaller projects and can be applied in a thin, even layer using a brush. Contact cement provides an exceptionally strong bond but must be applied sparingly to avoid saturating the felt. Traditional hide glue, which requires heating, allows for repositioning since it can be reactivated and works wonderfully for intricate projects.
For the application process, spread your chosen adhesive thinly and evenly using a brush or roller. When working with contact cement, coat both the felt and wood surfaces lightly, then wait until they become tacky before pressing them together. Press the felt firmly onto the wood surface, starting from one edge and working across to prevent air bubbles from forming. A plastic putty knife helps smooth out any bubbles and ensures complete contact between the surfaces. Secure the felt with weights or clamps until fully dry, which can take anywhere from 1 to 24 hours depending on your adhesive type.
After the adhesive has dried completely, trim any excess felt for a clean finish. For projects with large surfaces, it’s always wise to test your adhesive on scrap materials first to ensure compatibility between your exact felt and wood. Always avoid using excessive glue as this can cause unsightly seepage through the felt, and apply even pressure during the bonding process to eliminate gaps that might lead to peeling later.
Troubleshooting Common Issues
 10")
Even with careful application, you might encounter some challenges when sticking felt to wood. These common issues can be fixed with the right techniques and a bit of patience.
Dealing with Bubbles and Wrinkles
Bubbles and wrinkles in felt create an unprofessional appearance and can lead to premature peeling. A rolling tool provides the most effective solution for smoothing out these imperfections after application. Applying gentle, even pressure from the center outward helps eliminate air pockets trapped beneath the felt surface. For stubborn bubbles, carefully lift the affected section and reapply adhesive before pressing down firmly with your fingertips or a plastic putty knife. Rolling tools specifically designed for crafting offer precision when working with delicate felt materials, ensuring the adhesive bonds properly without damaging the fabric.
Fixing Loose Edges
Loose edges frequently occur when adhesive fails to bond properly along the perimeter of your felt. Adding a small amount of fresh adhesive directly to the problematic edge creates a stronger bond when pressed firmly back into place. Temporary fasteners like straight pins or small tacks can secure larger pieces of felt while the adhesive fully cures, preventing edges from lifting during the drying process. Heat-activated adhesives respond well to gentle warming with a hairdryer on low setting, which reactivates the bonding properties and helps secure stubborn edges. Clean any adhesive that squeezes out immediately with appropriate solvents to maintain a professional finish.
Creative Projects Using Felt on Wood
 12")
Felt boards serve as excellent educational tools that make storytelling and diagram creation interactive and captivating. Teachers frequently use these boards for visual lessons, while parents create them for children’s rooms to encourage imaginative play.
Handcrafted wooden boxes transform into premium storage answers when lined with felt. Jewelry boxes benefit particularly from this treatment as the soft lining prevents scratches on precious metals and gemstones. Tool cases with felt compartments protect expensive equipment from damage during storage or transport.
Custom table toppers enhance crafting stations by providing a soft, cushioned work surface. Simply attach felt to MDF or wooden boards to create a dedicated area for detailed work like jewelry making, model building, or paper crafting. The felt surface prevents small items from rolling away and reduces noise when working with tools.
Decorative wall art combines the natural texture of wood with the softness of felt for striking visual contrast. Creative enthusiasts cut felt into shapes, letters, or patterns and adhere them to wooden plaques or panels for unique home decor pieces.
Wooden game boards come alive with felt playing surfaces that prevent cards or game pieces from sliding. Chess boards, card tables, and custom board games benefit from this practical application that improves both functionality and aesthetic appeal.
Felt-bottomed wooden coasters protect furniture while adding a decorative element to your home. The felt layer absorbs moisture and prevents scratches, making these practical items both functional and attractive additions to any living space.
Conclusion
Attaching felt to wood opens up a industry of practical and creative possibilities for your projects. With the right materials properly selected and careful preparation of your wood surface you’ll achieve professional results that last.
Remember that success lies in the details: precise measurements clean surfaces even adhesive application and proper drying time. Don’t rush the process—taking time with each step ensures your felt will stay firmly attached without bubbles or peeling edges.
We’ve equipped you with all the techniques and troubleshooting tips needed to confidently incorporate felt into your wooden creations. Whether you’re making functional furniture pads educational toys or decorative art pieces you now have the skills to create beautiful lasting results.
Happy crafting!
Frequently Asked Questions
What is the best adhesive for attaching felt to wood?
The best adhesive depends on your specific project. Spray adhesive works well for large areas, providing even coverage. PVA glue is excellent for smaller projects and is non-toxic. Contact cement creates a strong bond for high-use items, while traditional hide glue is ideal for antique restoration. Always test your chosen adhesive on scrap materials first to ensure compatibility with both the felt and wood.
How do I prepare wood before attaching felt?
Prepare wood by thoroughly cleaning the surface with a lint-free cloth and mild detergent to remove dust, oils, and residue. Once dry, lightly sand the surface with fine-grit sandpaper to create texture for better adhesion. Remove all sanding dust before applying adhesive. Proper preparation ensures a stronger bond and prevents the felt from peeling away prematurely.
How can I prevent bubbles when applying felt to wood?
Prevent bubbles by applying adhesive evenly and working from the center outward. Use a plastic putty knife or brayer roller to smooth the felt as you go. If bubbles appear, gently lift the felt without completely removing it, reapply adhesive if needed, and press down firmly. For stubborn bubbles, you can make a tiny pinprick with a needle to release trapped air.
How long should I let the adhesive dry?
Drying times vary by adhesive type. Spray adhesives typically set in 15-30 minutes but reach full strength after 24 hours. PVA glue needs at least 1-2 hours before handling and 24 hours for complete curing. Contact cement requires the adhesive to become tacky (about 15-20 minutes) before joining surfaces. Always check manufacturer instructions for specific drying times and optimal temperature conditions.
What can I do if the felt edges start lifting after application?
If edges begin lifting, apply a small amount of fresh adhesive under the loose section using a toothpick or small brush. Press firmly and hold or clamp for several minutes. For persistent problems, consider using a stronger adhesive specifically for the edges. In some cases, decorative trim or finishing techniques can be added to secure and conceal problem edges.
Can I remove felt from wood if I make a mistake?
Yes, you can remove felt, though it may require patience. For water-based adhesives like PVA, dampen the felt with warm water to loosen the bond. For stronger adhesives, try carefully applying heat with a hairdryer to soften the adhesive. Work slowly from one edge, gently lifting the felt. You may need to sand residue from the wood surface before reapplying new felt.
What thickness of felt works best for wood projects?
Medium-weight felt (20-30% wool or 1-2mm thick) works best for most wood applications. It’s substantial enough to provide protection and cushioning without being too bulky. Thinner craft felt (less than 1mm) is suitable for decorative purposes, while thicker industrial felt (3mm+) works well for heavy-duty furniture protection and sound dampening applications.
How do I cut felt accurately for wood projects?
For precise cuts, use sharp fabric scissors or a rotary cutter with a self-healing mat. Measure your wood surface and cut the felt slightly larger (about 1/4 inch extra on all sides). Mark cutting lines with tailor’s chalk or a disappearing fabric marker. For intricate shapes, create a paper template first. After application and complete drying, trim excess felt with a sharp utility knife for clean edges.


