Wooden ladders blend practicality with timeless appeal, offering a versatile solution for reaching high places in your home or garden. Whether you’re replacing an old ladder or tackling your first woodworking project, crafting your own wooden ladder provides both satisfaction and a customized tool customized to your exact needs.
We’ll guide you through creating a sturdy, reliable wooden ladder using simple materials and basic tools. This DIY project doesn’t require advanced carpentry skills—just attention to detail and following our step-by-step instructions. From selecting the right wood to assembling the final product, you’ll discover how satisfying it is to build something functional with your own hands that will last for years to come.
Why Build Your Own Wooden Ladder
Building your own wooden ladder offers many practical advantages beyond simply having another tool in your shed. Custom wooden ladders can be customized to your exact height needs, making those hard-to-reach areas accessible without compromising safety. Many commercially available ladders don’t provide the exact height or design that might best suit your unique spaces.
Wooden ladders also bring aesthetic value to your home environment. Unlike their metal counterparts, wooden ladders blend seamlessly with home decor and can serve multiple purposes as decorative elements when not in use. Natural wood grain patterns create visual interest while complementing various interior design styles.
Important cost savings make DIY ladder building an economical choice for homeowners. Store-bought wooden ladders of high quality typically cost between $150-$300, while building your own often requires just $30-$50 in materials. This 80% savings doesn’t compromise functionality or durability when proper construction techniques are followed.
The hands-on experience of creating a wooden ladder develops valuable woodworking skills applicable to many other home projects. You’ll practice precise measuring, clean cutting, and secure joining techniques that transfer directly to future carpentry endeavors. Many woodworkers consider ladder building an excellent intermediate project that builds confidence for more complex constructions.
Environmental considerations also favor homemade wooden ladders. Using sustainably sourced lumber and natural finishes reduces the carbon footprint compared to manufactured products. You can also repurpose wood from other projects, giving new life to materials that might otherwise be discarded.
Tools and Materials Needed
Gathering the right supplies is crucial before starting your wooden ladder project. With proper preparation, you’ll ensure a smooth building process and create a sturdy, reliable finished product.
Essential Tools
Constructing a wooden ladder requires several basic tools that most DIY enthusiasts already own. A circular saw or hand saw is necessary for cutting wood pieces to your desired dimensions. You’ll need a drill press or handheld drill for creating holes where the rungs will connect to the side rails. Include a hammer for assembly work and driving in any nails if needed. Accurate measurements are essential, so a tape measure and combination square help ensure all cuts and angles are precise. Don’t forget safety equipment – safety glasses protect your eyes from wood chips and a dust mask prevents inhalation of sawdust during cutting operations.
Wood Selection
The type of wood you choose directly impacts your ladder’s durability and strength. White oak stands out as an excellent choice due to its exceptional strength and long-lasting properties, making it ideal for ladders that will see frequent use. Pine offers a more budget-friendly alternative while still providing adequate strength for most household applications. Cedar represents another solid option, particularly for outdoor ladders, as it naturally resists rot and insects. Each wood type brings different weight, appearance, and durability characteristics, so select based on your exact needs and where you’ll use the ladder most frequently.
Hardware and Fasteners
The right connecting hardware ensures your ladder remains stable and safe throughout its lifetime. Screws provide straightforward assembly and superior holding power compared to nails, making them the preferred fastener for ladder construction. Wood glue applied at all joints significantly enhances overall strength and prevents components from shifting over time. Consider using dowels to create more secure connections between rungs and side rails – these wooden pegs create mechanical reinforcement when inserted into corresponding drilled holes. Shims or wedges prove invaluable during assembly to tighten joints and ensure everything fits perfectly. For outdoor ladders, opt for corrosion-resistant screws and hardware to prevent rusting and premature failure of your connections.
Planning Your Ladder Design
Selecting the right materials and dimensions forms the foundation of a sturdy wooden ladder. We’ll guide you through choosing appropriate wood types and determining the critical measurements needed for a safe, functional ladder.
Determining Proper Dimensions
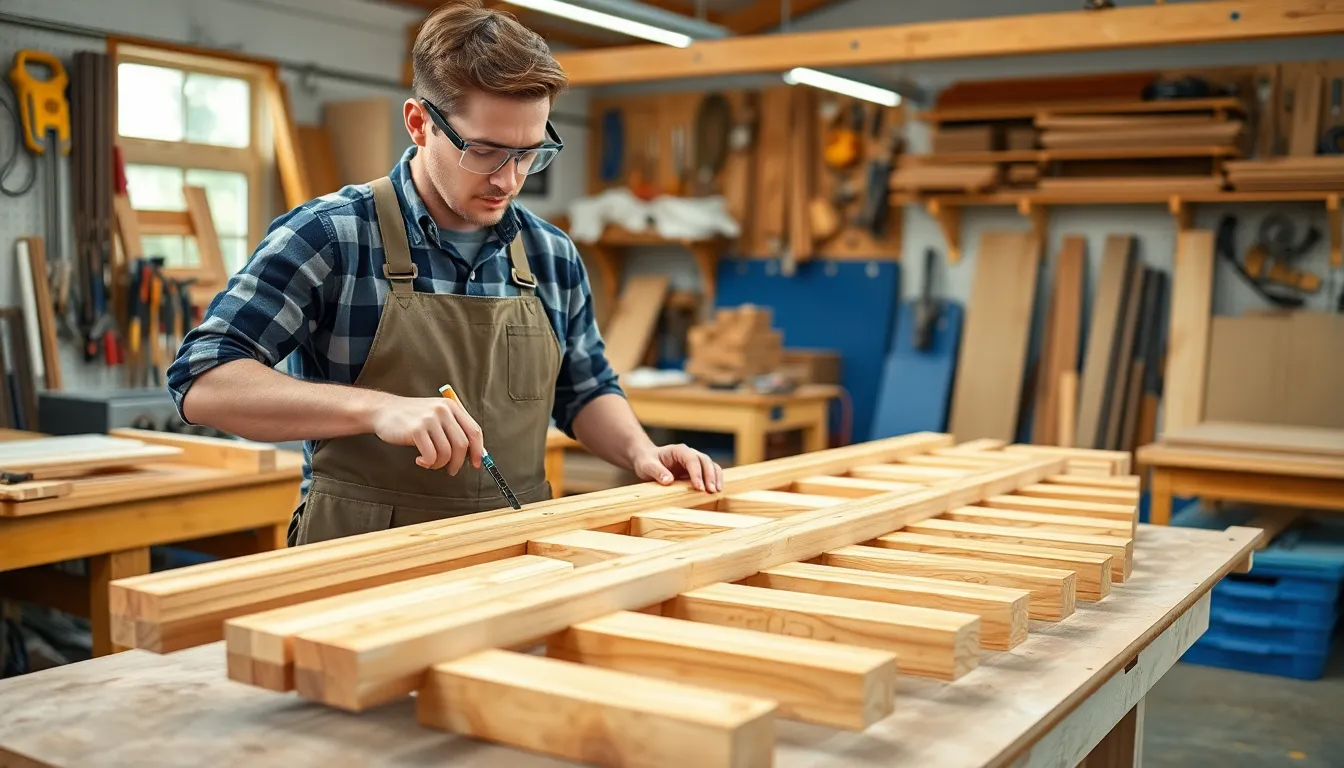
The dimensions of your ladder directly impact its stability and usability. Side rails require straight, knot-free hardwood like oak or maple for heavier loads, while pine works well for lighter applications. Cut two identical side rails between 6-12 feet long, with thicknesses ranging from 1.5-3 inches and widths of 3-4 inches. For optimal ergonomics, space your rungs 10-14 inches apart and mark their positions using a combination square with a 35mm offset from the edge. Rungs themselves should be made from 1-1.5 inch dowels or rectangular stock, with their length extending 10mm beyond each side rail (e.g., 520mm rungs for a 500mm-wide ladder). Drill holes that are 1/2 to 2/3 into the side rails to securely house the rungs without compromising structural integrity.
Safety Considerations
Safety features distinguish a professional-quality ladder from a dangerous one. Ensure all rung joints fit tightly by using high-quality wood glue and reinforcing with wedges where necessary. Insert glue-dipped shims into rung ends for additional reinforcement, especially at stress points. Test each rung’s strength by gradually applying at least 200 pounds of weight before putting the ladder into regular use. Add rubber feet or textured tape to the side rail bases to prevent slippage on smooth surfaces. During construction, maintain a consistent 16-inch spacing between side rails using a spacer block during assembly to ensure the ladder remains square and balanced. Trim any protruding rungs carefully with a handsaw and sand all edges thoroughly to eliminate splinters that could cause injuries during use.
Step-by-Step Construction Process
Building a wooden ladder requires attention to detail and precision at each stage of construction. Follow these steps to create a sturdy, reliable ladder that will serve you for years.
Creating the Rails
Side rails form the backbone of your wooden ladder and require careful preparation. Cut two long pieces of your chosen wood to serve as the side rails, making sure they’re identical in length for proper balance. Using a drill press ensures precise holes for the rungs, which is crucial for structural integrity. The side rails typically feature a slight outward angle from top to bottom (approximately 2-3 degrees) to improve stability when the ladder is positioned against a wall. Mark your measurements clearly before cutting to avoid costly mistakes and ensure the rails have smooth, splinter-free edges.
Cutting and Installing Rungs
Rungs provide the steps of your ladder and must be both comfortable and strong. Cut multiple rungs to a consistent width of about 14 inches to fit properly between the side rails. A Forstner bit works perfectly for boring clean, precise holes in the side rails where the rungs will be inserted. Space your rungs evenly, typically 10-12 inches apart, to create a comfortable climbing experience. When inserting the rungs into the holes, check that each one sits securely and maintains proper alignment with the others. The fit should be snug but not forced, allowing for the application of adhesive while preventing unwanted movement or rotation.
Reinforcing the Structure
Proper reinforcement transforms an adequate ladder into an exceptional one that lasts for decades. Use wooden wedges or shims to secure the rungs tightly within the side rails, eliminating any wobble or movement. Apply high-quality wood glue to all joints before final assembly to create stronger bonds between components. Clamp the entire assembly and allow sufficient drying time according to the glue manufacturer’s recommendations. Some craftsmen add supplementary reinforcement by driving small finishing nails through the sides into the rungs for added security. After reinforcement, test each rung by applying pressure to confirm it can safely support weight without any give or movement.
Finishing Your Wooden Ladder
Completing your wooden ladder requires careful finishing to ensure longevity, safety, and visual appeal. A well-finished ladder not only looks professional but offers greater comfort and safety during use.
Sanding Techniques
Proper sanding creates a smooth, splinter-free surface essential for a safe, user-friendly ladder. Begin by thoroughly sanding all components with 80- to 120-grit sandpaper to eliminate rough edges and tool marks. Hard-to-reach areas like tight joints or irregular surfaces benefit from using a detail sander or sandpaper wrapped around a small wooden block. Progress to finer 220-grit sandpaper for final smoothing, ensuring all ladder surfaces maintain uniform texture. Pay extra attention to rung ends and rail bevels, as these high-contact areas must be completely smooth to prevent painful splinters during use.
Applying Protective Finishes
Protective finishes shield your wooden ladder from moisture, wear, and environmental damage while improving its appearance. Start by removing all sanding dust with a tack cloth to ensure proper finish adhesion. Apply wood sealant or oil-based polyurethane for maximum durability and protection against frequent handling. Indoor ladders can benefit from water-based finishes which produce less odor and dry more quickly. Outdoor ladders require spar urethane, which offers superior protection against UV rays, moisture, and temperature fluctuations. Use a foam brush for even application, focusing on end grains and joints which absorb more finish than face grains. Let the first coat dry completely (typically 2-4 hours), lightly sand with 320-grit sandpaper to create a smooth surface, then apply a second coat for comprehensive protection.
For assembly and ongoing safety, ensure all mortise-and-tenon joints fit precisely by boring rung holes with a Forstner bit. Reinforce connections by inserting glued oak wedges into pre-cut rung slits, trimming excess material with a handsaw and planing flush with the surface. Maintain consistent 16-inch spacing between rungs using a spacer block during assembly to create ergonomic climbing intervals. Always wear safety goggles and gloves during sanding and finishing processes to protect yourself from dust and chemicals.
Maintaining Your DIY Wooden Ladder
Regular Inspection
Regular inspections extend your wooden ladder’s lifespan significantly. Check all rung joints for signs of loosening or movement every few months, particularly if the ladder sees frequent use. Examine the entire structure for cracks, splits, or warping that might compromise stability or safety. Pay close attention to the junction points where rungs meet the side rails, as these areas experience the most stress during use. Testing each rung by applying moderate pressure identifies weak spots before they become dangerous failures.
Cleaning and Care
Proper cleaning prevents premature aging of your wooden ladder. Wipe the entire ladder with a dry cloth to remove dust and debris that can scratch the surface over time. Avoid using excess water or cleaning answers that might cause wood swelling or damage the protective finish. Remove any sticky substances immediately with a slightly damp cloth followed by thorough drying. Store your ladder indoors or under a protective cover to shield it from direct sunlight, rain, and dramatic temperature changes that lead to warping.
Making Repairs
Addressing minor damage promptly prevents more serious structural issues. Re-glue loose rungs by applying wood glue inside the joint, then clamping until completely dry for at least 24 hours. Replace damaged shims by carefully removing the old pieces and inserting new, glue-coated wooden wedges to tighten joints. Sand and refinish any areas where the protective coating has worn away to prevent moisture penetration. Apply a matching finish to repaired sections, allowing proper drying time before using the ladder again.
Storage Answers
Correct storage practices dramatically affect your ladder’s longevity. Keep your wooden ladder in a dry, temperature-controlled environment whenever possible to prevent warping and joint stress. Hang the ladder horizontally on wall brackets to prevent side rail bending that occurs from extended vertical leaning. Allow air circulation around the ladder by avoiding direct contact with concrete floors that might transfer moisture. Cover the ladder with a breathable cloth if stored in areas prone to dust accumulation to minimize cleaning requirements.
Conclusion
Building your own wooden ladder isn’t just a practical project—it’s a rewarding experience that delivers lasting value. With just $30-$50 worth of materials and basic tools you likely already have you can create a custom piece that would cost 5x more in stores.
The skills you’ve gained through this project extend beyond the ladder itself. From precise measurements to finishing techniques you’ve expanded your woodworking knowledge while creating something both functional and beautiful.
Remember that regular maintenance will keep your handcrafted ladder sturdy and safe for years to come. By inspecting joints regularly and applying fresh finishes when needed you’ll protect your investment of time and materials.
We hope you enjoy both the building process and the satisfaction of climbing a ladder made with your own hands!
Frequently Asked Questions
What are the main benefits of wooden ladders?
Wooden ladders offer practicality and timeless appeal for home and garden use. They can be customized to specific height needs for safety, blend seamlessly with home décor, and serve as decorative elements. Additionally, DIY wooden ladders cost significantly less ($30-$50 for materials) compared to store-bought options ($150-$300), while providing valuable woodworking experience and environmental benefits when using sustainably sourced materials.
What tools do I need to build a wooden ladder?
Essential tools include a circular saw or hand saw, drill, hammer, tape measure, and safety equipment (safety glasses and dust mask). You’ll also need basic woodworking supplies like sandpaper of varying grits (80-220), a foam brush for applying finish, and appropriate clamps to hold pieces together during assembly.
What type of wood is best for making a ladder?
White oak is excellent for durability, pine is budget-friendly, and cedar is ideal for outdoor use due to its natural rot resistance. Your wood choice should match your ladder’s intended use and location. For outdoor ladders, always select weather-resistant wood species to ensure longevity and structural integrity over time.
How do I ensure my DIY ladder is safe to use?
Ensure safety by using precise measurements when cutting rails and rungs, maintaining consistent spacing between rungs (typically 10-12 inches), using high-quality fasteners, and reinforcing joints with wooden wedges and wood glue. Regularly inspect for loose parts, cracks, or warping, especially at stress points. Always follow proper assembly techniques and thoroughly test the ladder before regular use.
What finish should I apply to my wooden ladder?
For indoor ladders, use polyurethane or tung oil for durability. Outdoor ladders require marine-grade varnish, spar urethane, or exterior-grade oil finishes for moisture protection. Apply 2-3 coats with a foam brush, allowing adequate drying time between applications. The finish protects against moisture, prevents splintering, and enhances the ladder’s appearance.
How do I maintain my wooden ladder for longevity?
Maintain your ladder with regular inspections for loose joints or cracks. Clean with a dry cloth, avoiding excess moisture. Make prompt repairs by re-gluing loose rungs or replacing damaged parts. Sand and refinish worn areas as needed. Store horizontally in a dry place with good air circulation, away from direct sunlight and extreme temperature fluctuations.
How much money can I save by building my own ladder?
Building your own wooden ladder can save you $120-$250 compared to store-bought options. DIY ladder materials typically cost $30-$50, while commercial wooden ladders range from $150-$300. The savings are substantial, especially when you factor in the customization benefits and the satisfaction of creating something useful with your own hands.
Can beginners successfully build a wooden ladder?
Yes, beginners can successfully build a wooden ladder with basic tools and materials. The project requires no advanced carpentry skills—just careful measurement, cutting, and assembly. Following step-by-step instructions, beginners can create a functional, sturdy ladder while developing valuable woodworking skills that will benefit future projects.


