Discovering unwanted glue on your beautiful wood floors can be frustrating. Whether it’s residue from a DIY project, adhesive from labels, or sticky substances tracked in by kids, these sticky situations demand attention before they become permanent problems.
We’ve all been there—staring at stubborn glue spots wondering if removing them might damage our precious hardwood floors. The good news? You don’t need to panic or call expensive professionals. With the right techniques and household products, that adhesive doesn’t stand a chance. In this comprehensive guide, we’ll walk you through proven methods to safely remove various types of glue from wood flooring without causing damage to the finish or wood beneath.
Understanding Different Types of Glue on Wood Floors
Before attempting removal, it’s crucial to identify what type of adhesive you’re dealing with on your wood floors. Different glues require exact removal techniques to avoid damage to your valuable hardwood surfaces.
Identifying Common Adhesives on Hardwood
Wood floors commonly encounter several types of adhesives during their lifetime. White create glue (PVA) appears milky when wet and dries clear, making it a frequent culprit from school projects. Super glue (cyanoacrylate) forms an extremely strong, clear bond that’s particularly challenging to remove without damaging wood. Construction adhesives like Liquid Nails create yellow or tan residue and are exceptionally stubborn due to their waterproof properties. Carpet or flooring adhesives often leave behind thick yellow or brown deposits on wood surfaces after renovation projects. Hot melt adhesive from glue guns creates raised, hardened blobs that cool quickly but remain somewhat flexible. Identifying these adhesives correctly by their color, texture, and hardness significantly impacts your removal strategy’s success.
How Glue Affects Different Wood Finishes
Various wood finishes react differently when exposed to adhesives. Polyurethane-finished floors offer good resistance to most glues but can cloud or discolor with harsh solvents used for removal. Oil-finished woods absorb adhesives more readily, making staining a serious concern during removal attempts. Shellac finishes dissolve easily with alcohol-based products, requiring extra caution when removing adhesives. Lacquered surfaces can develop white spots or cloudiness when exposed to moisture during glue removal. Waxed wood floors present special challenges as many solvents will strip the wax coating along with the glue. Unfinished wood is particularly vulnerable since glue can penetrate deeply into the grain, sometimes requiring sanding to fully eliminate the adhesive. Testing any removal method in an inconspicuous area first protects your exact finish from unexpected damage.
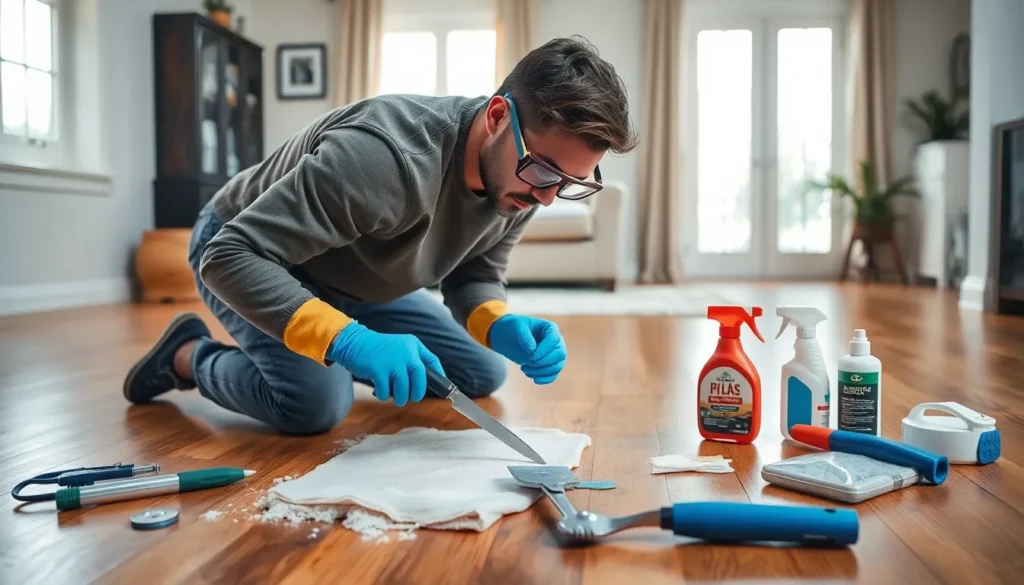
Essential Supplies for Removing Glue from Wood Floors

Successful glue removal from wood floors requires the right supplies and tools. We’ve compiled a comprehensive list of essential items you’ll need to tackle this project effectively and safely.
Safety Equipment You’ll Need
Safety equipment protects you from potential hazards during the glue removal process. Protective gear like gloves, goggles, and long sleeves prevents chemical contact with your skin and eyes. Proper ventilation through fans, open windows, or respirators helps avoid inhaling harmful fumes that many adhesive removers emit. Fire precautions are equally important when working with flammable solvents such as paint thinner or turpentine – keep all ignition sources away from your work area to prevent accidents.
Recommended Cleaning Tools and Products
The most effective tools for removing glue from wood floors fall into three main categories. Chemical removers like Bostick’s Adhesive Remover in liquid form, paint thinner, and turpentine work by breaking down adhesive bonds. Apply Bostick’s directly to the glue, allow it to sit according to package instructions, then scrape away the softened adhesive. For solvent-based adhesives, turpentine or paint thinner applied and left to soak for 10 minutes delivers excellent results.
Heat methods offer another approach to stubborn adhesives. Wallpaper steamers effectively soften glue, making it easier to scrape away without damaging the wood surface. Heat guns can also work but must be used with extreme caution to avoid scorching your valuable wood floors.
Mechanical tools complete your arsenal for glue removal. Floor scrapers, putty knives, and mastic removal blocks efficiently strip adhesive with minimal clogging. Belt sanders with 24-grit belts provide more aggressive removal but require frequent cleaning and careful handling to prevent damage to your floors. After the bulk of the adhesive is gone, stiff-bristle brushes and mineral spirits help clean any remaining residue before refinishing.
Heat Methods for Glue Removal

Heat techniques effectively soften stubborn adhesives on wood floors, making them easier to remove without harsh chemicals. These methods work by breaking down the molecular bonds in the glue, allowing for gentler removal with minimal risk to your flooring.
Using a Hair Dryer or Heat Gun
Heat guns and hair dryers provide targeted warmth that transforms hardened glue into a workable, tacky consistency. A hair dryer should be held 6-8 inches above the adhesive, moving continuously in a circular motion to prevent scorching the wood finish. Once the glue becomes pliable, gently lift it with a plastic scraper or putty knife, working from the edges toward the center. Heat guns offer more concentrated heat but require extra caution—always use the lowest setting and maintain a 3-4 inch distance from the wood surface. Keep the heat gun moving constantly and immediately scrape the softened adhesive before it re-hardens.
Hot Towel Technique for Sensitive Finishes
The hot towel method provides a safer alternative for waxed, oiled, or otherwise delicate wood finishes that might be damaged by direct heat. Start by soaking a clean cotton towel in hot water, then wring it thoroughly to remove excess moisture. Place this hot, damp towel directly over the glue spot and let it sit for 5-10 minutes, allowing the steam and heat to penetrate and loosen the adhesive bonds. After removing the towel, wipe the area with a cloth dampened with mild dish soap and warm water. Stubborn spots may require gentle scraping with a wooden or plastic tool to avoid scratching the floor’s surface. For particularly resistant adhesives, repeating the process several times often yields better results than applying more pressure during scraping.
Solvent-Based Removal Techniques

Solvent-based products effectively break down adhesives by dissolving the chemical bonds that make glue stick to wood floors. These powerful answers penetrate even the most stubborn glue residues without damaging your hardwood’s finish when used correctly.
Commercial Adhesive Removers Safe for Wood
Commercial adhesive removers designed specifically for wood surfaces offer the most reliable results for tough glue situations. Bostick’s Adhesive Remover stands out as an excellent choice for urethane-based adhesives, as it effectively dissolves the glue without compromising your wood’s finish. Application involves putting a small amount directly on the adhesive, allowing it to penetrate for 10-15 minutes, then gently scraping away the softened residue with a plastic scraper.
For particularly stubborn spots, paint thinner or turpentine works effectively by applying approximately 1/4 cup to the affected area and letting it sit for 10 minutes before scraping. Always test these stronger solvents on an inconspicuous area first to ensure they don’t damage your exact wood finish.
Specialized adhesive removers formulated for exact types of glue, such as mastic removers, provide targeted answers for construction adhesives and other industrial-strength bonding agents. These products require proper ventilation and protective equipment including gloves and safety goggles due to their strong chemical properties.
Natural Alternatives: Vinegar and Citrus Answers
Natural answers offer gentler approaches for removing less stubborn adhesives while minimizing chemical exposure. Creating a mixture of equal parts white vinegar and warm water provides an effective solvent that’s much milder than commercial products. Simply apply this solution to the glue spot, allow it to sit briefly, then gently scrape away the loosened adhesive with a plastic putty knife.
Citrus-based cleaners containing d-limonene (derived from citrus peels) naturally break down many adhesives without harsh chemicals. These eco-friendly options work particularly well on newer glue spots and leave behind a pleasant scent rather than chemical fumes.
Heat methods complement these natural approaches by utilizing a wallpaper steamer to soften stubborn adhesives before scraping. The steam gently penetrates the glue, loosening its bond to the wood without introducing any chemicals to your home environment.
For mechanical removal after applying solvents, titanium floor scrapers resist clogging and provide consistent results. Extremely stubborn residue might require careful sanding with coarse 24-36 grit sandpaper, though this approach demands caution to avoid damaging the wood surface.
Mechanical Methods for Stubborn Glue

Physical removal techniques offer effective answers for tough adhesives that resist chemical treatments. These methods leverage specialized tools designed to separate glue from wood surfaces without causing damage to your valuable flooring.
Gentle Scraping Techniques
Floor scrapers with carbide-edged blades provide excellent results when lifting adhesive from wood floors without gouging the surface. After applying a commercial adhesive remover like Bostick’s liquid formula or paint thinner, allow it to sit for 10 minutes until the glue dissolves. Plastic putty knives work best for gently prying away the softened adhesive without scratching the wood underneath. For black cutback adhesive, combine your scraping efforts with manual sanding blocks in the 60-80 grit range, focusing on small areas at a time. A wallpaper steamer can effectively soften thick layers of glue, making them significantly easier to scrape away without excessive force that might damage your floors.
Sanding as a Last Resort
Sanding should only be considered when other methods have failed to remove stubborn adhesive residue. Drum sanders with 24-grit belts can be used sparingly, as adhesives typically clog these machines within minutes of operation. Orbital sanders equipped with 60-100 grit sandpaper offer a safer alternative for final cleanup of remaining residue. Always sand parallel to the wood grain to minimize visible scratches and preserve the floor’s appearance. Heat guns set on low can loosen adhesives before sanding, but require constant motion to prevent scorching the wood—always test on an inconspicuous area first. Titanium mastic removal blocks strip glue efficiently but need frequent cleaning with solvent as they clog quickly during use. For safety, wear N95 masks, protective goggles, and gloves during any mechanical removal process, especially when sanding potentially hazardous adhesives.
Restoring Your Wood Floor After Glue Removal

After successfully removing adhesive from your wood floors, proper restoration is essential to return them to their original beauty. The removal process might leave behind scratches, discoloration, or patches where the finish has been affected.
Reapplying Finish to Affected Areas
Proper preparation creates the foundation for successful finish application on previously glued areas. Begin by lightly sanding the affected surface with fine-grit sandpaper to create an even, smooth base that promotes adhesion of the new finish. Thoroughly clean the area with a damp cloth and mild soap to remove any lingering solvent residue or debris that could interfere with the finish application.
For areas with noticeable color differences, apply a matching wood stain to blend the repaired section with surrounding flooring. When selecting a finish, polyurethane or water-based options deliver excellent results while protecting your restored floor. Apply thin, even coats using a high-quality brush or applicator, allowing each layer to dry completely before adding subsequent coats. This patience ensures proper curing and prevents bubbling or peeling issues in the future.
Polishing and Buffing Techniques
Professional-looking results come from proper polishing after finish application. Use a floor buffer with a fine abrasive pad to eliminate minor imperfections and create a seamless transition between the repaired area and surrounding floor. This mechanical buffing process smooths any slight ridges and enhances the overall appearance.
Apply a commercial wood floor polish designed specifically for your floor’s finish type to restore shine and provide additional protection. These specialized products not only enhance appearance but create a protective barrier against future damage. Regular maintenance using pH-neutral cleaners preserves your restored floor’s beauty and prolongs the life of your refinishing work. Sweeping frequently prevents small debris from scratching the new finish, while avoiding harsh chemicals prevents premature deterioration of your restored surface.
Preventing Future Glue Damage on Wood Floors

Preventing glue damage on wood floors saves time, money, and frustration compared to removal efforts. Implementing protective strategies during projects and knowing how to handle fresh spills can preserve your beautiful hardwood surfaces for years to come.
Protective Measures During Home Projects
Home improvement projects don’t have to threaten your wood floors. Start by clearing the entire work area of furniture and obstacles to create a clean space. Cover your floors completely with drop cloths or plastic sheets before beginning any projects involving adhesives. Proper ventilation reduces exposure to fumes from adhesives and solvents, so open windows or use fans during your project. Always wear protective gear such as gloves and safety goggles when working with adhesives to prevent accidental spills and protect yourself from harmful chemicals. Applying a quality wood floor sealer creates a barrier that makes future cleanup significantly easier if accidents occur.
Quick Response Tips for Fresh Spills
Fresh adhesive responds best to immediate action, making quick cleanup essential for preventing permanent damage. Grab a clean cloth dampened with warm water and mild dish soap to wipe up wet glue before it sets. Avoid rubbing aggressively as this can damage the wood finish and potentially drive the adhesive deeper into the grain. For stronger adhesives, gently blot rather than wipe to lift the substance without spreading it. Heat methods work effectively on semi-dried adhesive – use a hair dryer or heat gun on low setting to soften the glue, then carefully remove it with a flat-edged tool. For stronger adhesives that have just been spilled, specialized adhesive removers or appropriate solvents like paint thinner can be applied with caution before the glue fully sets. Remember that prevention and quick response significantly reduce the need for more aggressive removal techniques that might harm your wood floors.
Conclusion
Getting glue off wood floors doesn’t have to be a challenging job. With the right approach and tools you can successfully remove even stubborn adhesives while protecting your beautiful hardwood surfaces.
Remember to always identify the glue type first then select the appropriate removal method. Start with gentle techniques before progressing to more aggressive options and always test in an inconspicuous area.
By following our comprehensive guide you’ll not only restore your floors to their former glory but also gain valuable knowledge for handling any future adhesive accidents. Regular maintenance and preventive measures will keep your wood floors looking pristine for years to come.
Your wood floors are an investment worth protecting and now you have all the skills needed to tackle any glue mishap with confidence.
Frequently Asked Questions
How do I identify the type of glue on my wood floor?
Identify adhesive by appearance and texture. White craft glue is opaque and flexible when dry. Super glue forms a clear, hard film. Construction adhesives are thick and yellow-brown. Carpet adhesives appear yellow and rubbery. Hot melt adhesives look like hardened wax. Each type requires different removal techniques, so correct identification ensures you use the appropriate method to avoid damaging your wood floor.
Can I use acetone on my wood floors to remove glue?
Use acetone cautiously on wood floors. While effective for removing some adhesives, it can damage certain finishes, particularly shellac and lacquer. Always test in an inconspicuous area first. Apply sparingly with a cloth, never pour directly on the floor. Ensure good ventilation and wear gloves. For polyurethane-finished floors, consider gentler alternatives like mineral spirits before trying acetone.
What safety precautions should I take when removing glue?
Always wear protective gloves to prevent skin irritation from chemicals. Use safety goggles to shield eyes from splashes. Ensure proper ventilation by opening windows or using fans to disperse fumes. Read all product labels and follow manufacturer instructions. Work in small sections and keep chemical removers away from children and pets. Take breaks if you experience dizziness or headaches.
Will heat methods damage my hardwood floor finish?
Heat methods can be safe when used correctly. Keep heat guns and steamers moving constantly to prevent scorching. Maintain the tool 3-4 inches above the surface and never exceed 150°F for polyurethane finishes or 120°F for shellac or lacquer finishes. Test in an inconspicuous area first. Use the lowest effective setting and never leave heat applied in one spot for more than a few seconds.
How do I remove carpet adhesive from hardwood?
For carpet adhesive, start with heat application using a hairdryer or heat gun on low setting to soften the glue. Once pliable, gently scrape with a plastic putty knife. For stubborn residue, apply a commercial adhesive remover specifically formulated for wood floors. Let it sit according to package directions, then wipe away with a soft cloth. Finish by cleaning with mineral spirits and a soft brush.
Is sanding necessary after removing glue?
Sanding isn’t always necessary after glue removal. If the wood finish remains intact and no residue is present, you can skip sanding. However, if the finish is damaged or residue persists, light sanding with fine-grit sandpaper (220 grit) may be needed. Sand only the affected area, feathering the edges to blend with surrounding wood. Always clean thoroughly after sanding before applying any new finish.
How do I restore the finish after removing glue?
After removing glue, clean the area thoroughly with mineral spirits. Lightly sand with 220-grit sandpaper if needed. Apply a matching wood stain if color was affected. Choose a compatible finish (polyurethane for modern floors, shellac for antique floors) and apply 2-3 thin coats with a high-quality brush, allowing proper drying time between coats. Buff lightly with 0000 steel wool between coats for a smooth finish.
How can I prevent glue from damaging my floors during projects?
Prevent glue damage by covering floors with protective drop cloths or plastic sheeting during projects. Use painter’s tape to secure coverings. For crafts, work on a dedicated surface like a folding table. Keep adhesives capped when not in use. Clean tools away from wood surfaces. Address spills immediately—fresh glue is much easier to remove than dried adhesive. Consider using low-tack or removable adhesives for temporary projects.
Can commercial adhesive removers damage wood floors?
Commercial adhesive removers can damage wood floors if used incorrectly. Choose products specifically formulated for wood surfaces. Always test in an inconspicuous area first. Follow manufacturer directions precisely, including recommended contact time. Never allow removers to pool or soak into the wood. After use, neutralize the area according to product instructions and allow adequate drying time before walking on or refinishing the surface.
What should I do if glue removal damages my floor’s finish?
If glue removal damages your floor’s finish, first clean the area thoroughly with mineral spirits. For small spots, apply touch-up finish with an artist’s brush. For larger areas, lightly sand the entire affected section, feathering the edges. Apply matching stain if needed, followed by 2-3 thin coats of compatible finish. Consider consulting a professional for valuable or extensive floors to ensure proper color and texture matching.


