Spilled nail polish on your beautiful wood floors? We’ve all been there, and that moment of panic can feel overwhelming. Those vibrant drops of color suddenly look like permanent damage to your expensive flooring.
But don’t worry! We’ll show you exactly how to remove nail polish from wood floors without causing damage to the finish or wood itself. With the right techniques and household products, that stubborn polish can be completely eliminated. Our tried-and-tested methods have saved countless homeowners from costly repairs and refinishing jobs.
Understanding the Challenge of Nail Polish on Wood Floors
Nail polish spills on wood floors create a unique cleaning challenge due to their quick-drying formula and strong adhesive properties. These colorful cosmetics contain acetates, plasticizers, and resins designed to bond firmly to surfaces – including your beautiful hardwood. The longer nail polish sits on wood, the more it penetrates the grain or finish, making complete removal increasingly difficult.
Wood floors are particularly vulnerable to nail polish damage because of their porous nature. Different wood types react differently to spills – oak and maple have tighter grains that resist deep staining, while pine and cherry absorb liquids more readily. The floor’s finish also plays a crucial role in how challenging removal becomes. Polyurethane-finished floors offer better protection than waxed or oiled surfaces where polish can quickly penetrate below the surface layer.
Many common nail polish removers contain acetone, which effectively dissolves polish but can simultaneously damage wood finishes by stripping away protective sealants. This chemical can leave dull spots, discoloration, or even dissolve portions of the finish entirely. Non-acetone removers might seem safer but often contain other solvents equally capable of harming wood surfaces when used improperly.
Time is a critical factor when addressing nail polish spills on wood. Fresh spills that haven’t fully dried respond better to gentle removal techniques, while dried polish often requires more aggressive approaches. The color of the polish also matters – darker shades and glitter formulations typically prove more stubborn and might leave residual staining even after the bulk of the polish is removed.
Assessing the Damage: Types of Wood Finishes and Polish Stains
 2")
Wood floors feature various sealants including polyurethane, oil, or wax, each requiring exact care when removing nail polish stains. Understanding your floor’s finish type and whether the spill is fresh or dried determines the most effective removal strategy to prevent damage.
Fresh vs. Dried Nail Polish Spills
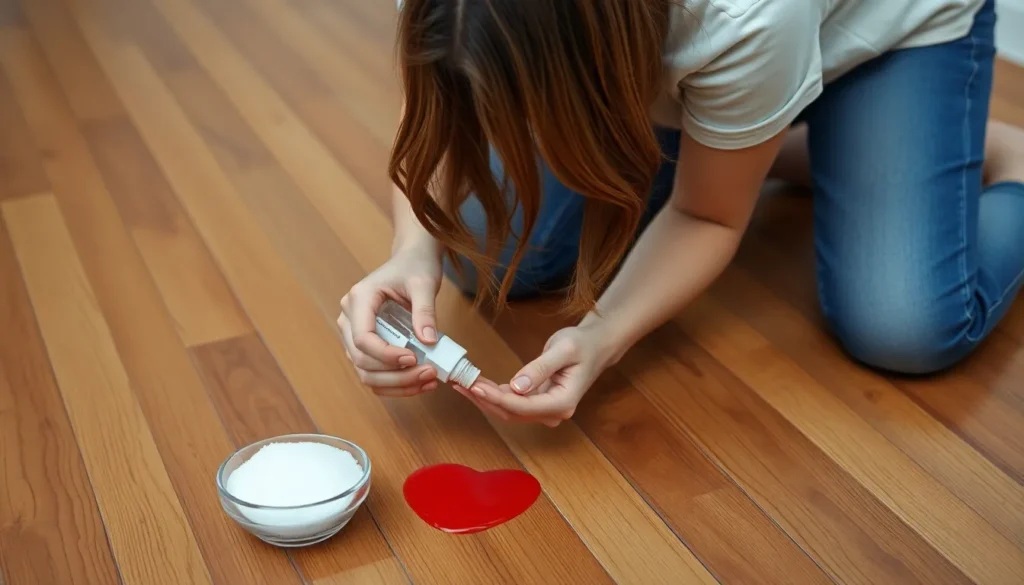
Fresh nail polish spills respond well to immediate treatment with white sugar, which helps congeal the polish into a removable solid. Simply sprinkle sugar over the wet polish, wait until it hardens, then gently brush the mixture away using a soft brush. This method works particularly well on polyurethane-finished floors where the polish hasn’t had time to penetrate.
Dried nail polish presents a more challenging removal situation, typically requiring chemical interventions. Older stains often bond more firmly with the wood surface, making them resistant to mechanical removal alone. These stubborn spots need specialized solvents applied carefully to dissolve the hardened polish without damaging the underlying wood finish.
Identifying Your Wood Floor’s Finish
Polyurethane finishes, the most common type on modern hardwood floors, create a plastic-like protective layer that resists most chemicals. These finishes appear glossy or semi-glossy and feel smooth to the touch. You can identify a polyurethane finish by applying a small drop of water – it will bead up rather than soak in.
Oil-based finishes penetrate the wood rather than creating a surface layer, giving floors a natural, matte appearance. These finishes require gentler chemical treatments as harsh solvents can strip away the protective oils. Rubbing alcohol typically works best on these surfaces as it’s effective yet mild enough not to damage the finish.
Wax finishes, often found in older homes, provide a soft sheen but less protection than other finishes. These floors feel slightly slick to the touch and show scratches when rubbed with a fingernail. Harsh chemicals easily damage wax finishes, making them unsuitable for acetone-based removers. Denatured alcohol applied with 0000-grade steel wool offers the safest removal method for waxed surfaces.
Essential Supplies for Removing Nail Polish from Wood
 4")
Effective nail polish removal from wood floors requires exact tools that balance cleaning power with gentle treatment of your wood surfaces. Gathering these supplies before you begin ensures a smooth, efficient cleanup process without causing additional damage to your floors.
Cleaning Agents
Isopropyl rubbing alcohol (70% concentration) serves as the primary solvent for most nail polish stains on wood. This alcohol effectively dissolves polish without damaging most wood finishes when used properly. Denatured alcohol provides a stronger alternative for stubborn stains, particularly effective when working with the grain of the wood.
Application Tools
Cotton balls or soft cloths allow for controlled application of solvents to the affected areas. Microfiber cloths or towels work best for final cleanup and buffing, as they’re gentle on wood surfaces while effectively removing residue. For fresh spills, white sugar works surprisingly well as an absorbent material that congeals with wet polish for easy removal.
Restoration Materials
Ultra-fine 0000-grade steel wool offers a gentle buffing solution for persistent stains without scratching your wood finish. Wood touch-up markers match your floor’s color and help restore areas where some finish may have been removed during the cleaning process. For severe damage cases, light sandpaper paired with an oil-based finish can repair spots where the original finish has been compromised.
Gentle Methods for Removing Nail Polish
 6")
Removing nail polish from wood floors doesn’t always require harsh chemicals. These gentle methods effectively lift polish stains while protecting your floor’s finish from damage.
Using Rubbing Alcohol
Rubbing alcohol offers a balanced approach to nail polish removal that’s effective yet gentle on wood surfaces. Soak a piece of felt or soft cloth in isopropyl alcohol and apply it directly to the nail polish stain. Let the alcohol sit for several minutes to penetrate and dissolve the polish before gently scrubbing the area. For stubborn stains, you might need to repeat this process a few times to completely remove the polish.
Rubbing alcohol works particularly well on floors without a durable finish where acetone would cause damage. Always test the alcohol on an inconspicuous area first to ensure it won’t affect your floor’s finish. Apply the alcohol sparingly to avoid oversaturation, which can seep into wood grain and cause swelling or warping.
For best results, work in the direction of the wood grain using light pressure. This technique prevents unwanted scratches while effectively removing the polish residue.
The Acetone-Free Nail Polish Remover Approach
Mineral spirits provide an excellent alternative to acetone-based removers when dealing with nail polish on wood floors. Apply a small amount to a cotton swab and dab it carefully onto the stained area. This gentler solvent dissolves nail polish effectively without the harsh effects of acetone.
For fresh nail polish spills, try the white sugar method. Sprinkle white sugar liberally over wet polish to congeal the liquid. Once the sugar and polish mixture hardens, gently brush it away using a soft-bristled brush. This technique works by absorbing the wet polish before it can fully penetrate the wood surface.
Stubborn stains might require 0000-grade steel wool for removal. Use extremely light pressure and always work in the direction of the wood grain. The ultra-fine steel wool removes remnants of polish without scratching the finish when used properly.
For delicate or antique wood floors, avoid chemical answers altogether. Instead, try gentle physical removal techniques first, moving to mild solvents only if necessary. Touch-up markers matching your floor’s finish can help disguise any slight discoloration that remains after cleaning.
Tackling Stubborn Nail Polish Stains
 8")
Dried nail polish stains on wood floors require exact techniques to remove without damaging the finish. Rubbing alcohol (70% or higher) proves most effective for dissolving stubborn polish while preserving your floor’s integrity. For fresh spills, white sugar can quickly save your floors by congealing wet polish before it sets.
The Baking Soda Paste Method
Baking soda isn’t typically recommended for nail polish removal from wood surfaces based on recent tests. More effective alternatives like alcohol-based answers deliver superior results without risking damage to your floor’s finish. After treating a stain with rubbing alcohol, any remaining residue can be gently buffed with 0000-grade steel wool. This ultra-fine abrasive removes persistent polish traces when worked parallel to the wood grain with minimal pressure. Always avoid scrubbing motions that might damage the floor’s protective coating.
Using Hydrogen Peroxide for Tough Stains
Hydrogen peroxide isn’t effective for removing nail polish from wood floors according to practical testing. Laboratory trials demonstrate that hydrogen peroxide fails to dissolve nail polish components while rubbing alcohol successfully breaks down these stains. When dealing with particularly stubborn stains, always test your chosen solution on an inconspicuous area first to check for potential discoloration. Rubbing alcohol applied with a felt cloth or cotton swab for 1-2 minutes softens even the most difficult dried polish, allowing gentle removal in the direction of the wood grain. Wood touch-up markers can help restore any finish damage that occurs during the cleaning process.
Protecting Your Wood Floors During Polish Removal
 10")
When removing nail polish from wood floors, protecting the underlying surface is just as important as eliminating the stain. Wood floors require special care throughout the cleaning process to maintain their beauty and integrity.
Use Protective Materials
Placing clean cloths around the affected area creates a buffer zone that prevents cleaning answers from spreading to untreated areas. Microfiber towels absorb excess liquid quickly, reducing potential exposure time of solvents on your floor’s finish.
Avoid Harsh Chemicals
Acetone-based nail polish removers damage wood finishes and can strip away protective sealants. These harsh chemicals penetrate beyond the surface and potentially cause discoloration or structural weakening of the wood itself. Rubbing alcohol or denatured alcohol offer effective alternatives that remove polish without compromising your floor’s integrity.
Work With the Wood Grain
Cleaning and scrubbing motions should always follow the direction of the wood grain. This technique minimizes the risk of creating micro-scratches across the grain pattern. Applying gentle pressure while moving along the natural lines of the wood helps preserve the floor’s appearance and prevents permanent damage.
Test in Inconspicuous Areas
Before applying any solution to visible areas, test it in a hidden spot like under furniture or in a corner. This precautionary step helps determine if the cleaning method causes adverse reactions with your exact floor finish. A small test area reveals potential problems before they affect prominent sections of your flooring.
Clean Promptly After Treatment
Residual cleaning answers left on wood surfaces can cause long-term damage. Wiping the area with a clean, slightly damp cloth after stain removal eliminates any remaining alcohol or other cleaning agents. Following up with a dry cloth ensures no moisture remains that could potentially warp or damage the wood.
Restoring Your Wood Floor’s Finish After Removal
 12")
Once you’ve successfully removed nail polish from your wood floor, restoring the finish is crucial to maintain your floor’s appearance and protection. Proper restoration ensures no trace of the mishap remains visible and prevents further damage to the exposed wood.
Cleaning the Treated Area
The first step in restoration involves thoroughly cleaning the area where you removed the nail polish. Wipe the spot with a slightly damp cloth to remove any remaining solvent traces or polish residue. Allow this area to dry completely before proceeding with any finish restoration techniques.
Assessing Finish Damage
Examine the cleaned area carefully to determine the extent of finish damage:
- Minor damage: Small dulled spots or light scratches that don’t reach the bare wood
- Moderate damage: Noticeable discoloration or areas where finish has thinned significantly
- Severe damage: Bare wood exposed or deep scratches that penetrate through the finish layer
Touch-Up Options
Wood touch-up markers work exceptionally well for addressing minor finish scratches without requiring extensive refinishing. These markers come in various wood tones and can effectively camouflage small imperfections where the finish has been compromised during polish removal.
For areas with moderate damage, light sanding with ultra-fine sandpaper followed by an application of oil-based polyurethane creates a seamless repair. Apply the polyurethane with a small touch-up brush, working in the direction of the wood grain for the most natural results.
Severely damaged spots might require spot refinishing. Sand the affected area gently with 0000-grade steel wool, clean thoroughly, then apply a compatible finish that matches your existing floor treatment.
Finish Compatibility Considerations
Different floor finishes require exact restoration approaches:
- Polyurethane finishes: Use a matching water-based or oil-based polyurethane for touch-ups
- Oil-based finishes: Apply a thin layer of compatible oil (tung or linseed) to restore sheen
- Waxed finishes: Buff in a small amount of paste wax with a soft cloth
Avoid using waxes or polishes unless you’re certain they’re compatible with your original floor finish, as incompatible products can create adhesion problems and uneven appearances.
Final Buffing and Blending
Once your touch-up materials have dried completely according to manufacturer instructions, lightly buff the area with a soft microfiber cloth to blend the repaired section with the surrounding floor. This gentle buffing helps eliminate any visible transition lines between the original and restored finishes.
Preventing Future Nail Polish Accidents
 14")
Proactive measures can save you from the hassle of removing nail polish from wood floors entirely. Using throw-away nail polish mats or protective films creates a barrier between your manicure station and valuable wood surfaces. These inexpensive protective layers catch drips and spills before they make contact with your floors.
Smart preparation includes keeping emergency supplies within arm’s reach during your nail sessions. A small container of white sugar serves as your first line of defense against fresh spills, allowing you to quickly sprinkle it over accidents for easier cleanup. Similarly, having rubbing alcohol nearby lets you address stains promptly before they set into the wood grain.
Location matters significantly when applying nail polish at home. Choose well-ventilated areas away from wood surfaces whenever possible, such as near a window or on a non-wood table. Bathrooms with tile floors or outdoor spaces provide safer alternatives for your manicure routine, eliminating the risk to your wood floors entirely.
Dedicated manicure stations create controlled environments for nail polish application. A folding TV tray covered with old towels or newspapers gives you a portable setup that protects surrounding surfaces. This simple solution contains potential spills while providing a comfortable workspace for your nail care routine.
Proper lighting enhances visibility during polish application, reducing the likelihood of accidental spills. Setting up in a well-lit area helps you maintain precision and control throughout the manicure process, minimizing the risk of polish missing your nails and landing on the floor instead.
Conclusion
Removing nail polish from wood floors doesn’t have to be a nightmare. With the right approach and materials on hand we’ve shown you can successfully tackle this common household mishap. Remember that time is your ally—act quickly when spills occur.
Whether you’re dealing with fresh spills or stubborn stains the key lies in matching the removal method to your exact wood finish. Gentle answers like rubbing alcohol often work wonders without damaging your floors.
After treatment don’t forget to restore your floor’s finish for a seamless look. By implementing preventive measures and keeping emergency supplies ready you’ll be prepared for any future polish accidents. Your beautiful wood floors can remain pristine with these techniques even for the most dedicated nail enthusiasts.
Frequently Asked Questions
What removes nail polish from wood floors?
Rubbing alcohol (70% isopropyl) is the most effective and safe solution for removing nail polish from wood floors. For fresh spills, try the white sugar method to absorb wet polish. Stubborn stains may require denatured alcohol or mineral spirits applied with cotton balls or soft cloths. Always test in an inconspicuous area first and avoid acetone-based removers as they can damage wood finishes.
Will nail polish remover damage wood floors?
Yes, most commercial nail polish removers containing acetone will damage wood floor finishes. Acetone dissolves not only the polish but also the protective finish on your wood floor. Even non-acetone removers often contain harsh solvents that can harm wood. Instead, use rubbing alcohol, which effectively removes polish while being gentler on most wood finishes.
How do I handle fresh vs. dried nail polish spills?
Fresh spills are easier to remove—immediately pour white sugar over wet polish to absorb and congeal it, then sweep up the crystalized sugar. For dried spills, apply rubbing alcohol to a cotton ball and gently dab the stain, working from the outside in. Dried polish may require longer contact time with the solvent and possibly gentle buffing with ultra-fine steel wool.
Does the type of wood finish affect nail polish removal?
Absolutely. Polyurethane finishes (common in modern floors) are more resistant to staining and chemicals—identified by water beading on the surface. Oil-based finishes require gentler treatment with rubbing alcohol. Wax finishes found in older homes are most vulnerable and may need denatured alcohol with steel wool. Always identify your finish before selecting a removal method.
Can I use baking soda to remove nail polish from wood?
Baking soda is not effective for removing nail polish from wood floors. Unlike other cleaning applications, baking soda lacks the solvent properties needed to dissolve nail polish. Stick with alcohol-based solutions (isopropyl or denatured alcohol) which are proven effective at breaking down nail polish while being relatively gentle on wood finishes.
How can I restore my wood floor after removing nail polish?
After removing the polish, clean the area with a damp cloth and assess the damage. For minor damage, use wood touch-up markers or wax sticks that match your floor color. Moderate damage may require spot application of compatible finish (polyurethane, oil, or wax). Severe damage might need professional spot refinishing. Always use products compatible with your existing finish.
What should I do if the stain won’t come out completely?
For persistent stains, try buffing gently with 0000-grade steel wool in the direction of the wood grain. If discoloration remains, consider using wood touch-up markers that match your floor color. For deeper stains, wood bleach might help lighten the area before refinishing. As a last resort, replacing the affected board or professional refinishing may be necessary.
How can I prevent nail polish spills on my wood floors?
Use protective nail polish mats or plastic sheets under your work area. Keep emergency supplies (white sugar, rubbing alcohol) nearby during nail sessions. Create a dedicated manicure station away from wood surfaces. Ensure good lighting when applying polish. Use spill-proof nail polish holders, and consider applying polish outdoors or in areas without wood flooring when possible.


