Spotted some unsightly holes in your wood floor? We’ve got you covered! Those pesky imperfections can detract from your home’s beauty, but with the right techniques and materials, you’ll have your floors looking flawless again in no time.
Whether you’re dealing with tiny nail holes, larger gouges from furniture, or damage from wood-boring insects, restoring your wooden floors doesn’t have to be complicated or expensive. We’ll walk you through the simple steps to fill those gaps and restore the natural beauty of your hardwood flooring without calling in professionals.
Join us as we explore the most effective methods for repairing wood floor holes, from selecting the right filler to achieving that perfect finish. Your floors deserve some TLC, and we’re here to help you give them exactly that.
Common Types of Holes in Wood Floors
Wood floors develop different types of holes and damage over time, each requiring exact repair approaches. Identifying the type of damage is the first step in determining the most effective repair method for your floors.
Small Nail Holes and Pin Holes
Small nail holes and pin holes are tiny perforations in wood flooring typically measuring 1/16 to 1/8 inch in diameter. These minor blemishes commonly result from previous hardware installations, furniture legs, or floor nails that have worked their way up from the subfloor. The damage often appears as dark specks across the floor surface, particularly in older homes where flooring nails have become exposed. Most small holes can be effectively filled with wood putty or wood filler that matches your floor’s color, creating a seamless repair that’s virtually invisible after finishing.
Large Gouges and Damage
Large gouges represent important damage to wood floors, typically ranging from 1/4 inch to several inches across. These substantial imperfections often stem from dropped heavy objects, furniture dragging, pet claws, or water damage that has caused wood to deteriorate. Deep gouges expose the raw wood beneath the finish and frequently penetrate beyond the surface layer. Repairing these larger damages usually requires wood filler with sawdust mixed in, epoxy wood fillers, or even wood patches for extremely deep gouges. The repair process involves multiple steps including cleaning, filling, sanding, and refinishing to completely restore the damaged area.
Gaps Between Floorboards
Gaps between floorboards emerge when wooden planks contract due to seasonal humidity changes or age-related shrinkage. These spaces typically range from hairline cracks to gaps of 1/4 inch or more and create uneven floor surfaces that collect dirt and debris. Older homes commonly display this issue as the wood naturally ages and loses moisture over decades. Filling these gaps requires specialized materials like flexible wood fillers, rope fillers, or wood strips depending on the gap width. It’s important to address these openings not only for aesthetic reasons but also to prevent drafts, reduce noise, and protect the structural integrity of your flooring system.
Essential Tools and Materials for Wood Floor Repair

Successful wood floor repair requires exact tools and materials customized to the type of damage you’re addressing. Here’s what you’ll need to tackle holes in your wooden floors effectively, from basic equipment to specialized fillers.
Wood Fillers and Putties
Wood fillers and putties form the foundation of most floor repair projects. Pre-made face-grain dowel plugs work exceptionally well for small holes up to 1 inch in diameter, offering superior results to end-grain dowels which tend to be too porous. Latex-based wood fillers handle minor imperfections beautifully and can be stained to match your floor, though they’re less effective for holes larger than ¼ inch. Colored wax sticks provide quick, temporary fixes for shallow gouges when immediate cosmetic improvement is needed. Don’t forget essential application tools like chisels and block planes for shaping repair areas, along with quality wood glue or polyurethane adhesives for securing your repairs.
Epoxy Fillers for Larger Holes
Epoxy fillers excel at repairing substantial damage in wood floors. Two-part epoxy mixed with sawdust creates a color-matched filling compound perfect for holes exceeding 1 inch in diameter. Custom-cut wood patches, known as the Dutchman method, offer the most professional solution for severely damaged areas. This technique involves tracing the damaged section, cutting a matching plug using a circle cutter, chiseling out the damaged wood while angle-cutting the replacement patch for a snug fit, and securing it with wood glue under clamps overnight. Drill bits (including countersink and Forstner types) and circle cutters create clean, precise holes for your repairs, ensuring professional-looking results.
Sandpaper and Finishing Supplies
Finishing supplies transform repaired areas to match the surrounding floor seamlessly. Medium-grit sandpaper (80–120 grit) levels repairs flush with the existing floor, eliminating any unevenness after your patches or fillers have dried completely. Stains matching your floor’s existing color help disguise repairs by blending them with the surrounding wood. Polyurethane finish in satin or semi-gloss provides essential protection, with 2–3 coats typically required for durability. Testing finishes on scrap wood before application ensures color consistency, while pre-staining repair wood helps achieve a perfect match with your existing floor. Avoid over-relying on fillers for holes larger than ¼ inch—wood plugs provide both structural integrity and superior aesthetics for lasting repairs.
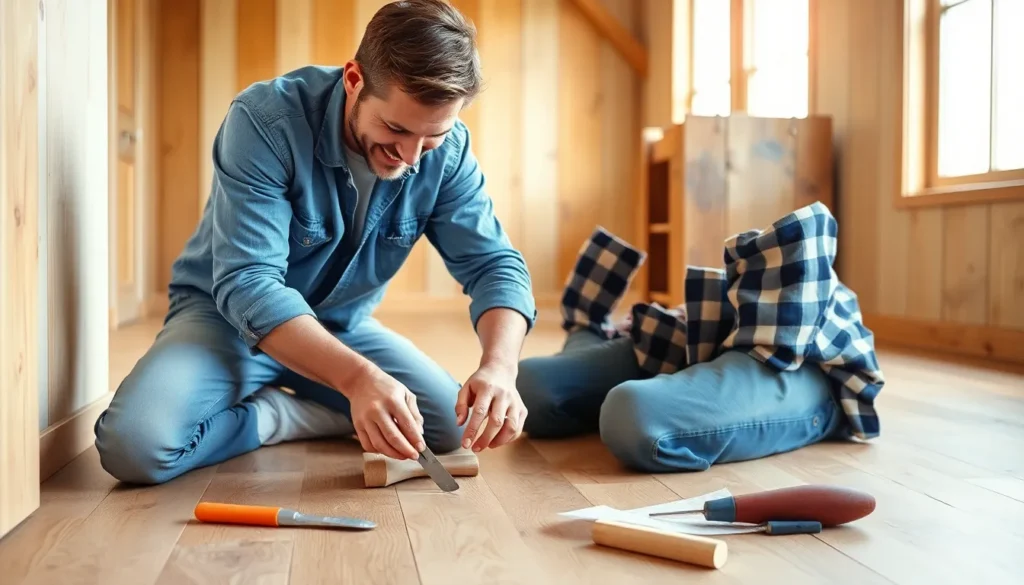
Step-by-Step Guide to Filling Small Holes

Repairing small holes in your wood floor requires attention to detail and proper technique to achieve seamless results. Our comprehensive guide breaks down the process into three manageable stages to restore your floor’s natural beauty.
Preparing the Surface
Proper surface preparation creates the foundation for a successful repair job. Start by thoroughly cleaning the hole area, removing all debris and dust that might prevent proper adhesion. Take a piece of 120-grit sandpaper and gently sand the edges of the hole to create a smooth transition between the damaged area and the surrounding wood. For holes with jagged or splintered edges, use a sharp chisel to carefully create a clean perimeter, which helps the filler bond more effectively and produces a more professional-looking result.
Applying the Wood Filler
Selecting the right filler material dramatically impacts your repair’s appearance and durability. Choose a wood filler or epoxy that closely matches your floor’s wood type and color to ensure the repair blends naturally with the surrounding flooring. Apply the filler using a putty knife, pressing it firmly into the hole while slightly overfilling to compensate for potential shrinkage as it dries. Deep holes often require multiple layers of filler—apply each layer and allow proper drying time according to the manufacturer’s instructions before adding subsequent layers. Face-grain dowel plugs offer an excellent alternative for holes larger than 1 inch in diameter, providing better stain absorption and a more natural appearance than end-grain plugs.
Sanding and Finishing
Once the filler has completely dried (typically 24 hours for deep repairs), sand the area flush with the surrounding floor. Begin with 120-grit sandpaper and progress to 220-grit for a smooth finish that matches the existing floor texture. Vacuum all sanding dust thoroughly and wipe the repaired area with a slightly damp cloth to remove any remaining particles. Perfect the color match by applying a stain-matching marker like Mohawk Ultra Mark to blend the repair with the surrounding wood. Add realistic wood grain patterns using a grain-pattern marker such as Mohawk Brush Tip Marker to mimic the natural wood texture. This attention to detail ensures your repair becomes virtually invisible, restoring the uniform appearance of your beautiful wood floor.
Repairing Large Holes and Gouges in Wood Floors

Large holes and gouges in wood floors require more advanced repair techniques than small imperfections. These important damages demand careful assessment and specialized approaches to restore both the appearance and structural integrity of your flooring.
Assessing the Damage
Proper assessment of floor damage begins with categorizing the hole size as small (less than 1 inch), medium, or large. Small holes don’t work well with end-grain dowels since they absorb finish unevenly, creating noticeable differences in appearance. Structural issues like loose floorboards need immediate attention before cosmetic repairs take place. Securing damaged areas with screws and polyurethane glue provides essential stability for long-lasting repairs.
Using Epoxy or Deep-Fill Products
While epoxy products aren’t typically the first choice for major wood floor repairs, they serve exact purposes in the restoration process. Custom-cut wood plugs generally produce better results for larger holes than epoxy fillers alone. Epoxy works best for non-structural cosmetic fills where matching the wood grain isn’t critical. For deeper gouges requiring structural support, combining wood plugs with adhesives delivers superior durability and a more authentic appearance.
Creating Custom Wood Plugs
Custom wood plugs create seamless repairs for substantial floor damage through a methodical process:
- Create clean circular openings using hole cutters or Forstner bits that match your intended plug dimensions. This preparation ensures precise fitting of the replacement wood.
- Choose face-grain plugs rather than end-grain options for better blend with surrounding flooring. Pre-made tapered face-grain plugs work well for medium holes, while larger damages benefit from custom-cut “Dutchman” patches made from matching wood.
- Apply appropriate adhesive to secure the plug firmly in place. Wood glue works for standard repairs, while polyurethane glue (activated with a light water mist) provides exceptional strength for structural fixes.
- Finish the repair meticulously by sanding the plug flush with surrounding flooring. Pre-staining helps match the color before applying polyurethane finish. Light sanding between coats ensures the repair blends naturally with the existing floor.
For severely damaged areas, reattaching original wood pieces salvaged from the floor often produces the most authentic repairs. Screws provide additional reinforcement for loose floorboards before applying patches, creating repairs that look great and maintain structural integrity.
Addressing Gaps Between Floorboards

Gaps between floorboards are common issues that can affect both the appearance and functionality of your wood floor. These spaces often develop due to seasonal humidity changes or natural aging of the wood, creating unsightly lines throughout your flooring that can collect dirt and debris.
When to Fill vs. When to Replace
Narrow gaps measuring less than ¼ inch typically respond well to filling answers rather than full replacement. For these smaller spaces, wood filler or a mixture of sanding dust with adhesive creates seamless repairs that blend with the surrounding floor. Larger gaps benefit from color-matched caulking or epoxy-powder fillers, which resist shrinkage and movement over time. Always apply slightly more filler than needed as most products shrink during the drying process.
Replacement becomes necessary when holes exceed 1 inch in diameter or when multiple damages compromise the floor’s structural integrity. Minor holes can be addressed with pre-made face-grain wood plugs or by drilling circular holes to insert custom plugs that match your flooring. Extensive damage, but, requires cutting out the affected sections and installing a Dutchman patch or replacement boards specifically milled to match your existing flooring pattern.
Using Wood Strips for Large Gaps
Large gaps exceeding ¼ inch or irregularly shaped holes require a more substantial approach using matching wood strips. The repair process involves several critical steps:
- Cut out damaged sections using a circular saw or chisel to create clean, straight edges that will accept the new wood piece
- Measure precisely and cut replacement strips from matching wood species to ensure proper fit
- Install the wood strips by securing them with appropriate adhesive and finishing nails
- Sand the patched area to create a level surface that blends with the surrounding floor
Historic floors demand special attention to detail—replicate the original milling techniques such as square-edge boards with cut nails for authentic restoration. Materials for these repairs include face-grain dowel plugs for smaller holes, wood filler (available in water-based or epoxy formulations), and color putty for final touch-ups after sanding. Basic repairs can be completed for under $40, though costs increase if custom milling or professional refinishing is required.
Matching the Color and Finish

Creating invisible repairs in wood floors requires careful attention to color matching and finish application. The right techniques ensure your fixed areas blend seamlessly with the surrounding wood, making repairs virtually undetectable.
Staining Techniques for Seamless Repairs
Successful color matching begins after sanding your repaired areas smooth. Apply stain markers or fill sticks directly to the wood to match the existing finish, carefully feathering the color outward from the repair site to avoid creating noticeable edges. For deeper holes, we’ve found that layering wood filler and restaining incrementally creates the proper depth and tone match. Testing stains on scrap wood first ensures color accuracy before committing to your actual floor repair. Mohawk Ultra Mark or brush-tip markers excel at mimicking surrounding grain patterns and color variations, allowing you to recreate the natural wood appearance. Tiny cracks can be filled using wood slivers from kitchen matches—simply glue them in place and stain to match the surrounding area.
Applying the Final Finish
Proper finish application starts with thorough sanding using progressively finer sandpaper, beginning with 120-150 grit and finishing with 220-grit for optimal smoothness. Select a polyurethane finish that matches the existing floor’s sheen—whether matte, satin, or gloss—to prevent your repair from standing out. Apply the finish using a quality brush or rag, feathering the edges into surrounding boards to eliminate visible ridges. Respect drying times between coats (2-4 hours for water-based finishes and 8-12 hours for oil-based options) to ensure proper curing. Lightly buff the area with fine steel wool after the final coat has dried completely to create a uniform texture that matches the surrounding floor. Face-grain dowel plugs absorb finish better than end-grain dowels for repairs under 1 inch, creating more natural-looking results when properly stained and finished.
Preventative Maintenance to Protect Your Wood Floors

Regular maintenance prevents many common wood floor issues before they develop into problems requiring repairs. Protecting your investment starts with understanding the key factors that damage wood floors over time.
Moisture Management
Moisture exposure ranks as the primary enemy of wood flooring integrity. Spills must be cleaned immediately to prevent the wood from swelling or warping. Water damage often leads to cupping, crowning, or buckling that’s difficult to reverse without extensive repairs. Controlling indoor humidity between 30-50% reduces the natural expansion and contraction that causes gaps and cracks in wood floors.
Furniture Protection
Furniture legs can create important damage to wood floors through scratches and gouges. Felt pads placed under furniture bases provide essential protection against such damage. Moving heavy pieces by lifting rather than dragging them across the floor further prevents scratching and gouging. Regularly checking and replacing worn protective pads ensures continuous floor protection.
Regular Inspection and Maintenance
Early detection of floor problems allows for simpler, less costly repairs. Checking for loose boards, splinters, or developing gaps during regular cleaning helps identify issues before they worsen. Loose sections can be secured with adhesive or screws to prevent further damage to surrounding boards. Addressing minor problems promptly prevents them from expanding into major repair projects.
Proper Finishing Schedule
Wood floors benefit from periodic refinishing to maintain their protective barrier. Applying polyurethane or floor-grade finish creates a seal that protects against daily wear and tear. High-traffic areas may need more frequent attention as their protective coating wears down faster than in less-used spaces. Professional refinishing every 7-10 years provides optimal protection, though this timeline varies based on household activity level and floor exposure.
Cleaning Techniques
Using appropriate cleaning methods preserves wood floor integrity. Gentle cleaning with products specifically designed for wood floors prevents damage to the finish. Microfiber mops capture dust and debris without scratching the surface. Avoiding steam cleaners and excessive water when mopping prevents moisture from penetrating between boards and damaging the wood structure.
Conclusion
Restoring your wood floor’s beauty doesn’t have to be complicated. With the right tools materials and techniques we’ve shared you can effectively repair everything from tiny nail holes to larger gouges and gaps between boards.
Remember that successful repairs depend on proper preparation careful application and meticulous finishing. By taking time to match colors and textures you’ll achieve results that blend seamlessly with your existing flooring.
Regular maintenance will extend the life of your repairs and prevent future damage. Whether you’re tackling a DIY project or preparing for professional help these methods will help preserve both the function and character of your wood floors for years to come.
Frequently Asked Questions
What causes holes in wood floors?
Holes in wood floors can result from various factors including removed nails, furniture damage, pet scratches, or insect infestations. Natural aging can also cause gaps between floorboards as wood expands and contracts with humidity changes. Identifying the cause helps determine the appropriate repair method.
Can I repair wood floor holes myself?
Yes, most wood floor holes can be DIY-repaired. Small nail holes require only wood putty and basic tools, while larger gouges might need epoxy fillers or wood plugs. The complexity depends on the hole size and your skill level. For extensive damage or historic floors, professional assistance may be better.
What materials do I need to fill small holes in wood floors?
For small holes, you’ll need wood filler that matches your floor color, a putty knife, fine-grit sandpaper (180-220 grit), cleaning supplies, and finishing materials like stain markers and polyurethane. Optional items include a shop vacuum for cleanup and painter’s tape to protect surrounding areas.
How do I repair large gouges in my wood floor?
For large gouges, clean the damaged area thoroughly and remove loose wood pieces. Use epoxy wood filler or the Dutchman method (inserting a custom-cut wood patch). Apply filler in layers for deep gouges, allowing proper drying time between applications. Sand smooth, then stain and finish to match the surrounding floor.
What’s the best way to fix gaps between floorboards?
For gaps under ¼ inch, use wood filler or a mixture of fine sawdust and wood glue. For larger gaps, consider specialized elastic gap fillers or wood strips cut to fit. Apply the filler, allow it to dry completely, then sand flush with the floor surface. Finish with matching stain and polyurethane.
How do I match the color of repaired areas to the existing floor?
Test stains on scrap wood before applying to repairs. Use stain markers, fill sticks, or pre-colored wood fillers that match your floor. For custom matching, mix stains to create the perfect shade. Apply in thin layers, building up gradually until the color blends seamlessly with surrounding wood.
How long should I wait before walking on repaired wood floors?
Wait at least 24 hours after applying wood filler before light foot traffic. For areas with newly applied finish or polyurethane, wait 24-72 hours depending on the product instructions and humidity levels. Full curing can take up to a week, so avoid placing furniture or rugs during this time.
How can I prevent future damage to my wood floors?
Prevent damage by controlling indoor humidity (30-50%), promptly cleaning spills, using felt pads under furniture, lifting rather than dragging heavy items, and regular inspection for early problem detection. Use proper cleaning products designed for wood floors and maintain a regular refinishing schedule based on wear.
Do I need to refinish the entire floor after repairing holes?
For small, isolated repairs, spot refinishing is usually sufficient if you can match the existing finish. However, if repairs are extensive or scattered throughout the floor, refinishing the entire floor will provide the most uniform appearance. This is especially true for floors with aged or custom finishes.
What’s the average cost to repair holes in wood floors?
DIY repairs for small holes typically cost $20-$50 for materials. Medium-sized repairs using wood plugs or epoxy might cost $100-$200. Professional repairs range from $200-$500 for basic work to $1,000+ for extensive damage. Complete refinishing after repairs adds $3-$8 per square foot to the total cost.


