Imagine turning a simple piece of wood or stone into a timeless work of art—an intricate infinity symbol or a mesmerizing Celtic knot. These designs aren’t just beautiful; they’re packed with meaning and history. Whether you’re crafting a heartfelt gift, adding a personal touch to your home, or exploring a new hobby, carving these symbols lets you create something truly unique and meaningful.
You don’t need to be a master sculptor to get started. With the right tools, a bit of patience, and some guidance, you can bring these stunning designs to life. Ready to transform raw material into a symbol of eternity or interconnectedness? Let’s jump into the steps and techniques that’ll make your carving journey both rewarding and unforgettable.
Tools And Materials Needed

Successfully carving an infinity symbol or Celtic knot depends on using proper tools and selecting suitable materials. Your choices directly impact the quality and ease of your carving experience.
Recommended Tools For Carving
Different tools serve unique purposes during carving. Start with a sharp carving knife for detailed cuts and precision. Chisels are essential for shaping and creating depth; gouges work well for carving curved elements like those found in Celtic knots. Include sandpaper in varying grits (e.g., 80, 120, 220) for smoothing edges and detailing. Use a mallet to apply controlled force while working with chisels.
A carving glove ensures your safety, protecting your hands during detailed work. Compact clamps or a bench vise keeps your material securely in place. If you’re carving harder materials, like stone or hardwood, rotary tools with fine bits can assist in adding intricate designs.
Choosing The Right Wood Or Material
Your material should match the design’s complexity and your skill level. Softwoods, like basswood or butternut, are excellent for beginners because they’re easy to carve and require less force. Hardwoods, such as oak or walnut, provide durability and detailed finishes but demand more effort.
For stone carvings, softer options like soapstone or alabaster balance workability and strength. Always select materials free from cracks or imperfections, as these could complicate the carving process. For functional items, like home decor, durability becomes critical when choosing the material.
Step-By-Step Guide To Carve An Infinity Symbol

Creating an infinity symbol involves patience and precision. Follow these steps to create a clean and polished design.
Preparing The Material
Choose high-quality wood or stone to ensure a smooth result. Softwoods like basswood are ideal if you’re a beginner, while more experienced carvers may opt for hardwoods or soft stones. Inspect the material for imperfections, such as knots or cracks, which could disrupt your design. Secure your material using clamps to prevent movement during carving.
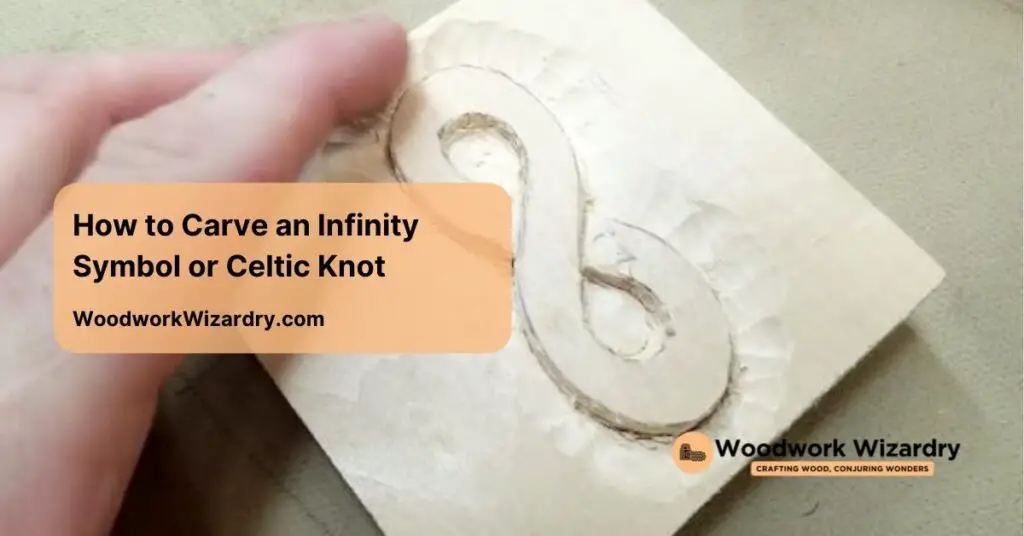
Drawing The Infinity Symbol Outline
Sketch a clear infinity symbol directly onto the surface. Use a pencil for wood or chalk for stone to allow easy corrections. Ensure the lines are proportionate, smooth, and centered for balanced results. A template or stencil can assist in achieving accuracy if hand-drawing feels challenging.
Techniques For Carving Smooth Curves
Start carving with a sharp knife or chisel, focusing on one loop of the infinity symbol at a time. Follow the outline carefully, taking shallow cuts to maintain control. For tighter curves, smaller gouges or rotary tools improve precision and prevent accidental slips. Regularly remove excess material from edges to refine the shape.
Finishing Touches And Polishing
Sand the surface with fine-grit sandpaper to smooth any roughness. Work along the curves to preserve the design’s fluidity. For wood, apply a protective finish like varnish or oil to enhance its appearance and durability. If you’ve used stone, polish it with a rotary tool or sanding pads to create a clean, glossy surface.
Step-By-Step Guide To Carve A Celtic Knot

Celtic knots are intricate designs symbolizing eternity and connection. To carve one effectively, follow these structured steps.
Understanding The Design
Study the structure of a Celtic knot by observing reference images or patterns. These knots interweave in a continuous loop, requiring precision. Identify repeating elements like loops and crossings to simplify the carving process.
Sketching A Celtic Knot Pattern
Draw the knot’s outline on your material using a pencil for wood or chalk for stone. Begin with basic grid lines to maintain symmetry. Carefully add interlaced lines, ensuring they don’t overlap incorrectly. Use a stencil for consistent and proportional shapes if freehand drawing feels too complex.
Tips For Intricate Carving
Start carving shallow grooves along the sketched lines to establish the design. Maintain steady hand movement to avoid uneven cuts. Work with smaller chisels or knives for tight sections and details. Frequently check the symmetry and alignment to prevent inaccuracies.
Adding Depth And Details
Deepen the grooves gradually to create dimension in the design. Vary the depth to highlight overlaps within the knot. Smooth the carved edges using sandpaper or a fine file for a polished look. Apply a wood finish or stone polish to enhance the contrasting depths and protect the surface.
Common Challenges And How To Overcome Them

Carving intricate designs like the infinity symbol or Celtic knot presents unique challenges. Addressing common issues ensures a smoother and more successful carving process.
Avoiding Breakage In Intricate Sections
Intricate areas, such as tightly curved segments or overlapping lines, are prone to breakage. Focus on using sharp tools to minimize excessive force when carving these delicate parts. Opt for materials with fewer imperfections, as knots or cracks in wood and inconsistencies in stone create weak points.
Work in small, controlled motions to reduce stress on intricate sections. For example, carve away thin layers instead of forcing a large removal at once. Ensure the material is properly secured to avoid accidental slips that can cause breakage. If errors occur, light sanding or careful repairs might restore the design.
Ensuring Smooth Connections
Seamless connections between design elements highlight the elegance of infinity symbols and Celtic knots. Maintain consistent hand pressure while carving curves or intersections to prevent jagged or uneven lines. Regularly pause to smooth rough edges using fine sandpaper or precision tools like a micro chisel.
Aligning parts of the design keeps the pattern visually cohesive. Use grid lines or templates to measure symmetry throughout your carving process. Double-check intersections, particularly in Celtic knots, as these areas define the design’s continuous loops and visual flow.
Tips For Beginners
Starting with foundational practices helps you build confidence and control. Delicate designs like infinity symbols and Celtic knots demand preparation and attention to detail.
Practicing With Simple Designs First
Focus on basic patterns before addressing intricate designs. Shapes like straight lines, spirals, and simple curves help establish steady hand movement. Experiment with basswood, as its softness makes it easy to carve. Practice scoring shallow grooves to control depth and line clarity. Gradually try replicating simple abstract symbols to develop precision. Use scrap wood or stone to avoid wasting materials while refining skills.
Patience And Precision In Carving
Approach the carving process with a deliberate pace, focusing on accuracy over speed. Smooth curves and symmetrical patterns require steady hand pressure. Pause frequently to assess your progress and maintain alignment. Work in a well-lit area to clearly see fine details while carving. Small, controlled cuts reduce the risk of breaking delicate sections, especially in knots or overlapping curves. Regularly sharpen tools to ensure clean lines without snagging.
Conclusion
Carving an infinity symbol or Celtic knot is a rewarding journey that blends creativity and craftsmanship. With the right tools, materials, and techniques, you can transform simple wood or stone into meaningful, intricate designs.
Whether you’re a beginner or looking to refine your skills, patience and practice will be your greatest allies. Embrace the process, enjoy the details, and let each project reflect your unique touch.


