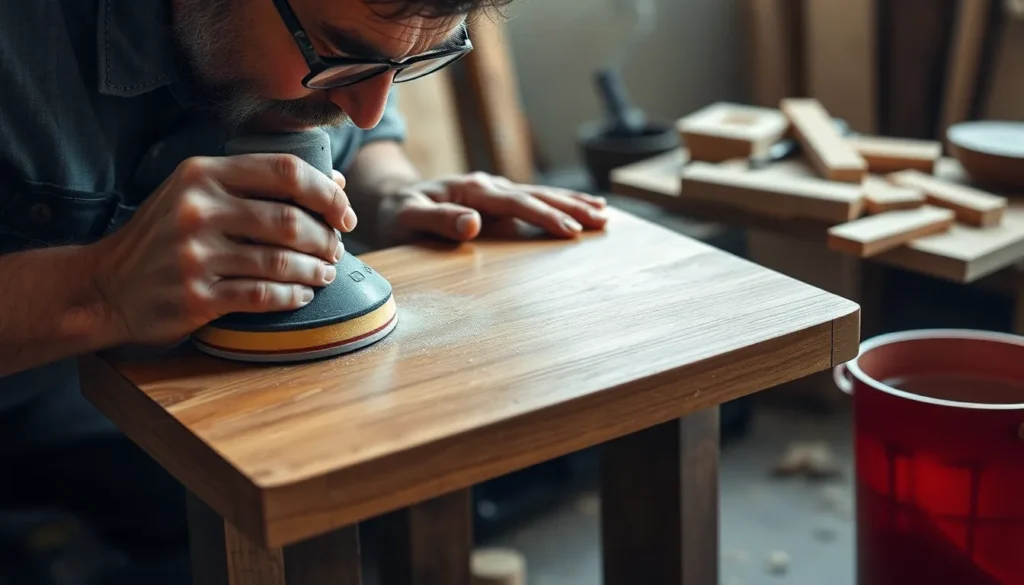
When it comes to achieving that flawless wooden surface, wet sanding might be the game-changer you’ve been looking for. Yes, you absolutely can wet sand wood—and we’re excited to show you why it’s often the preferred method among woodworking professionals.
We’ve discovered that wet sanding creates significantly less dust while producing superior results compared to traditional dry sanding. The water acts as a lubricant, preventing sandpaper clogging and helping to achieve that ultra-smooth finish that’s difficult to attain with dry methods alone. Whether you’re refinishing furniture, preparing wood for staining, or putting final touches on a carpentry project, wet sanding could be your new secret weapon.
Understanding Wet Sanding Wood
Wet sanding wood involves using water as a lubricant while sanding to achieve superior finishes. The process combines traditional sanding techniques with water to create a slurry that helps remove material more effectively. Unlike dry sanding, wet sanding reduces airborne dust by 90% and prevents the sandpaper from clogging with wood particles.
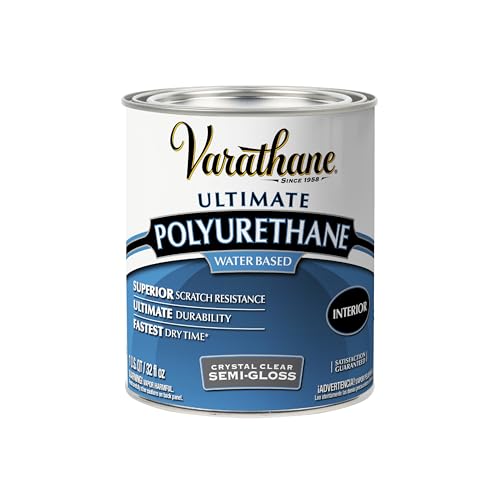
The technique works by allowing the water to suspend the sanding debris, which both lubricates the surface and helps carry away the removed material. Fine wood particles mix with water to form an abrasive slurry that enhances the cutting action of the sandpaper. This method is particularly effective on finishes like polyurethane, varnish, and lacquer.
Wet sanding produces significantly smoother surfaces than dry sanding alone. The water reduces friction, allowing the abrasive to cut more consistently and preventing deep scratches. Many professional woodworkers rely on wet sanding for final finishing stages because it reveals a level of smoothness unattainable through conventional dry sanding methods.
Most woodworking projects benefit from wet sanding during the final finishing stages. The technique excels when preparing surfaces for high-gloss finishes, removing small imperfections in existing finishes, or blending repaired areas with surrounding surfaces. Furniture restoration experts frequently employ wet sanding to achieve museum-quality results on antique pieces.
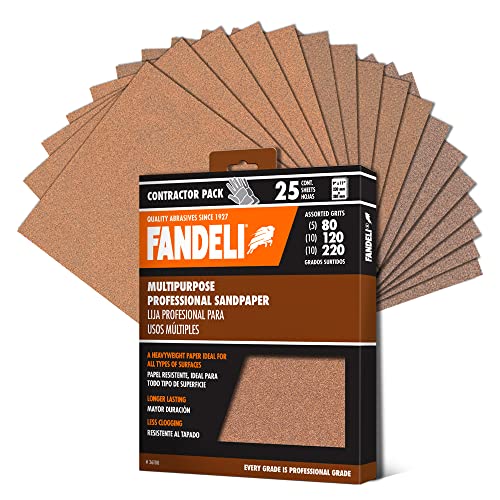
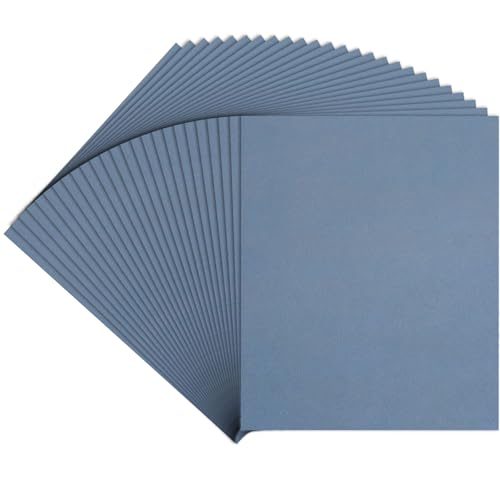
The process requires exact materials including waterproof sandpaper (silicon carbide paper works best), clean water, a sanding block, and appropriate safety gear. Sandpaper designed specifically for wet applications remains durable when soaked and maintains its cutting ability throughout extended use.


Benefits of Wet Sanding Wood
 2")
Wet sanding offers distinct advantages that make it a superior technique for many woodworking applications. This method combines water with sanding to create a more efficient and effective process for achieving premium wood finishes.
Reduced Dust Production
Wet sanding significantly reduces airborne dust by approximately 90% compared to traditional dry sanding. The water traps wood particles, preventing them from becoming airborne and creating a cleaner working environment. This reduction in dust isn’t just about cleanliness—it’s a crucial health benefit that protects your respiratory system from harmful particulates. Many woodworkers appreciate this aspect when working in enclosed spaces or workshops without sophisticated dust collection systems. The slurry created during wet sanding contains the debris that would otherwise fill the air, making cleanup easier and reducing the time spent dusting afterward.
Smoother Finish Results
Wet sanding provides exceptionally smooth surfaces by preventing sandpaper from clogging with dust. The water acts as a lubricant between the abrasive material and wood surface, allowing the sandpaper to glide more effectively while maintaining consistent cutting action. Sanding in straight lines and alternating directions with each pass helps achieve an ultra-smooth finish that’s difficult to obtain with dry sanding alone. The water reduces friction during the sanding process, minimizing heat generation that could potentially damage delicate wood surfaces. This technique proves especially valuable when working with high-end furniture pieces or preparing surfaces for high-gloss finishes where even minor imperfections would be visible.


When to Wet Sand Wood
 4")
Wet sanding wood creates superior finishes when applied at the right stages of your woodworking project. This technique uses water as a lubricant to produce smoother surfaces while minimizing dust. Here’s when you should incorporate wet sanding into your woodworking process.
Between Finish Coats
Wet sanding between coats of finish eliminates imperfections and creates the foundation for a flawless final surface. After applying lacquer, polyurethane, or other finishes, small dust nibs, brush marks, and minor flaws often appear that require smoothing before the next coat. Using 400-600 grit wet/dry sandpaper effectively removes these imperfections without cutting through the finish layer. Each coat must be completely cured before wet sanding to prevent damage to the uncured finish. This intermediate sanding creates a slightly textured surface that improves adhesion between finish layers, resulting in a stronger, more durable final finish.
For Final Smoothing
Wet sanding after the final coat of finish transforms a good surface into an exceptional one with glass-like smoothness. This final smoothing process typically employs finer sandpaper ranging from 600 to 1000+ grit to remove the finest imperfections while maintaining the finish integrity. Only minimal water should be applied to avoid wood swelling or finish damage during this critical stage. Professional woodworkers often progress through multiple grits (800, 1000, 1500) for high-end pieces requiring mirror-like finishes. The ultra-smooth surface created through final wet sanding reflects light more evenly, improving the wood’s natural beauty and creating depth in the finish that’s impossible to achieve with dry sanding alone.


How to Properly Wet Sand Wood
 6")
Wet sanding wood requires precision and the right approach to achieve professional results. The technique demands attention to detail and exact materials to avoid damaging the wood while maximizing the smoothness of the finished surface.
Tools and Materials Needed
Gathering the proper equipment ensures successful wet sanding. You’ll need wet/dry sandpaper in various grits (400 to 1000+), preferably silicon carbide paper which withstands moisture without deteriorating. A flat sanding block provides even pressure distribution, preventing uneven sanding patterns across your workpiece. Clean water in a spray bottle allows controlled application, while some professionals add a small amount of dish soap (1-2 drops per cup) to reduce surface tension. Protective gear including waterproof gloves protects your hands from extended water exposure. Microfiber cloths or tack rags help remove slurry without scratching the surface. A shop vacuum with fine-dust filter capabilities makes cleanup more efficient and reduces airborne particles by approximately 90%.
Step-by-Step Process
Starting with proper surface preparation dramatically impacts your results. Ensure the wood has been previously sanded with progressively finer dry sandpaper up to at least 220 grit before attempting wet sanding. Apply water sparingly to the surface using a spray bottle, dampening without soaking the wood or finish. Wet your sandpaper completely and wrap it around your sanding block, maintaining consistent pressure while sanding in the direction of the wood grain. Sand in small sections (approximately 2-3 square feet at a time), rewetting as needed when the paper begins to dry out. Apply light pressure and let the sandpaper do the work, using long, even strokes rather than circular motions that can create swirl marks.
Clean the slurry frequently with a damp cloth to monitor your progress and prevent the abrasive particles from creating new scratches. Between grits, thoroughly dry the surface with compressed air or a clean towel and allow 15-30 minutes drying time. Progress through finer grits (moving from 400 to 600 to 800 or higher) for increasingly smoother results, spending adequate time with each grit before moving to the next. After the final sanding, remove all moisture using clean microfiber cloths, followed by compressed air to force water out from any grain pores. Allow the wood to dry completely for at least 24 hours in a dust-free environment before applying any additional finishes or sealants. Check the surface in angled light to identify any remaining imperfections that might require additional attention.


Types of Wood Suitable for Wet Sanding
 8")
Finished/Sealed Woods
Lacquered, polyurethane, or varnished surfaces are the ideal candidates for wet sanding techniques. These finishes create a water-resistant barrier that prevents moisture from penetrating and damaging the wood underneath. When working with these sealed surfaces, we recommend using 400–600-grit wet/dry sandpaper with minimal water application. The protective coating allows the sanding process to focus on smoothing the finish rather than affecting the wood fibers directly, creating an exceptionally smooth result without risking wood damage.
Stabilized or Stabilizing Woods
Resin-impregnated or plastic-coated woods handle wet sanding exceptionally well compared to untreated varieties. Many specialized materials like pen blanks undergo stabilization treatments that dramatically reduce their water absorption properties. This treatment essentially fills the wood’s cellular structure with resin, making it significantly more resistant to moisture damage during the wet sanding process. The stabilized nature of these woods allows for more aggressive wet sanding techniques without the risk of grain raising or warping.
Exceptions for Raw Wood
Raw, untreated wood typically doesn’t respond well to wet sanding due to its tendency to absorb moisture and swell. Some woodworkers use a slightly damp cloth with high-grit sandpaper (600+) to intentionally raise the grain once, then let it dry completely before dry sanding it smooth. This limited application can help achieve an ultra-smooth finish on raw wood but requires careful execution. For situations where some lubrication is needed on raw wood, quick-evaporating options like mineral spirits offer a safer alternative to water, providing similar dust-reduction benefits without excessive moisture exposure.

Common Mistakes to Avoid When Wet Sanding
 10")
Wet sanding requires exact techniques to achieve optimal results. Many woodworkers make preventable errors that compromise their projects. Understanding these pitfalls helps ensure a successful finish when wet sanding wood.
Using the Wrong Sandpaper
Waterproof silicon-carbide sandpaper is essential for wet sanding projects. Regular sandpaper quickly deteriorates when exposed to moisture, leaving you with a disintegrating mess. Always check that your sandpaper is explicitly labeled “wet/dry” before beginning your project.
Sanding Unfinished Wood
Wet sanding works best on cured finishes like lacquer and polyurethane, not raw wood. Moisture causes unfinished wood grain to swell, potentially damaging your workpiece. If you’re determined to wet sand bare wood, use minimal water and stick to higher grits (400 or above) to minimize grain raising.
Applying Too Much Water
Excessive moisture leads to wood warping and extended drying times. Instead of soaking your work surface, use a lightly damp sponge or spray bottle to apply just enough water for lubrication. The goal is to create a slurry without saturating the wood underneath.
Not Allowing Proper Drying Time
Wood needs to dry completely between sanding stages. Trapped moisture under subsequent finish layers creates cloudy spots and adhesion problems. Patience during the drying process prevents frustrating finish defects that might require starting over.
Skipping Surface Cleaning
Residual dust combines with water to form a gritty slurry that clogs sandpaper and creates scratches. Clean surfaces thoroughly with compressed air or a tack cloth before wet sanding to remove all loose particles and debris.
Rushing Through Grit Progression
Starting with too coarse a grit or skipping grit levels leaves visible scratches in your finish. Begin with 320-400 grit for most finishes, then systematically progress to finer grits (600+) for polishing. Each grit removes the scratches from the previous one.
Applying Excessive Pressure
Let the abrasive do the work during wet sanding. Pressing too hard creates uneven surfaces and potentially damages the underlying finish. Light, consistent pressure yields better results than forceful sanding.
Sanding Against the Grain
On bare wood sections, always sand parallel to the grain direction to prevent tear-out and visible scratches. When working on finishes, circular motions can be effective but use them sparingly and finish with strokes that follow the grain.
Working with Uncured Finishes
Ensure all coatings are fully hardened according to manufacturer recommendations before wet sanding. Uncured finishes are soft and easily gouged, potentially ruining your project. Some finishes require several days to completely harden.
Using Dirty Water
Replace your water frequently during the wet sanding process. Dirty water redistributes debris across your workpiece, creating new scratches. Clean water ensures the slurry effectively carries away particles rather than redepositing them.
Wet Sanding vs. Dry Sanding: Key Differences
 12")
Wet Sanding Wood
Wet sanding involves using water or a lubricating liquid to sand wood, reducing dust and heat generation during the process. This technique creates a slurry that suspends wood particles, preventing them from becoming airborne.
Water acts as a cooling agent during wet sanding, providing several distinct advantages:
- Smoother Finish: Wet sanding delivers a more polished surface compared to dry methods
- Dust Reduction: Airborne particles decrease by approximately 90%, creating a cleaner, healthier work environment
- Heat Prevention: The liquid cools the surface continuously, eliminating potential heat damage to delicate woods
- Extended Sandpaper Life: Sandpaper remains unclogged longer due to water’s lubricating properties
Wet sanding works exceptionally well for furniture projects, fine woodworking, and any application requiring a glass-like appearance. The technique particularly suits finished surfaces like polyurethane, varnish, and lacquer.
Dry Sanding Wood
Dry sanding relies solely on friction between sandpaper and wood to remove material without any lubricant. This traditional approach offers distinct benefits in exact scenarios.
The process excels at rapid material removal, making it ideal for initial sanding stages such as stripping old paint or varnish. Dry techniques work perfectly with water-sensitive materials including certain hardwoods or metal surfaces that might deteriorate with moisture exposure.
Many woodworkers prefer dry sanding for quick jobs due to its convenience—no water setup or cleanup required. The straightforward approach allows for immediate progress without additional preparation steps.
Considerations for Wet Sanding Wood
Wood’s natural absorption properties create important considerations when wet sanding. Excessive water can lead to swelling or warping of wood fibers, potentially damaging your project.
Best practices include:
- Using minimal water—just enough to create a light slurry
- Wiping away excess moisture promptly after sanding
- Working in small sections to control water exposure
Raised grain presents another challenge with wet sanding wood. Dampness causes wood fibers to stand up, creating a rough texture that wasn’t initially present. This issue requires additional light sanding once the surface dries completely to restore smoothness.
Conclusion
Wet sanding is a game-changing technique that can elevate your woodworking projects to professional levels. The reduced dust improved finish quality and enhanced control make it worth adding to your skill set.
Remember that it’s best used on finished surfaces rather than raw wood and requires waterproof sandpaper with proper technique. Working through progressive grits while maintaining light pressure will deliver those glass-like results you’re after.
Whether you’re refinishing furniture touching up between coats or putting final touches on a prized project wet sanding offers benefits that dry sanding simply can’t match. With the right materials and approach you’ll achieve finishes that truly showcase your craftsmanship.
Frequently Asked Questions
What is wet sanding wood?
Wet sanding wood is a finishing technique that uses water as a lubricant while sanding. The water creates a slurry that suspends debris, reduces dust by about 90%, and prevents sandpaper from clogging. This method produces smoother surfaces than dry sanding and is particularly effective on finishes like polyurethane, varnish, and lacquer.
When should I use wet sanding instead of dry sanding?
Use wet sanding between finish coats to eliminate imperfections and for final smoothing when you want a glass-like surface. It’s ideal for high-end furniture pieces, high-gloss finishes, and when working with sealed woods. Choose dry sanding for initial material removal and raw wood preparation, as wet sanding works best on already finished or sealed surfaces.
What materials do I need for wet sanding?
You’ll need waterproof sandpaper (in various grits from 400-1000+), a flat sanding block, clean water, and protective gear including gloves and eye protection. The sandpaper must be specifically labeled as “wet/dry” to ensure it won’t disintegrate when exposed to water during the sanding process.
Can all types of wood be wet sanded?
No, not all wood types are suitable for wet sanding. Finished or sealed woods with lacquer or polyurethane coatings work best because they have water-resistant barriers. Stabilized woods also handle wet sanding well. Raw, untreated wood typically doesn’t respond well to wet sanding as it can raise the grain and cause warping.
What are the main benefits of wet sanding?
Wet sanding creates significantly less dust (90% reduction), protecting respiratory health and creating a cleaner workspace. It produces smoother surfaces by preventing sandpaper clogging and reducing friction. The technique extends sandpaper life, allows for more precise work, and achieves professional-level finishes that are difficult to obtain with dry sanding alone.
What are common mistakes to avoid when wet sanding?
Avoid using regular sandpaper instead of wet/dry types, applying too much water, and wet sanding raw wood. Don’t rush drying time between coats or skip grit progressions. Apply light, even pressure and always sand with the grain. Ensure finishes are fully cured before wet sanding, and always use clean water to prevent contamination.
How do I properly wet sand wood?
Start with properly finished or sealed wood that’s been dry-sanded with progressively finer grits. Soak wet/dry sandpaper for 10-15 minutes before use. Apply water to the surface, sand with light pressure in the direction of the grain, and clean the slurry regularly to monitor progress. Move through finer grits (400-1000+) for smoother results. Allow the wood to dry completely before applying additional finishes.
Does wet sanding damage wood?
Wet sanding won’t damage properly finished or sealed wood. However, it can damage raw, untreated wood by raising the grain and potentially causing warping. Always ensure the wood has a protective finish before wet sanding, and don’t oversaturate the surface with water. When done correctly, wet sanding enhances rather than damages the wood surface.


